Data Overview
A portlet that contains a table showing archive data files with missing data based on the accepted threshold. The table initially shows the following information:
- 90 days worth of data
- All the vendor licenses with greater than 0 missing data files
- License Polling (LicPoll2) data
Before using the Data Overview portlet, follow the instructions on Displaying Core Server Tracking pages in the Analysis Server.
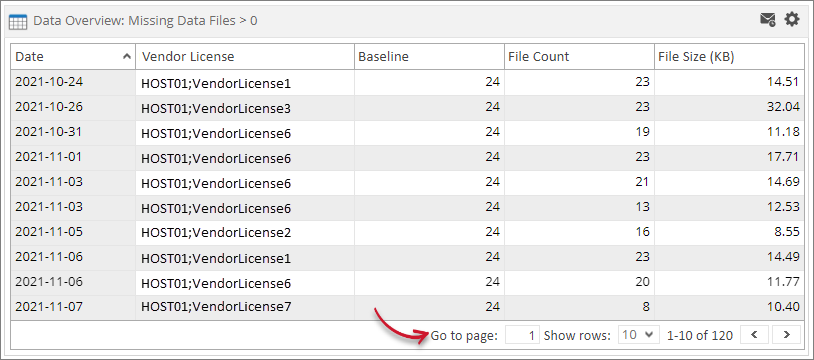
The table contains Date, Vendor License, Baseline, File Count and File Size.
Use the page navigator and number of rows option located at the bottom-right corner of the portlet to view specific data.
How to configure
When configuring a table-type portlet, the configuration is separated into two parts - Filters and Alerts settings. Filters consists of configuration for refining the selected classifications and setting the threshold to display in the portlet. While Alerts consists of scheduling of sending email alerts and specifying the desired formatting of the messages.
Filters
To configure the Filters, follow these instructions:
-
In the upper-right corner of the portlet, click the gear icon.
The configuration dialog should appear.
-
Provide the Label or the text displayed in the title bar of the portlet. The initial value is Data Overview: Missing Data Files > 0.
-
Select among the available Vendor License. It is possible to select multiple items.
-
Provide the Threshold or the value to limit the rendered data. The value will be the accepted number of missing data files compared to the baseline.
The default value is 0 which means no data should be missing.
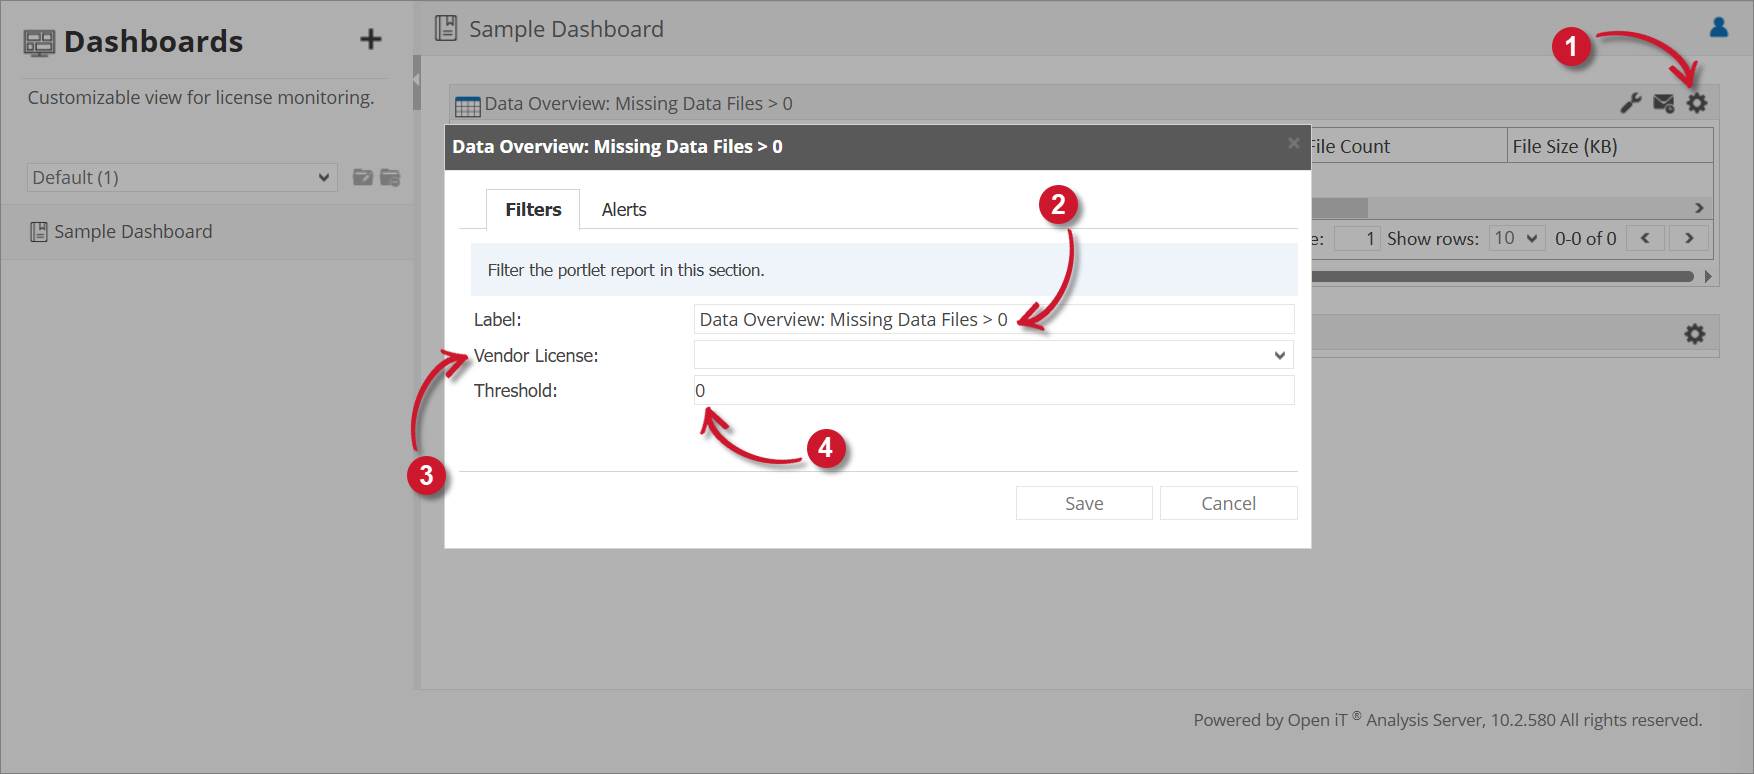 Data Overview Filter Settings
tipYou may save the changes and use the default configuration for the Alerts or proceed with the Alerts configuration.
Alerts
To configure the Alerts, follow these instructions:
-
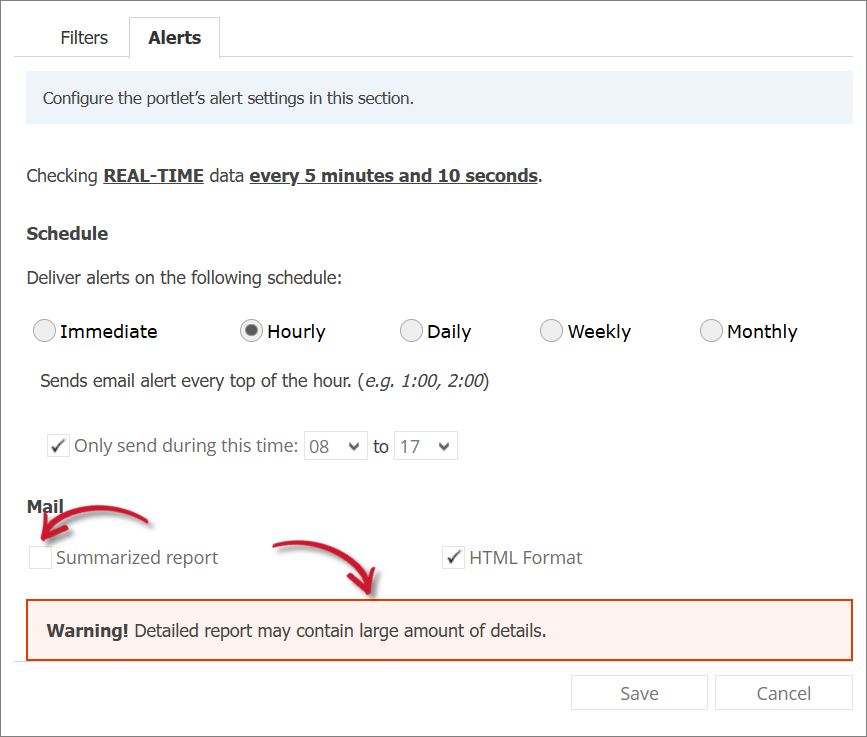
Go to the Alerts tab and choose from the available schedule options. Immediate is selected by default.
Use the statement provided describing the schedule as a guide.
-
If Daily, provide the time of the day the email will be sent.
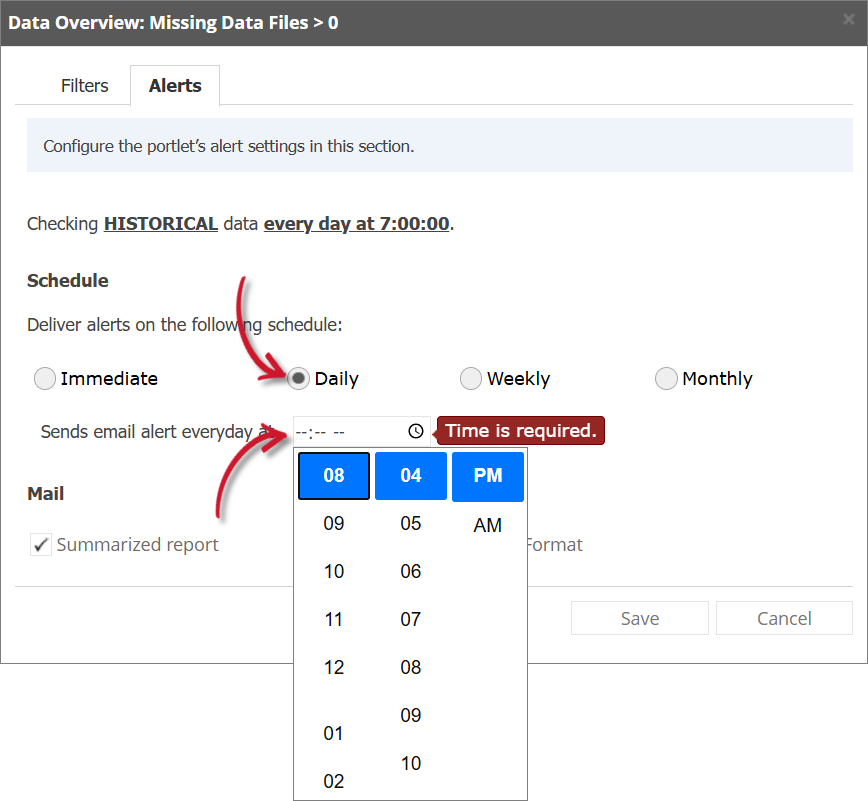 Data Overview Alert Settings Daily
If Weekly, provide the specific day of the week and the time of the day the email will be sent.
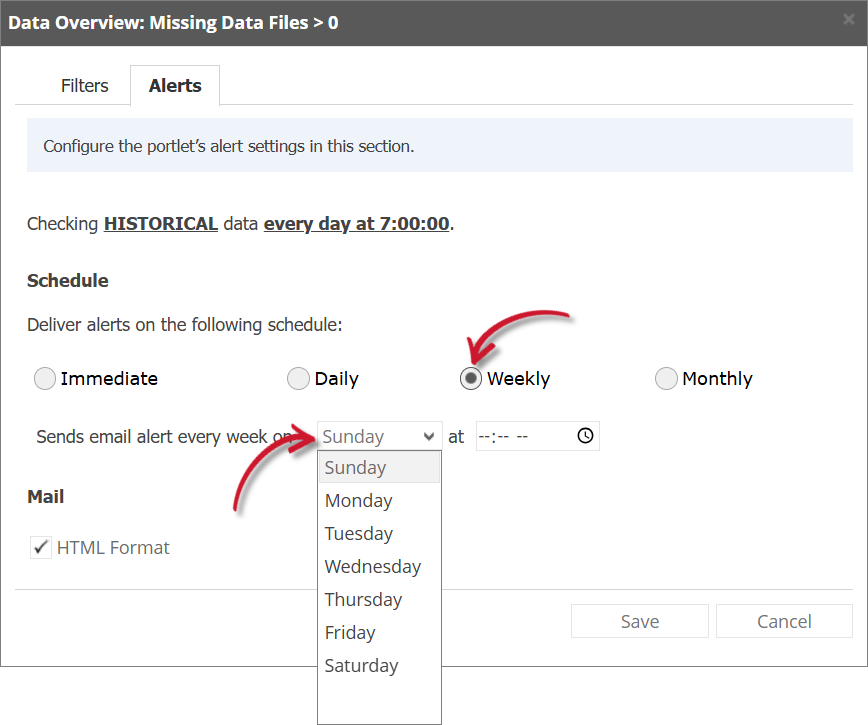 Data Overview Alert Settings Weekly
If Monthly, provide the specific day of the month and the time of the day the email will be sent.
 Data Overview Alert Settings Monthly
 -
Check the following options to enable the functionality:
-
Summarized Report - the report included in the email message is in summarized form; otherwise, will be in detailed form. Only available in Hourly and Daily schedules.
infoA warning will be displayed when Summarized Report is unchecked. Please read carefully.
 Data Overview Alert Settings Warning
 -
HTML Format - the email alert template is formatted as HTML.
-
Flood Email - all subscribed users will receive email alerts even if there is no new data. Only available in Immediate schedule.
-
-
Click Save to continue.
 Data Overview Alert Settings