Installation
This guide provides instructions for installing the Open iT Insight.
Installing through the Windows Installer Interface
Step 1: Launch the Installer
-
Double-click the
openit_insight_<version>_<architecture>.msifile. The Open iT Insight Setup Wizard will appear. -
Click Next to continue.
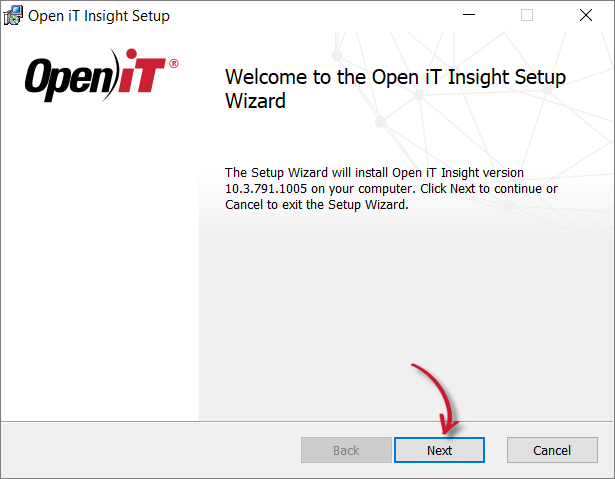 Setup Wizard Welcome Screen
Step 2: Review the License Agreement
-
Read the End-User License Agreement carefully.
-
Accept the license terms, then click Next to proceed.
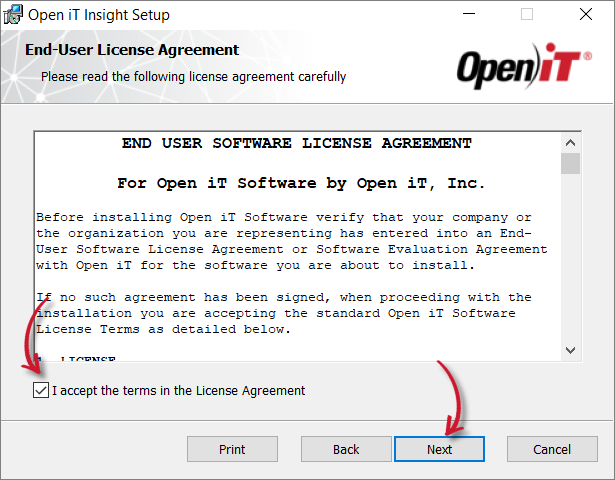 End-User License Agreement
Step 3: Select the Installation Directory
-
Specify where the Open iT Insight component will be installed.
-
If you want to install the component in a different directory, click Change, then select your preferred location.
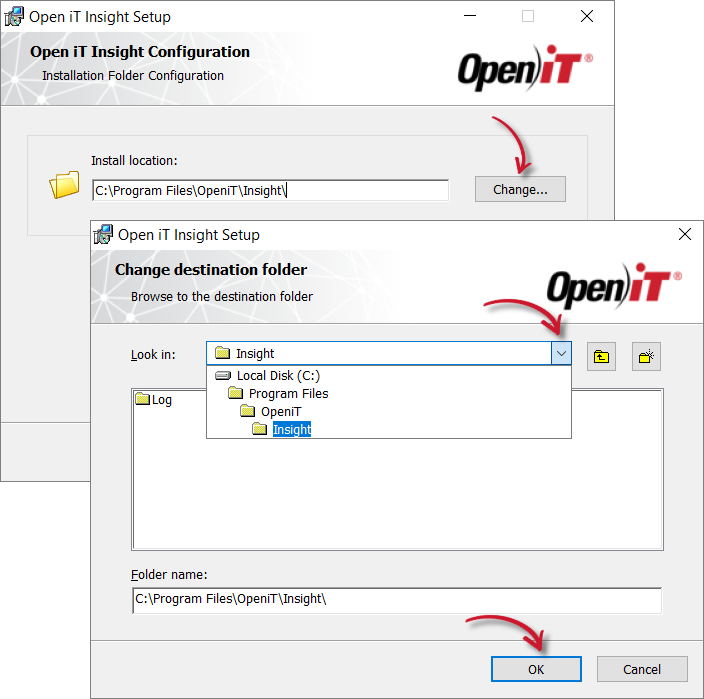 Destination Folder Configuration
-
Click Next to continue.
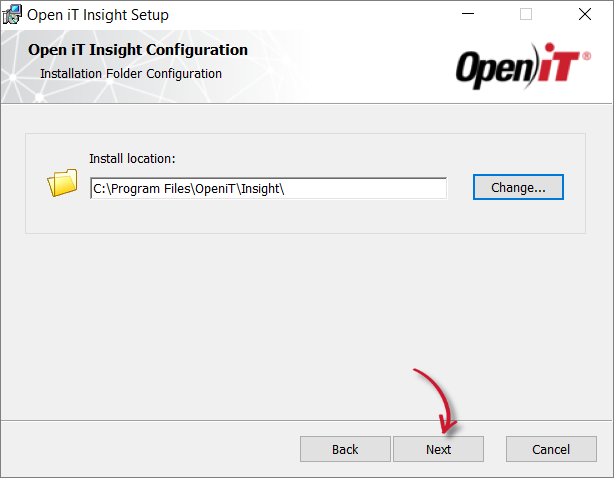 Destination Folder
NoteIf you click Next without changing the installation directory, the default directory will be used.
Step 4: Select Authentication Method
-
Select the authentication method Open iT Insight will use.
-
Once done, click Next.
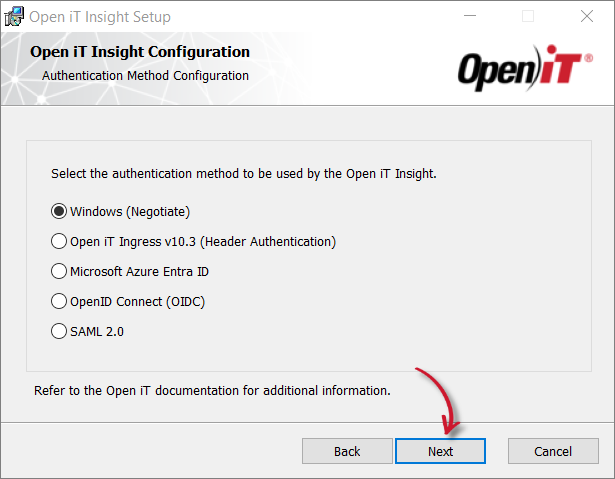 Open iT Insight Authentication Selection
If Microsoft Azure Entra ID was selected, you will be redirected to the Azure Entra ID Authentication Configuration dialog. Fill in the Azure Entra ID application details. Once done, Click Next.
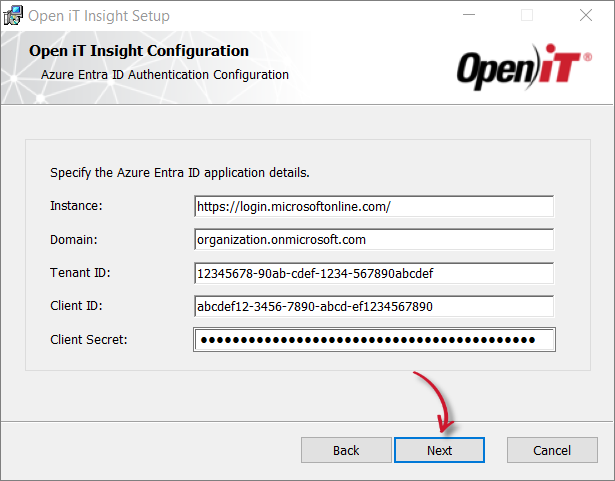 Azure Entra ID Configuration
- If OpenID Connect was selected, you will be redirected to the OpenID Connect Authentication Configuration dialog. Fill in the OpenID Connect provider details. Once done, Click Next.
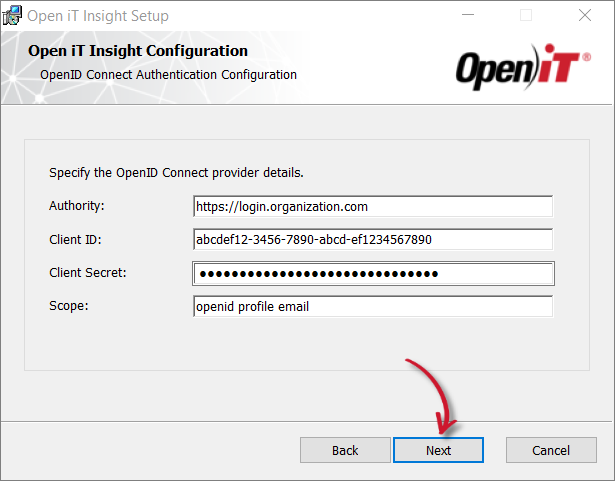 OpenID Connect Authentication Configuration
- If SAML 2.0 was selected, you will be redirected to the SAML 2.0 Authentication Configuration dialog. Fill in the SAML service provider and identity provider details. Once done, Click Next.
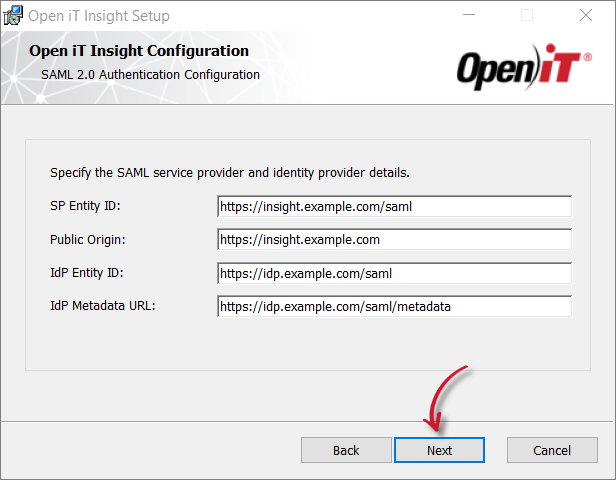 SAML 2.0 Authentication Configuration
Step 5: Configure Open iT Insight Client Access Credentials
-
Enter the Open iT Insight Client ID and Client Secret provided by the Open iT Account Manager or Support Team. These will be used to access the Open iT Insight Server.
NoteIf you do not have the Open iT Insight Client ID and Client Secret, reach out to support@openit.com.
-
Click Next to continue.
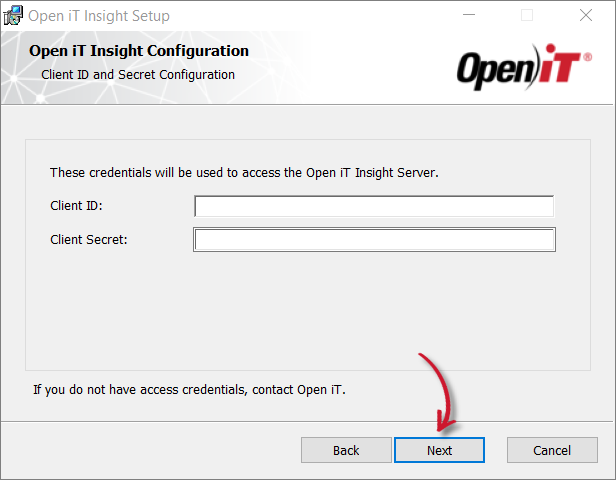 Open iT Insight Client ID and Client Secret
Step 6: Configure Active Directory Service Account
-
Enter the Username and Password of your Active Directory service account. These will be used to access the Open iT Analysis Server database.
-
Click Next to continue.
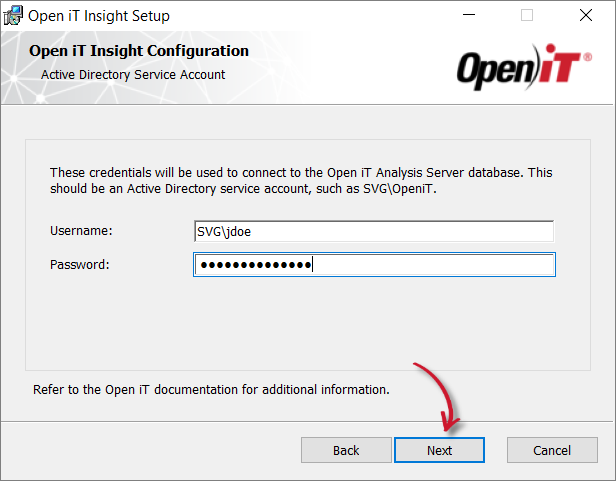 Configure Active Directory Service Account
Step 7: Configure Database
-
Select the database Open iT Insight will use, then click Next.
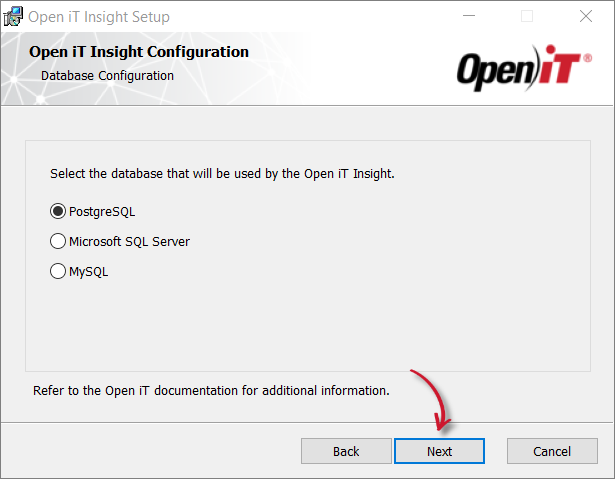 Select Database
-
Fill-in the database details.
- If PostgreSQL, was selected, you will be redirected to the PostgreSQL Database Configuration dialog. Enter the database details, then click Next to proceed.
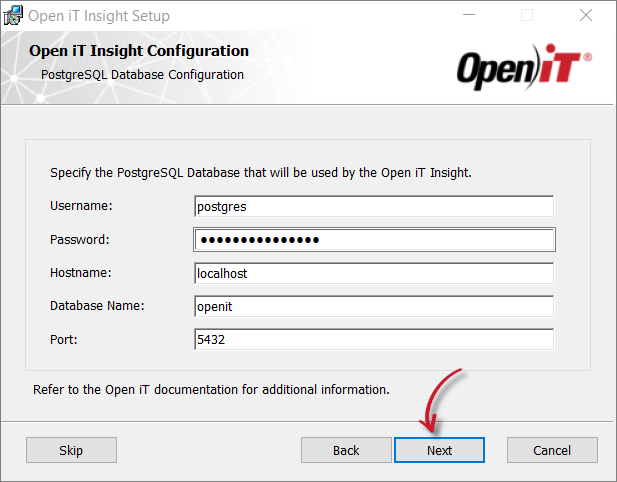 PostgreSQL Database Configuration
NoteIt is not recommended to use the same PostgreSQL database as the Core Server and Analysis Server.
- If Microsoft SQL Server, was selected, you will be redirected to the SQL Server Database Configuration dialog. Enter the database details, then click Next to proceed.
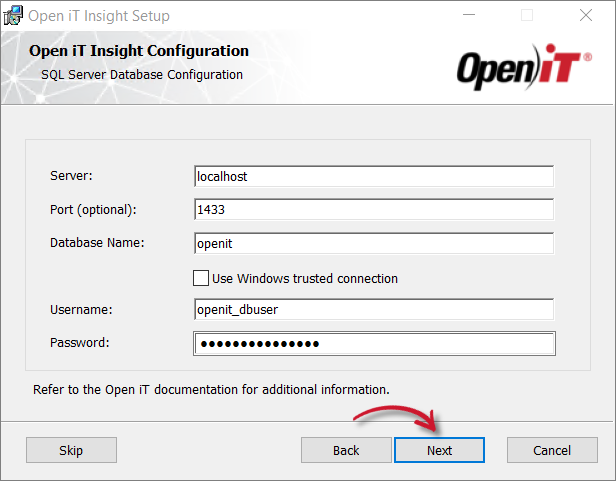 Microsoft SQL Server Database Configuration
- If MySQL, was selected, you will be redirected to the MySQL Database Configuration dialog. Enter the database details, then click Next to proceed.
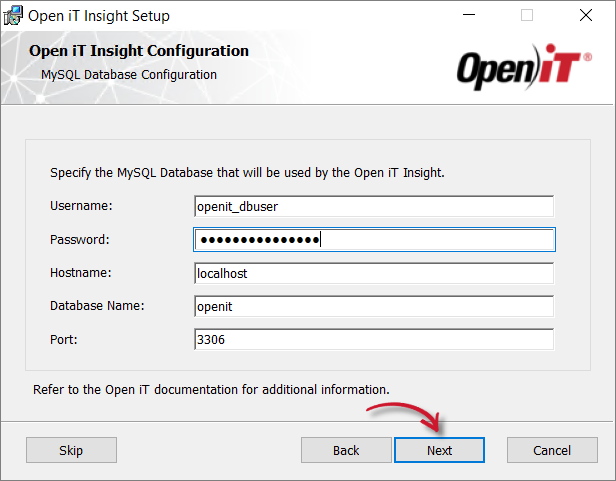 MySQL Database Configuration
-
If you enter a database name that does not yet exist, a confirmation dialog will appear:
 Database Configuration Confirmation
Click Yes to continue. The system will automatically create the database.
warningLeaving the database name field empty will result in a handle request error.
Step 8: Start the Installation
-
Click Install to begin the installation.
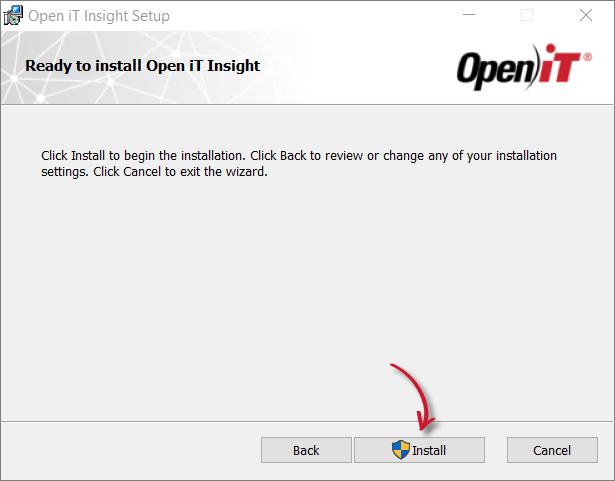 Ready to Install
 -
Wait for the installation to complete.
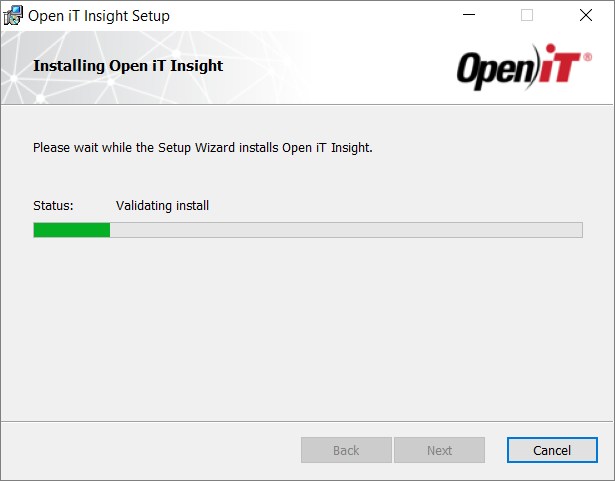 Installation In-progress
Step 9: Complete the Installation
-
Click Finish to exit the installer.
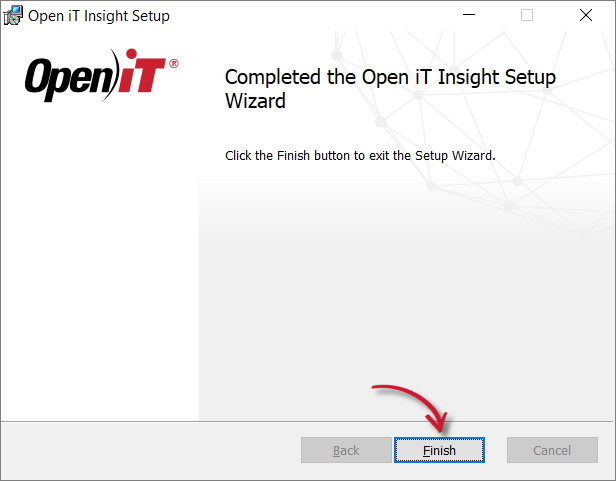 Installation Complete