Installation
- Windows
- Unix
This guide provides instructions for installing the Open iT Core Server. Choose one of the available installation methods:
Installing through the Windows Interface
Follow these steps to install the Open iT Core Server using the Windows graphical installer. This installation includes steps for configuring required and optional components such as PostgreSQL (required) and Open iT Ingress (recommended).
Step 1: Mount the Installation Image
-
Right-click the
openit_<version>_server_windowsISO image. -
Select Mount.
A new File Explorer window will appear containing:
openit_<version>_server_windows_<architecture>.msi- compressed Git files (
Git.zip) - compressed LicensePredictor files (
openit_forecast.zip) - compressed PostgreSQL files (
pgsql.zip) - a
clientsdirectory containing client installers
Step 2. Launch the Installer
-
Double-click the
openit_<version>_server_windows_<architecture>.msifile. The Open iT Core Server Setup Wizard will appear. -
Click Next to continue.
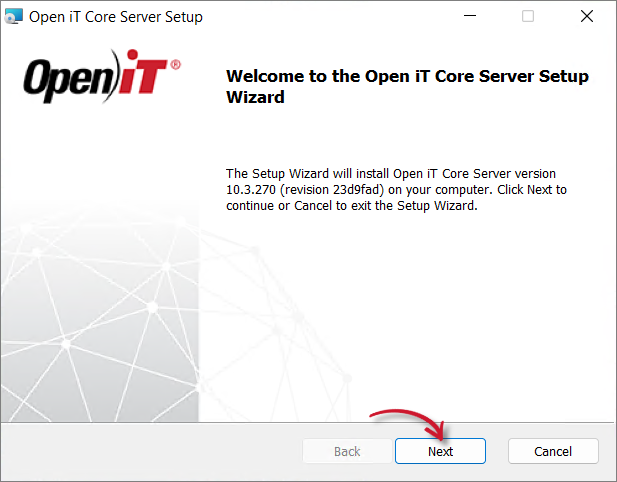 Setup Wizard Welcome Screen
Step 3: Review the License Agreement
-
Read the End-User License Agreement carefully.
-
Accept the license terms.
-
Click Next to continue.
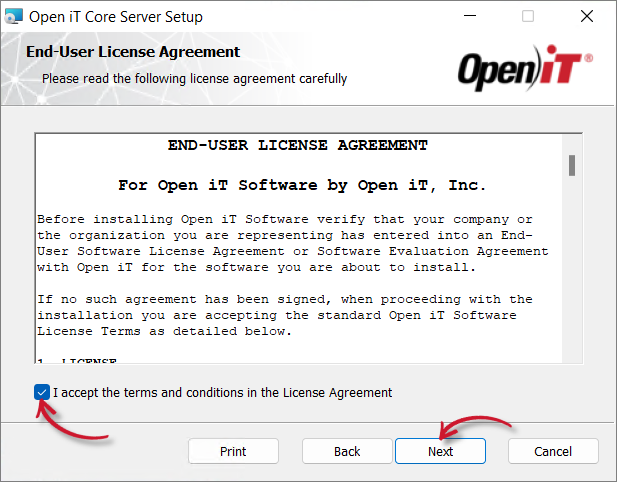 End-User License Agreement
Step 4: Select the Installation Directory
-
Choose where the Open iT software will be installed.
-
Click Change to select a different location.
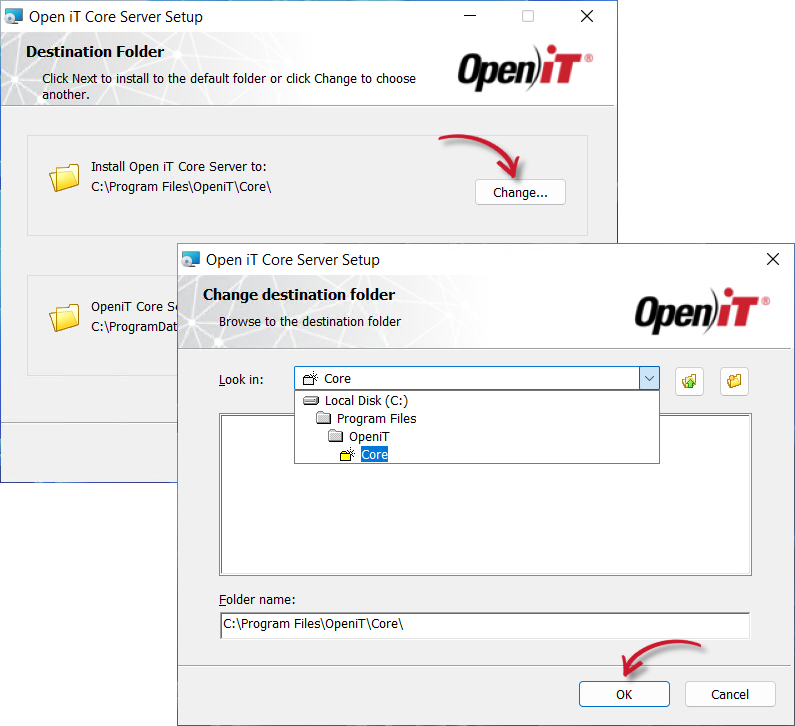 Destination Folder Configuration
 -
Click Next to continue.
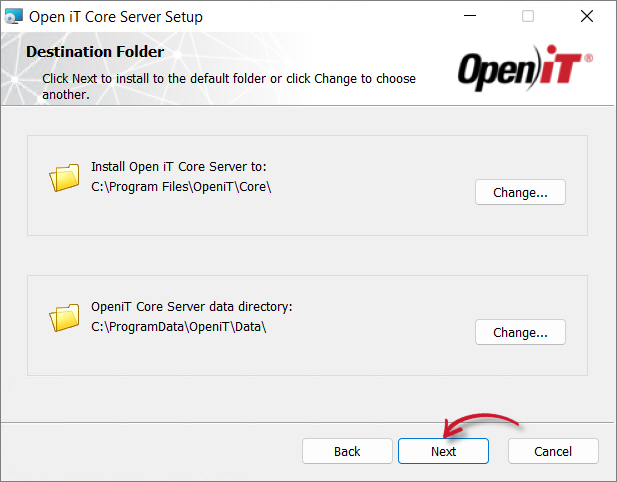 Destination Folder
Step 5: Configure Active Directory Service Account
Specify the account that will run the Open iT Core Server services.
-
If your organization uses a dedicated Active Directory service account:
- Select Use Service Account.
- Enter the User Name in the
<DOMAIN\username>format. - Enter the corresponding Password.
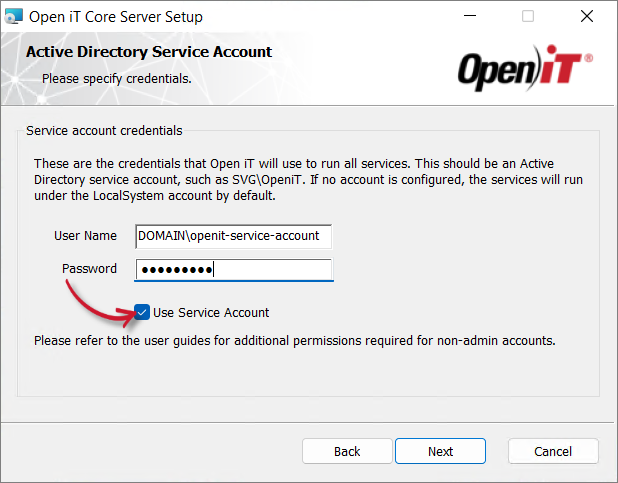 Active Directory Service Account Configuration
 -
If a dedicated service account is not available:
- Leave Use Service Account unchecked.
- The installer will configure the services to run using the LocalSystem account.
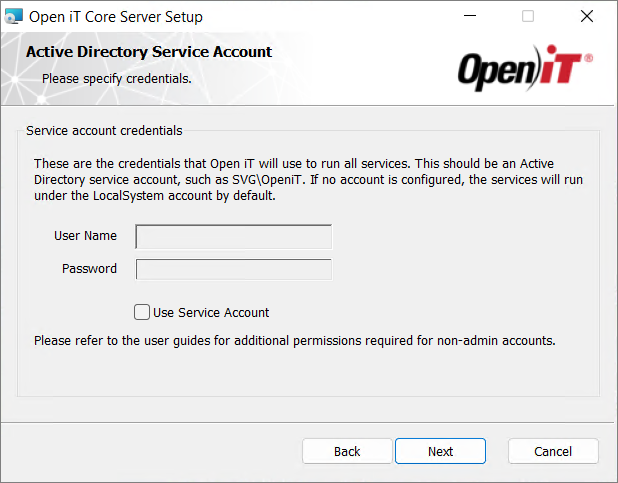 Use LocalSystem Account
 -
Click Next to continue.
Step 6: Configure the Open iT Ingress URI
Specify the Open iT Ingress URI that the Open iT Core Server will use to connect to the Open iT web application using the following format: http(s)://<ingress_hostname>:<port_number>.
You will only see this dialog box if Ingress is not installed on the machine where you are installing the Open iT Core Server. If it is already installed, this step is skipped and the existing Ingress details are used.
Choose one of the following:
-
Provide a URI (recommended if Ingress is already available). The installer will use the URI you entered and continue the installation.
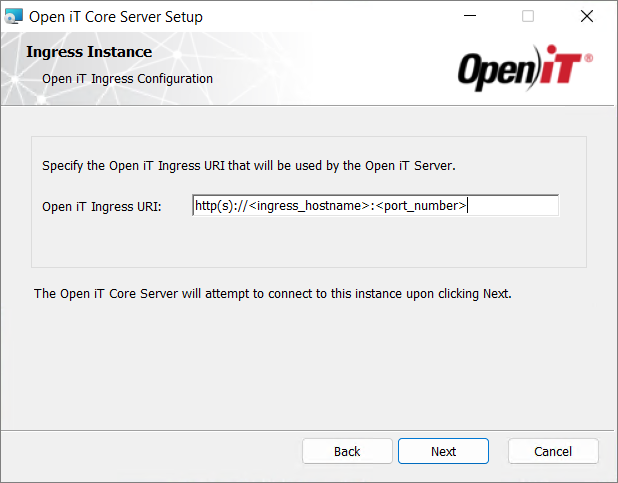 Ingress Instance Configuration
 -
Accept the default value (
http://localhost:27893). Use this if Ingress is not yet installed on the machine.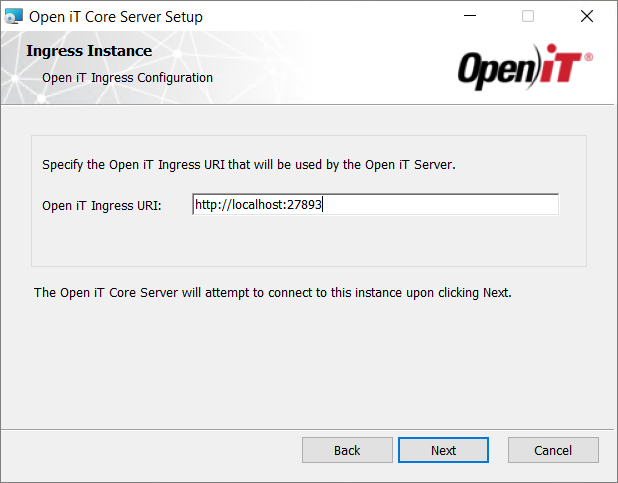 Default Ingress Instance
If Ingress is not installed and you proceed with the default value, a warning dialog will appear saying the Ingress URI is inaccessible.

Decide whether to proceed:
-
Click Yes to continue. The installer assumes you will install Ingress on the same machine later, and it will use
http://localhost:27893.noteYou may proceed with the installation and configure it later. See Installing Open iT Ingress for setup instructions.
-
Click No to go back and enter a reachable Ingress URI.
Step 7: Configure SSAD Access (Optional)
Enter the Client ID and Client Secret for the Open iT Shared Software Assets Directory (SSAD). These credentials will be utilized to ensure SSAD-Core Server connection for the ServiceNow Integration.
You may skip this step by clicking Next and configure it post-install. See Configuring Access to the Open iT Shared Software Assets Directory (SSAD) for setup instructions.
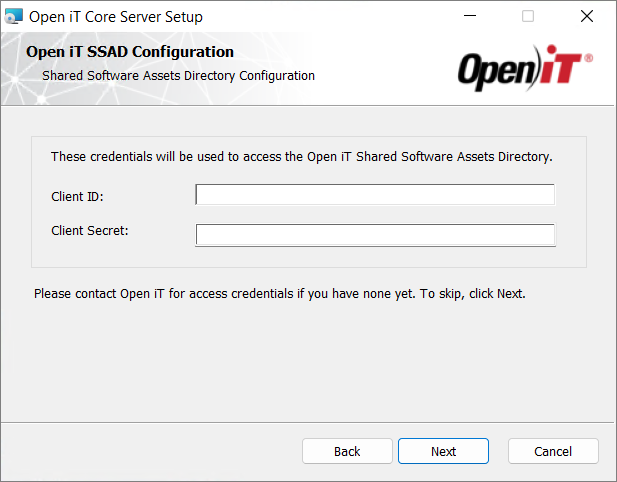
Step 8. Configure the Orchestrator and PostgreSQL Instance
Configure the gRPC port for the Open iT Orchestrator service and select the PostgreSQL instance that will be used by the Open iT Core Server.
-
Enter the gRPC Port that will be used by the Open iT Orchestrator service. The default value is 4266.
-
Select the PostgreSQL instance to use:
- Use the bundled PostgreSQL
- Use an existing PostgreSQL
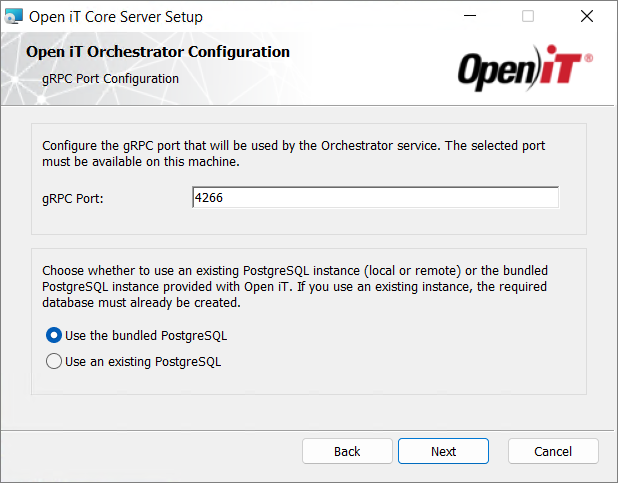 Open iT Orchestrator Configuration
 -
Click Next to continue.
-
In the PostgreSQL Configuration window, provide the required connection details.
If Use the bundled PostgreSQL is selected:
- Hostname – Pre-filled with localhost
- Port – Default is 5432
- Username – Pre-filled with postgres
- Password – Enter the password
You only need to confirm defaults and provide the password (and optionally database name).
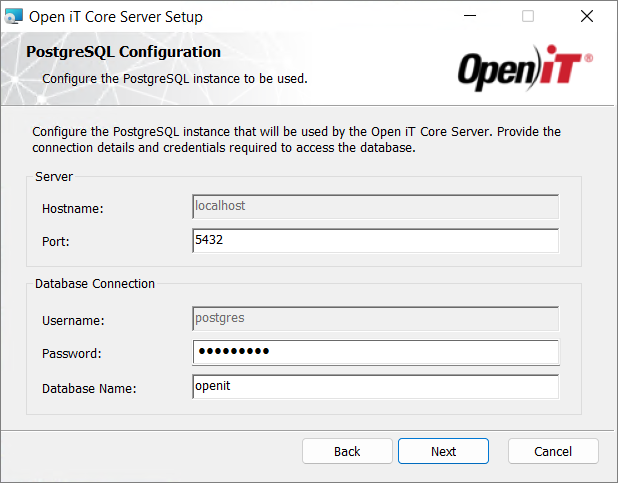 Bundled PostgreSQL Configuration
If Use an existing PostgreSQL is selected:
- Hostname – Enter the hostname or IP address of the PostgreSQL server
- Port – Enter the PostgreSQL port (default: 5432)
- Username – Enter the PostgreSQL user account
- Password – Enter the password
- Database Name – Enter the existing database name
You must provide all required connection details.
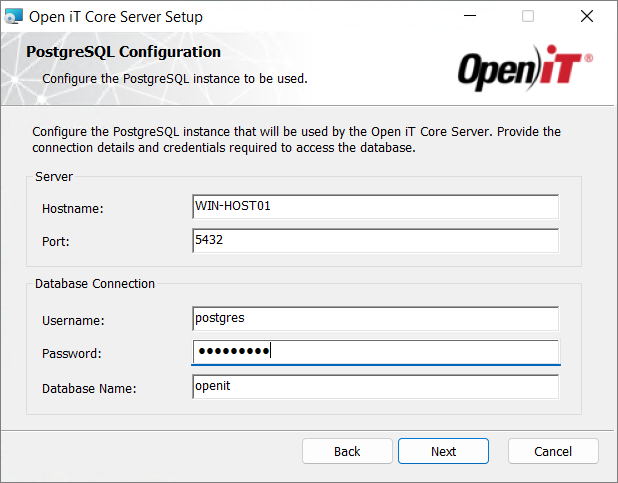 Existing PostgreSQL Configurationnote
When using the bundled PostgreSQL, all required configuration is handled automatically by the installer.
-
Click Next to continue the installation.
Step 9. Specify the License File
- Browse to the directory containing a valid Open iT license file.
- Click Next.
If you skip this step, the installation will use a temporary license file. Install a valid license before expiration to avoid service interruption.
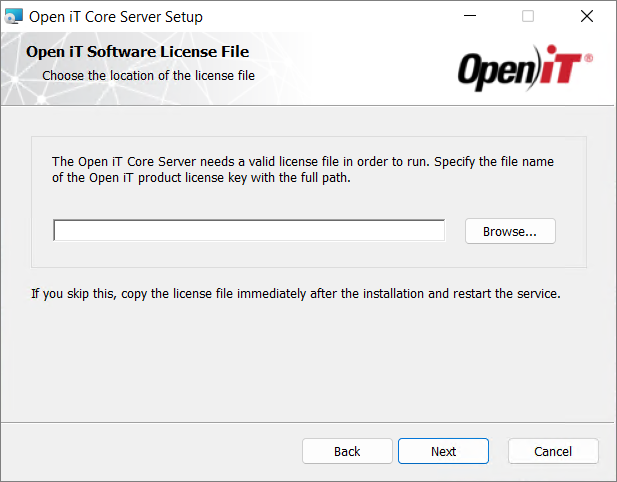
Step 10: Start the Installation
Choose optional actions before starting the installation.
-
(Optional) Select any of the following options:
- Create a shortcut to the Core Server GUI on the Desktop. – Creates a shortcut to the Open iT Core Reporter on the desktop after installation.
- Run LicenseAnalyzer Auto Configurators – Automatically executes configuration tools after installation to detect and configure supported license managers and system settings.
-
Click Install to begin the installation.
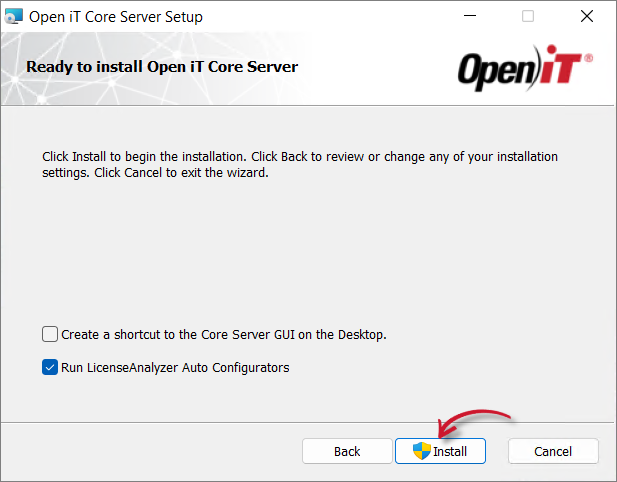 Ready to Install
 -
If prompted by Windows User Account Control (UAC), click Yes to allow the installer to proceed.
The installer will now copy and configure the required files on the system.
Step 11: Complete the Installation
When the installation finishes:
-
(Optional) View release notes.
-
Click Finish to exit the installer.
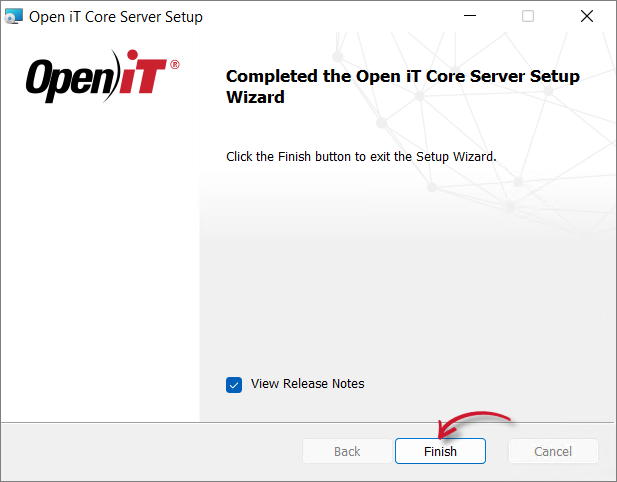 Installation Complete
Installing through the Command Line
Follow these steps to install the Open iT Core Server using the command line.
Step 1: Mount the Installation Image
-
Right-click the
openit_<version>_server_windowsISO image. -
Select Mount.
A new File Explorer window will appear containing:
openit_<version>_server_windows_<architecture>.msi- compressed Git files (
Git.zip) - compressed LicensePredictor files (
openit_forecast.zip) - compressed PostgreSQL files (
pgsql.zip) - a
clientsdirectory containing client installers
Step 2: Open Command Prompt
- Open a command prompt with Administrator level privileges.
Step 3: Execute the Installation Command
-
Execute the following command:
Command Syntaxmsiexec /i <msi_file> /l*v <log_file> <Installer Switches> <MSI Properties>The installation command contains two types of parameters:
- Installer Switches - control how the installer runs
- MSI Properties - configure the Open iT application during installation
Installer Switches (MSIEXEC Options)
Controls installer behavior.
Required Switches:
Switch Description /i <msi_file>Use this to specify the path to the Windows installer file, openit_<version>_server_windows_<architecture>.msi. This should be the path to the mounted ISO image./l*v <log_file>Use this to specify the path of the installation log file that will be created during installation. Required Switches for Core Server InstallationOptional Switches:
Switch Description /quietUse this to run the command in silent mode. /passiveUse this to run the command in unattended mode — progress bar only. Optional Switches for Core Server InstallationnoteIf no installation mode is specified, the installer will use the Windows Installer interface.
MSI Properties (Application Configuration)
MSI properties configure the Open iT application during installation. Properties are passed in this format:
Command SyntaxPROPERTY=VALUERequired MSI Properties:
Property Description PGINSTANCEOPTUse this to specify the PostgreSQL instance to use during installation.
Accepted Values:
local- Specify this option to use an existing PostgreSQL instance, whether it islocalorremote.embedded- Specify this option to install and use the bundled PostgreSQL included with Open iT.
The default value is embedded.POSTGRESUSERNAMEUse this to specify the super admin username used in your PostgreSQL setup. POSTGRESPASSWORDUse this to specify the password of the super admin used in your PostgreSQL setup. Required Core Server Installation Properties
Optional MSI Properties:
The following optional MSI properties are defined with default values. If you want to use a different value during installation, specify the corresponding property.
Property Default Value Description INSTALLDIRC:\Program Files\OpeniT\CoreUse this to specify the path where the Open iT files will be installed. DATADIRC:\ProgramData\OpeniT\DataUse this to specify the path where the Open iT data files will be stored. INGRESSURIhttp://localhost:27893Use this to specify the Ingress URL where the Core Server will register.
Provide this if Ingress is installed on a different machine. Otherwise, the installer assumes that Ingress will be installed on the same machine later.SSAD_IDnone Use this to specify the SSAD Client ID during installation for the Open iT Share Software Assets Directory (SSAD) component of the ServiceNow Integration. Coordinate with the Open iT Account Manager or Support Team regarding the SSAD Access Credentials. SSAD_SECRETnone Use this to specify the SSAD Client Secret during installation for the Open iT Share Software Assets Directory (SSAD) component of the ServiceNow Integration. Coordinate with the Open iT Account Manager or Support Team regarding the SSAD Access Credentials. OPENITGRPCPORT4266Use this to specify the gRPC port that will be used by the Core Server. POSTGRESHOSTNAMElocalhostUse this to specify the hostname of the PostgreSQL server. POSTGRESDBNAMEopenitUse this to specify the PostgreSQL database name. POSTGRESPORT5432Use this to specify the port used to connect to PostgreSQL. LICENSEFILE0Use this to specify the path to the valid Open iT license file.
The installation will use a temporary license file if this is not specified. Install a valid license before expiration to avoid service interruption.RUNAUTODETECTORS0Specify a non-empty value to execute the autoconfigurators after installation.
Accepted Values:
0- Specifying this option executes the autoconfigurators after installation.- null (i.e.,
RUNAUTODETECTORS="") - Specifying this option will not execute the autoconfigurators after installation.
INSTALLSHORTCUTnone Specify a non empty value to create a desktop shortcut to the Core Reporter after installation.
Accepted Values:
0- Specifying this option creates a desktop shortcut to the Core Reporter after installation.- null (i.e.,
INSTALLSHORTCUT="") - Specifying this option will not create a desktop shortcut to the Core Reporter after installation.
USESERVICEACCOUNTnone Specify a non empty value if the installer should use a service account to run Open iT services.
Accepted Values:
0- Specifying this option means a service account will be used to run Open iT services.- null (i.e.,
INSTALLSHORTCUT="") - Specifying this option means a service account will not be used to run Open iT services.
The account provided will also have full access to Open iT files and data regardless if the account is an Administrator or not.RUNASUSERnone Specifying the service account username.
This is required if aUSESERVICEACCOUNTis specified.RUNASPASSWORDnone Specify the service account password.
This is required if aUSESERVICEACCOUNTis specified.Optional Core Server Installation Properties
You must specify the PostgreSQL instance to use during installation using the PGINSTANCEOPT property.
-
Set
PGINSTANCEOPT=embeddedor do not specify to install and use the bundled PostgreSQL included with Open iT. In this mode, all required PostgreSQL configuration is handled automatically by the installer. -
Set
PGINSTANCEOPT=localto use an existing PostgreSQL instance (local or remote). In this case, you must provide the required connection details:POSTGRESHOSTNAMEPOSTGRESDBNAMEPOSTGRESPORTPOSTGRESUSERNAMEPOSTGRESPASSWORD
In both cases, a database (openit) will be created using the provided PostgreSQL credentials.
msiexec /i openit_10_3_500_server_windows_x64 /l*v install_log.txt /passive PGINSTANCEOPT=embedded POSTGRESUSERNAME="postgres" POSTGRESPASSWORD="Adm!n123"
Step 4: Verify Installation Completion
- If using passive mode, wait until the progress bar disappears.
- If using quiet mode, verify installation by:
- Opening Task Manager
- Checking the Details tab
- Ensuring the
msiexecprocess is no longer running
Follow these steps to install the Open iT Core Server on Unix-based systems.
Step 1: Extract the Installer
Extract the contents of the installer archive:
tar -xvpf openit_<version>_server_<platform>_<architecture>.tar
tar -xvpf openit_10_3_540_server_linux_x86_64.tar
Step 2: Navigate to the Installation Directory
After extraction, a dist directory will be created.
cd dist
Step 3: Run the Installer
Execute the installation script:
./install.sh <key1=value1> <key2=value2>...
To view available options:
./install.sh --help
Required Parameters
The following parameters must be provided:
| Name | Description |
|---|---|
user | Use this to specify a service account name. Use a service account other than root. |
group | Use this to specify a service account group name. Use a service account group other than root. |
data-dir | Use this to specify a path to where you want the Open iT database to be. |
postgres-password | Use this to specify the password of the super admin used in your PostgreSQL setup. |
The installer installs a compatible PostgreSQL instance on the local machine by default.
If you want to use an existing PostgreSQL instance, set use-existing-postgres=y and provide the required connection details:
postgres-userpostgres-hostnamepostgres-namepostgres-port
Optional Parameters
| Name | Default Value | Description |
|---|---|---|
install-dir | /opt/openit | Use this to specify the location for Open iT static data, binaries, and libraries. If not specified, the default value is /opt/openit. If this default directory is not suitable for your system, you can specify another location, and a link will be created pointing to this directory. If a link already exists from /opt/openit, the destination of the link will be suggested as the installation destination. Do not set the install-dir value to / and avoid using /var. |
temp-dir | /var/opt/openit | Use this to specify where you want to keep the Open iT Core Client collected data from the original data sources before converting and transferring them to the Core Server. Default value is /var/opt/openit. |
ingress-uri | http://localhost:27893 | Use this to specify the Ingress URL where the Core Server will be registered. Provide this if Ingress is installed on a different machine. Otherwise, the installer assumes that Ingress will be installed on the same machine later. |
html-dir | $data-dir | Use this to specify the path to where you want the report data to be. |
httpd-log-dir | $temp-dir/log/httpd | Use this to specify the path to where you want the web daemon activity logging (access and error) to be. |
ssad-id | none | Use this to specify the SSAD Client ID during installation for the Open iT Share Software Assets Directory (SSAD) component of the ServiceNow Integration. Coordinate with the Open iT Account Manager or Support Team regarding the SSAD Access Credentials. |
ssad-secret | none | Use this to specify the SSAD Client Secret during installation for the Open iT Share Software Assets Directory (SSAD) component of the ServiceNow Integration. Coordinate with the Open iT Account Manager or Support Team regarding the SSAD Access Credentials. |
activate-eventhandler | n (no) | Set to y (yes) to enable the websocket server (handlerd) service for real-time events. |
enable-autoconfig | n (no) | Set to y (yes) to enable automatic configuration of license server daemons. |
gprc-port | 4266 | Use this to specify the gRPC port that will be used by the Core Server. |
use-existing-postgres | n (no) | Set to y (yes) to use an existing PostgreSQL instance. |
postgres-hostname | localhost | Use this to specify the hostname of the PostgreSQL server. |
postgres-user | postgres | Use this to specify the super admin username used in your PostgreSQL setup. |
postgres-name | openit | Use this to specify the PostgreSQL database name. |
postgres-port | 5432 | Use this to specify the port used to connect to PostgreSQL. |
./install.sh user=openit group=openit data-dir=/opt/openit_data postgres-user=postgres postgres-password='Adm!n123'
Once started, the install.sh script will display the following:
Version: 10.3.570
Platform: x86_64-unknown-linux
Installer package directory: /openit/dist
Host Type: server

Data directory: /opt/openit_data
Installation Directory: /opt/openit
Root Temporary Directory: /var/opt/openit
Service Account Name: openit
Service Account Group: openit

Checking for OpeniT Ingress accessibility ...
OpeniT Ingress installation found on this host.


Checking minimum OS requirement ...
Minimum OS requirement met.


Checking PostgreSQL instance.
Warning: PostgreSQL instance not found. Installation of PostgreSQL is recommended.
Installing PostgreSQL 18...
Unable to resolve argument postgresql
Error: Problems in request:
missing groups or modules: postgresql
Successfully installed PostgreSQL 18
Initializing database ... OK


Configuring pg_hba.conf for trust authentication...

Configuring password for postgres superuser...
Successfully changed postgres superuser password

Configuring pg_hba.conf for SCRAM authentication...
PostgreSQL authentication is now set to SCRAM for all connections.

Ensuring database exists: openit
Created database: openit

Testing PostgreSQL database connection.
PostgreSQL connection/auth test succeeded via psql.
Creating .pgpass file for automatic authentication...

Verifying the directories that will be used by Open iT...

Using ROOT_DATA_DIR for ROOT_HTML_DIR

Installing Open iT Server files...
Installing crontab jobs, startup scripts, and boot runlevel links...

Setting the service account as the owner of the installation files...
File ownership setup complete.

Setting up configuration files...
Configuration file setup complete.

Installation complete. The URL for the Open iT web interface is:

  https://host01/

Log in as: admin
Password:  admin

Setting up git and bare repositories of configuration files.
Installation successful.
If you encounter the warning Warning: Git Not Found., follow this troubleshooting guide.
Next Steps?
After installing the Open iT Core Server, you may need to configure additional components:
For accessing the Open iT web interface
Configure credentials for ServiceNow integration