Autodesk Cloud Plugin
The Autodesk Cloud Plugin integrates with the Core Server to collect usage data from the Autodesk Admin Portal. This data is utilized to optimize usage and provide insights into Autodesk license management.
This section presents the requirements and step-by-step instructions on how to install the Autodesk Cloud Plugin.
Requirements
Before installing the Autodesk Cloud Plugin, make sure the following requirements are in place:
- An installed and properly configured Core Server
- Administrative privilege on the machine
- Autodesk Cloud Plugin installation package
Plugin Installation
Installing through the Windows Installer Interface
-
Double-click the
openit_autodesk_cloud_plugin_<version>_<architecture>.msiinstaller file to begin. Once clicked, a setup wizard will be displayed. Click the Next button to proceed.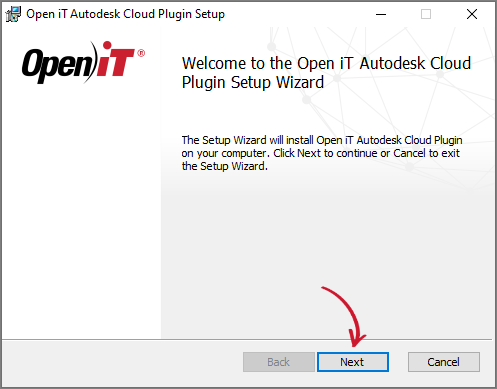 Welcome Screen
noteIf the Core Server is not installed on your system, the plugin installation will terminate prematurely. Make sure the Core Server is set up before proceeding with the plugin installation.
-
Read the License Agreement before accepting the terms. Click Next.
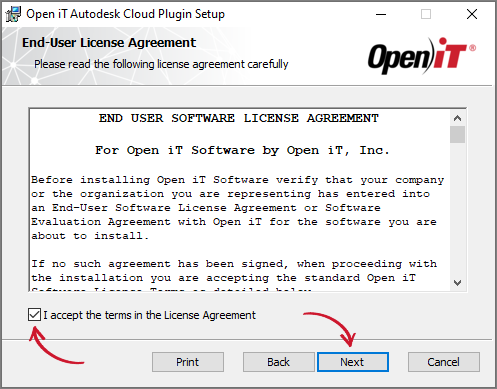 End-user License Agreement
-
Specify where the Open iT Autodesk Cloud Plugin will be installed. Click Change to specify a different directory and click Next. Clicking Next without doing any changes will use the default installation path.
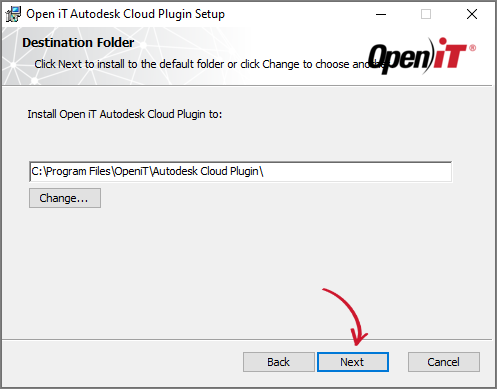 Destination Folder
-
Configure the gRPC Port to be used by the plugin. Enter the desired port number, then click Next. Clicking Next without specifying a desired port number uses the default gRPC port, 4269.
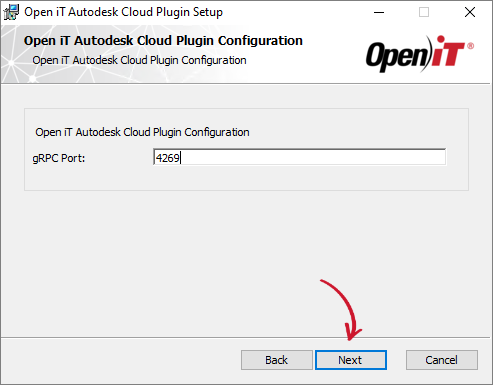 gRPC Port Configuration
-
Click Install to start the installation process. Click Back to review any installation setting.
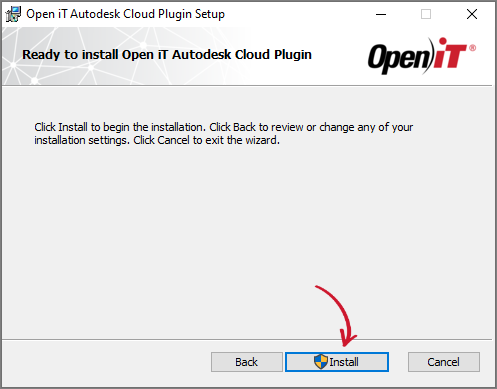 Ready to Install
-
Click Finish to complete the installation.
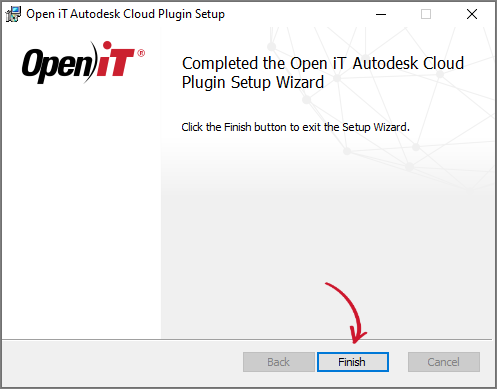 Installation Complete
Installing through the Command Line
-
Open a command prompt with Administrator level privilege.
-
Execute the following command to run the installer:
Command Syntaxmsiexec /i <msi_file> /l*v <log_file> <options> INSTALLDIR=<root_dir>Required:
Name Description /i <msi_file>The path to the Autodesk Cloud Plugin Windows installer file, openit_autodesk_cloud_plugin_<version>_<architecture>.msi./l*v <log_file>The path to the installation log file that will be created during installation. Required Key-Value Pairs for Autodesk Cloud Plugin Installation
Options:
Name Description /quietUse this to run the command in silent mode. /passiveUse this to run the command in unattended mode - progress bar only. Options for Autodesk Cloud Plugin Installation
noteThe installer will use the Windows installer interface process when the installation option is not specified.
Properties:
Name Description INSTALLDIR=<root_dir>Use this to specify the path where the Open iT files will be installed. This value is set to C:\Program Files\OpeniT\Autodesk Cloud Pluginby default.Properties for Autodesk Cloud Plugin Installation
Examplemsiexec /i openit_autodesk_cloud_plugin_1.0.33.1071_x64.msi /l*v install_log.txt /passive INSTALLDIR="C:\Program Files" -
When using the passive mode, wait until the process bar dialog disappears. When using the quiet mode, verify if the installation is complete by opening the Task Manager and checking in the Details tab if the msiexec process is still running.
Installation Verification
After completing the installation of the Autodesk Cloud Plugin, verify that it has been correctly installed and is functioning as expected.
Verifying the Installation Directory
-
Go to
C:\Program Files\OpeniT\Autodesk Cloud Pluginto confirm that the Autodesk Cloud Plugin files are present. -
The following files and directory should be located in the directory:
Log- contains log files generated by the Autodesk Cloud Plugin componentsopenit_cbcsautodeskpipeline- containsopenit_cbcsautodeskpipeline.exe, the data orchestration engine responsible for scheduling and managing Autodesk Cloud data collection, and the_internaldirectory, which contains libraries, DLLs, and packages required to run the executableLICENSE-WinSW.txt- contains the license for the Windows Service Wrapper (WinSW), a third-party component used by the pluginopenit_autodeskcredentials.exe- configures Autodesk account credentials used to collect data from the cloud portalopenit_autodeskoauth.exe- enables the Cloud-Based Collection Service (CBCS) to securely access Autodesk Portal data by obtaining the required access tokensopenit_aws.exe- a command line interface (CLI) tool from Amazon Web Services (AWS), built by Open iT, for accessing the AWS resources required by the pluginopenit_oauth.exe- securely obtains an access token on behalf of a user from the Customer Portal; enables the Core Server to access protected resources in the cloudOpeniTCBCSAutodeskPipeline.exe- runsopenit_dagstercbcsautodesk.exeas a Windows serviceOpeniTCBCSAutodeskPipeline.xml- defines configuration settings for the Windows service, including the service name, description, and execution parameters
Verifying the Dagster Working Directory
-
Go to
C:\ProgramData\OpeniT\Data\dagsterto confirm that the Dagster working directory has been created. -
The following directory should be present:
home— contains Dagster-related files and subdirectories such as.telemetry,history,logs,schedules,storage, anddagster.symlink
Verifying the Plugin Service
-
Open the Task Manager.
-
Go to Services.
-
Verify that the listed service or services are running.
Service Purpose OpeniTCBCSAutodeskPipeline Hosts the Autodesk-specific CBCS processing definitions and logic used by the Orchestrator. Autodesk Cloud Services
For more information about the purpose and functions of these services, see Open iT Services.
Next Step?
After successfully installing the Autodesk Cloud plugin, proceed to the configuration of cloud data collection to gain insights for license optimization.