Configure Mapping Sources
Configuring Destination Field Sources
Follow these instructions to assign a mapping source to various destination types used for reporting:
When configuring Destination Field Sources with multiple mapping sources, make sure that all fields from each configured mapping source are fully loaded.
-
Look for
user-to-groups.mapanduser-properties.mapfrom the source list, then click Load Fields.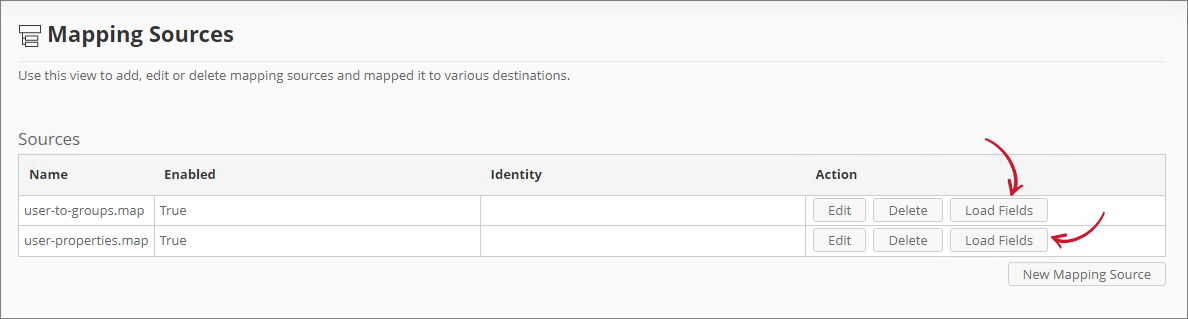 Loading Mapping Sources
-
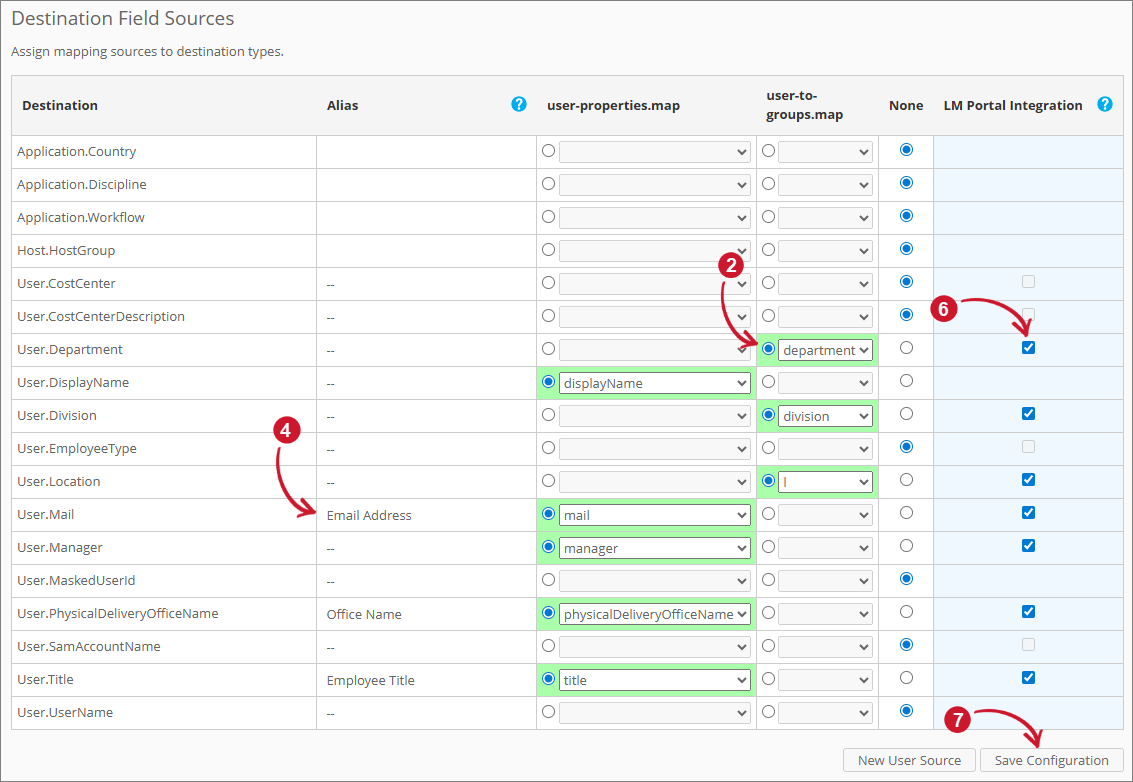
Map the following source values by clicking the radio button beside the row value, then select the same destination value:
Destination Field Sources (
user-to-groups.map)Destination Source Value User.Department department User.Division division User.Location l Destination Field SourceDestination Field Sources (
user-properties.map)Destination Source Value User.DisplayName displayName User.Mail mail User.PhysicalDeliveryOfficeName physicalDeliveryOfficeName User.Title title Destination Field SourceNOTEThese are the default configurations for the Destination Field Sources. To add or remove attribute values, refer to step 4 in the Configuring LDAP Collector section.
-
You can also configure the Alias of a specific destination field. Alias is used to replace the static name of the destination field. This is to customize the fields in reporting. Look for the specific fields to assign an alias.
-
Click the Alias column of the field to assign. This should transform into a textbox.
Type the desired alias.
NOTEThe following characters are not allowed:
. , ; ' ` : / \ '' | ? % $ ! + = ( ) [ ] < >
-
You can also configure which fields are shown in the LM Portal user-level report by configuring the LM Portal Integration column. Look for the specific fields to show.
-
Check the associated checkbox of the field in the LM Portal Integration column.
NOTEOnly user fields are allowed to be configured.
Only the configured or mapped fields can be configured.
The user fields UserName and DisplayName have no checkbox because they are displayed by default.
-
Once all set, click Save Configuration to apply the changes.
 Configuring Mapping Sources
 -
Using the Analysis Server Console Application, run the command
RunEtl. Follow the instructions in the RunEtl section. -
Run the command
SyncLicenseStatus /reload. Follow the instructions in the SyncLicenseStatus section. -
Verify the configuration by following the instructions in Verifying Mapping Sources Configuration section.
Verifying Mapping Sources Configuration
License Monitor Portal
Follow these instructions to check whether the mappings have been successfully configured in the License Monitor Portal:
-
Go to the License Monitor Portal's Web Interface.
NOTEFor detailed instructions, refer to the License Monitor Portal section.
-
Select an item from the list of vendor licenses.
-
Click on a feature from the list. Check the following:
- If Display Name is configured, it it is displayed instead of the UserName.
- It shows the configured fields as columns in the user-level report.
 License Monitor Portal Verification
 -
Click on the Display name to view the details. It should include the following fields:
- UserName
- Department
- Division
- Manager
- EmployeeType
- Location
- CostCenter
- PhysicalDeliveryOfficeName
Associated values should be present if available.
NOTEAlias is applied in the user's details view.
 License Monitor Portal Verification
Analysis
Follow these instructions to verify whether the mappings have been successfully configured in the Analysis:
-
Go to the Analysis page.
NOTEFor detailed instructions, refer to the Analysis section.
-
Expand the User Dimension. Make sure that the configured Alias is applied.
-
If you have configured user properties, report on any mapped user classification (e.g., User Full Name) with User Id, and Elapsed Time measure. Make sure that mapped values are correct and present.
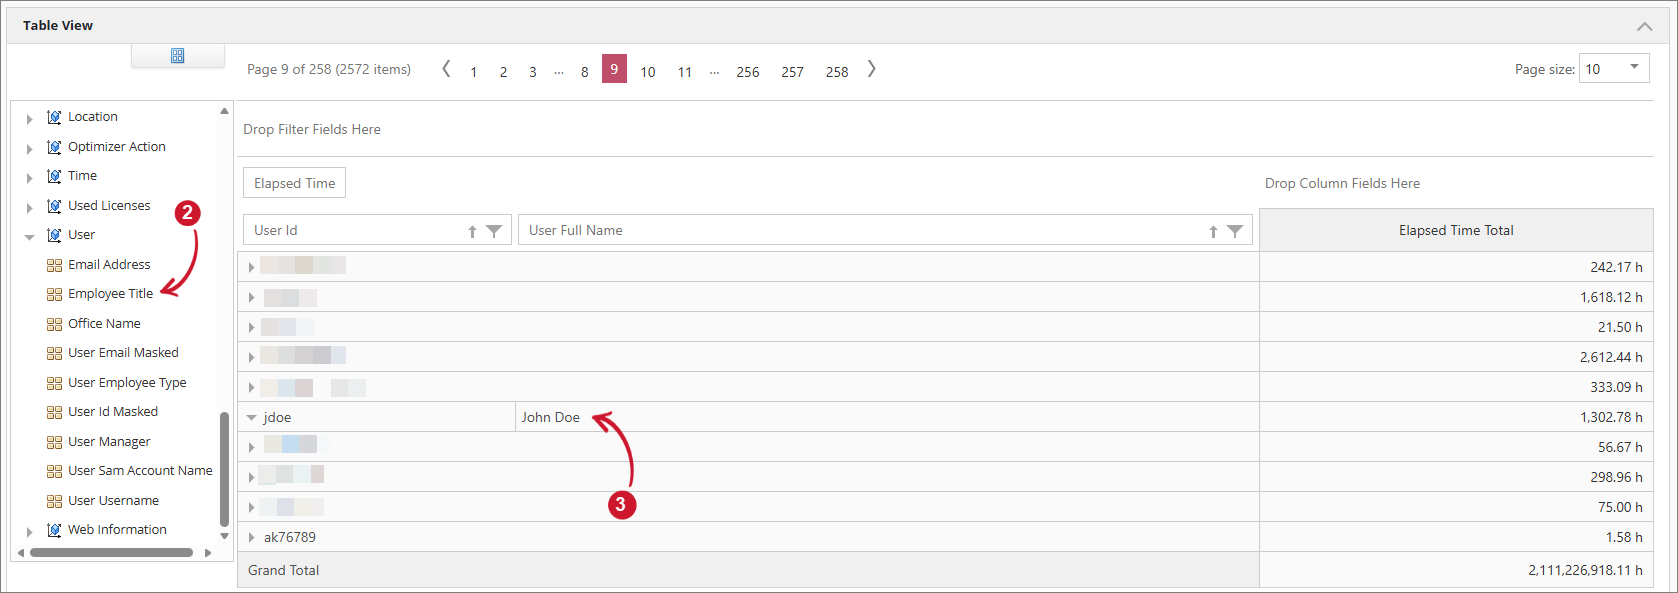 Analysis User Reporting Verification
 -
If you have configured user groups, report on any mapped user group (e.g., User Department) with User Id, and Elapsed Time. Make sure that users are correctly mapped to their user groups.
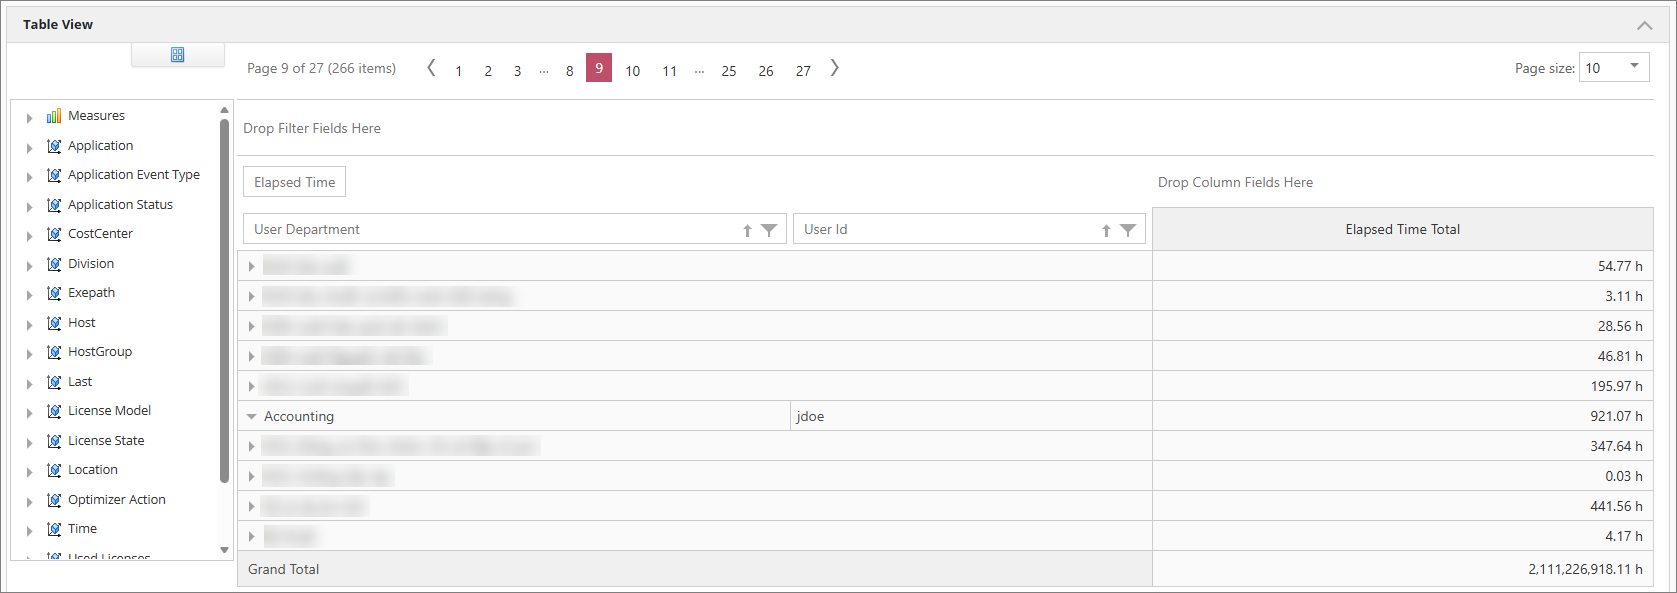 Analysis Usergroup Reporting Verification