Zitadel Management Console - Application Registration
This assumes that you have a Zitadel property installed and configured, whether cloud or local.
Follow these steps to register an application in the Zitadel Management Console:
-
Access the Zitadel Management Console.
- cloud instance: https://zitadel-cloud-instance/ui/console
- local instance: https://zitadel-local-instance/ui/console
-
Once logged in, in the upper-left corner of the dashboard, select an existing organization or create a new one.
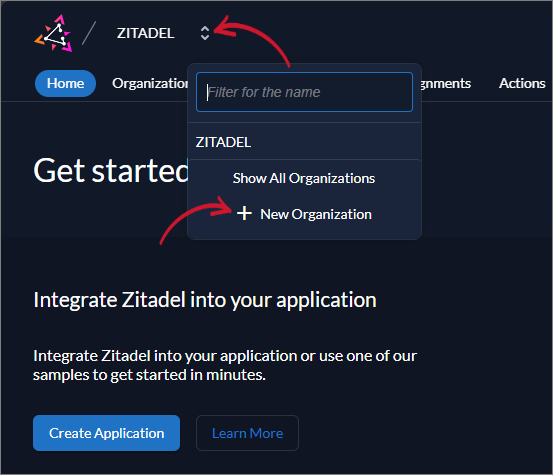 Zitadel Organization
a. When creating a new organization, provide the Name. Click Create.
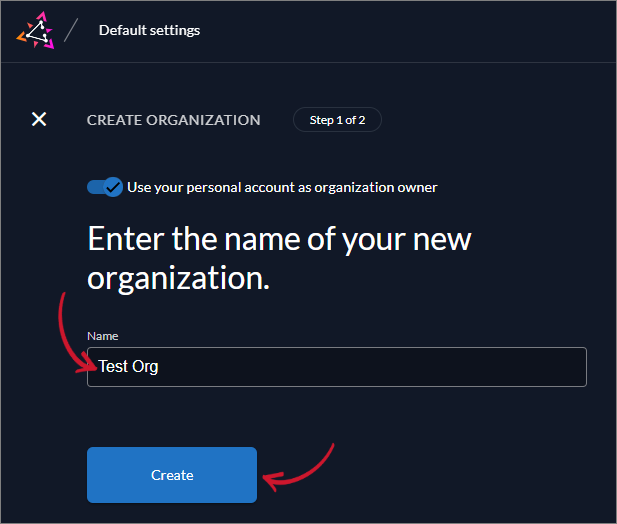 Zitadel New Organization
b. Select the newly created organization in the displayed list.
 Zitadel Organizations List
-
Once in the selected organization dashboard, click Projects. Select an existing project or create a new one.
a. When creating a new project, click Create New Project.
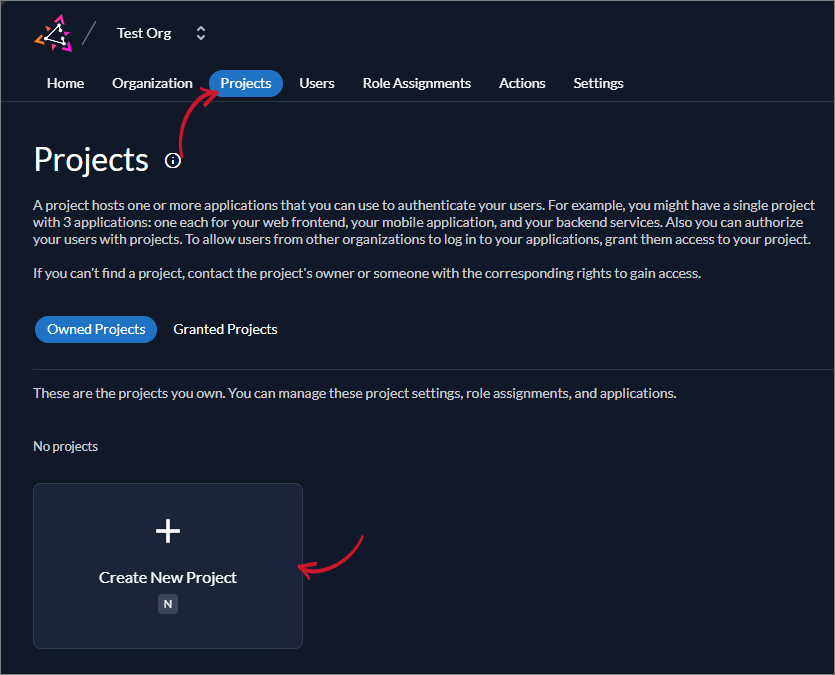 Zitadel New Project
b. Provide the Name. Click Continue.
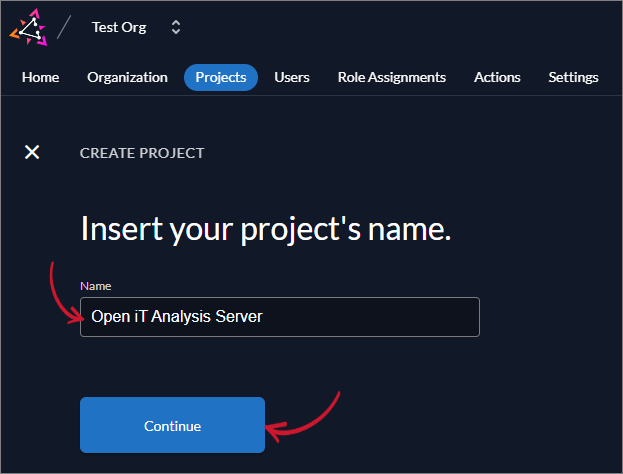 Zitadel Project
-
Once in the selected project dashboard, create a new application by clicking the New button.
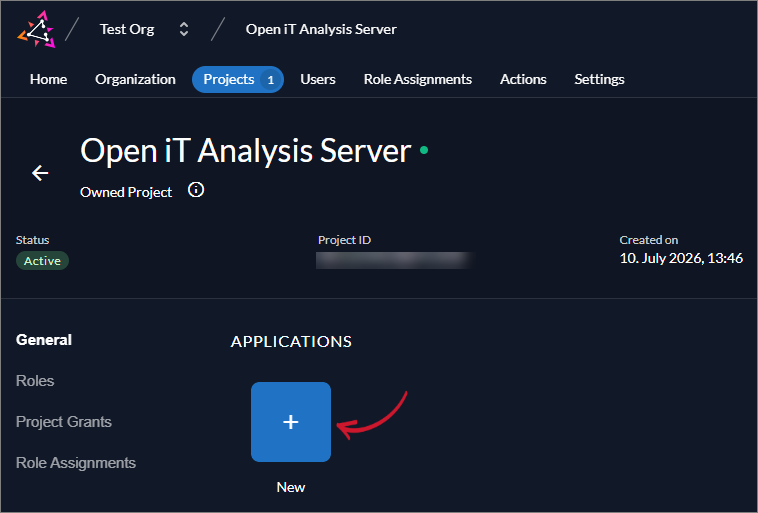 Zitadel New Application
-
Provide the Name of the application. (e.g., Analysis Server)
-
Select Web for the Type of Application, then click Continue.
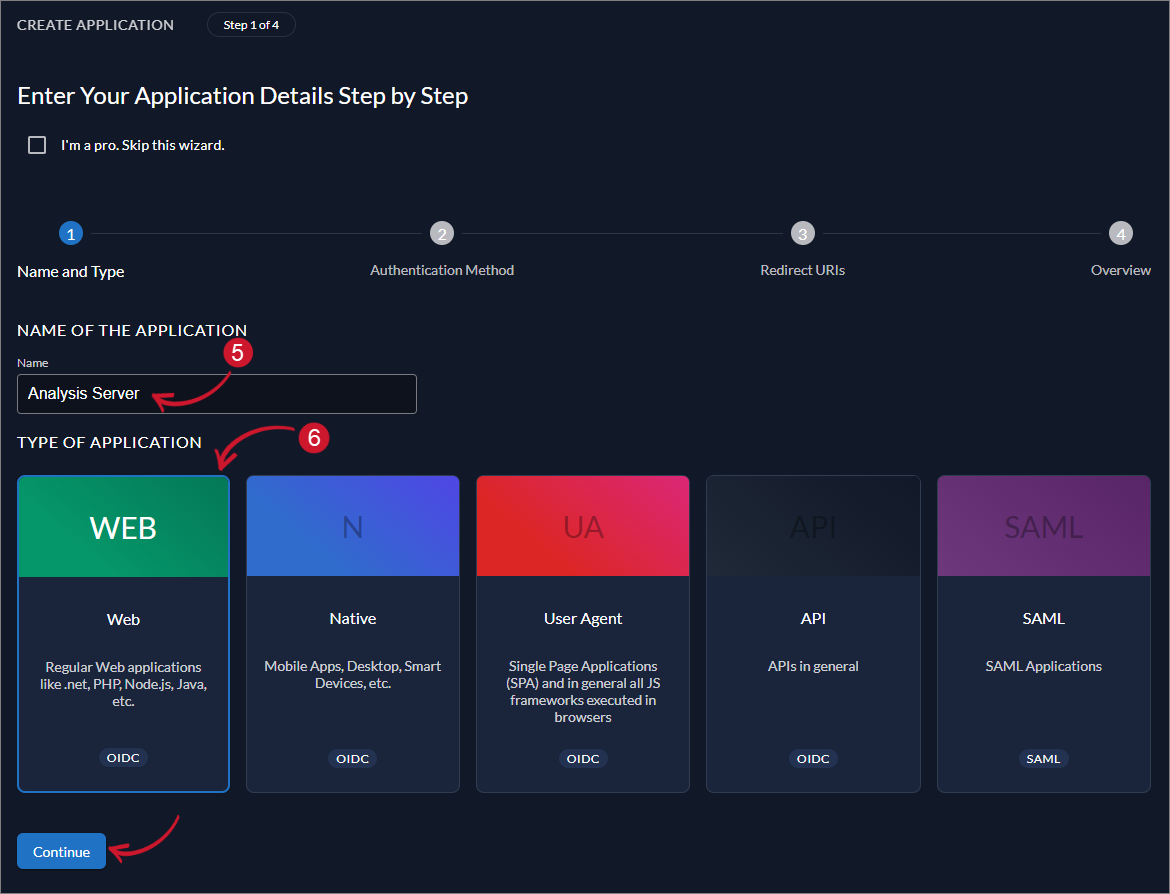 Zitadel Application Type
-
Select Code for Authentication Method, then click Continue.
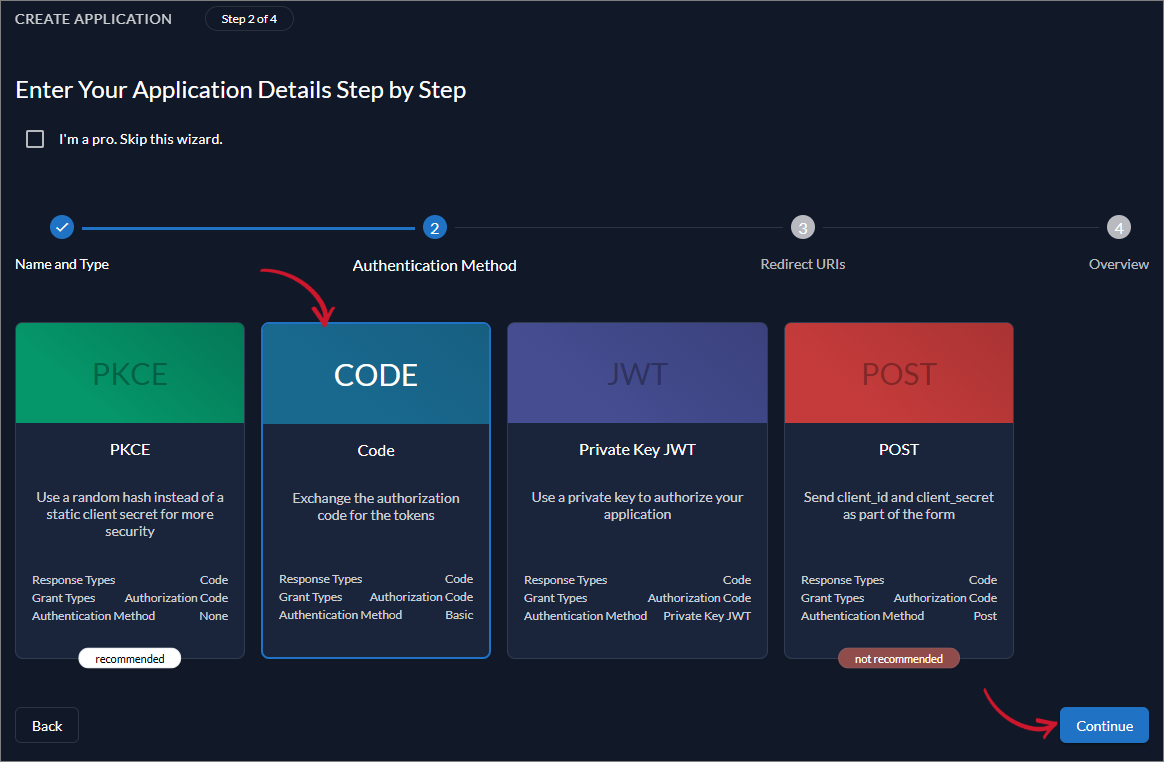 Zitadel Application Authentication Method
-
Provide the RedirectURI in the following format: https://<as_hostname>:<port_number>/signin-oidc. (e.g., https://as.openit:8443/signin-oidc). Click the (+) plus button.
The newly added item should be added in the list.
-
Provide the Post Logout URIs(Post Redirect URIs) in the following format: https://<as_hostname>:<port_number>/. (e.g., https://as.openit:8443/). Click the (+) plus button.
The newly added item should be added in the list.
Click Continue.
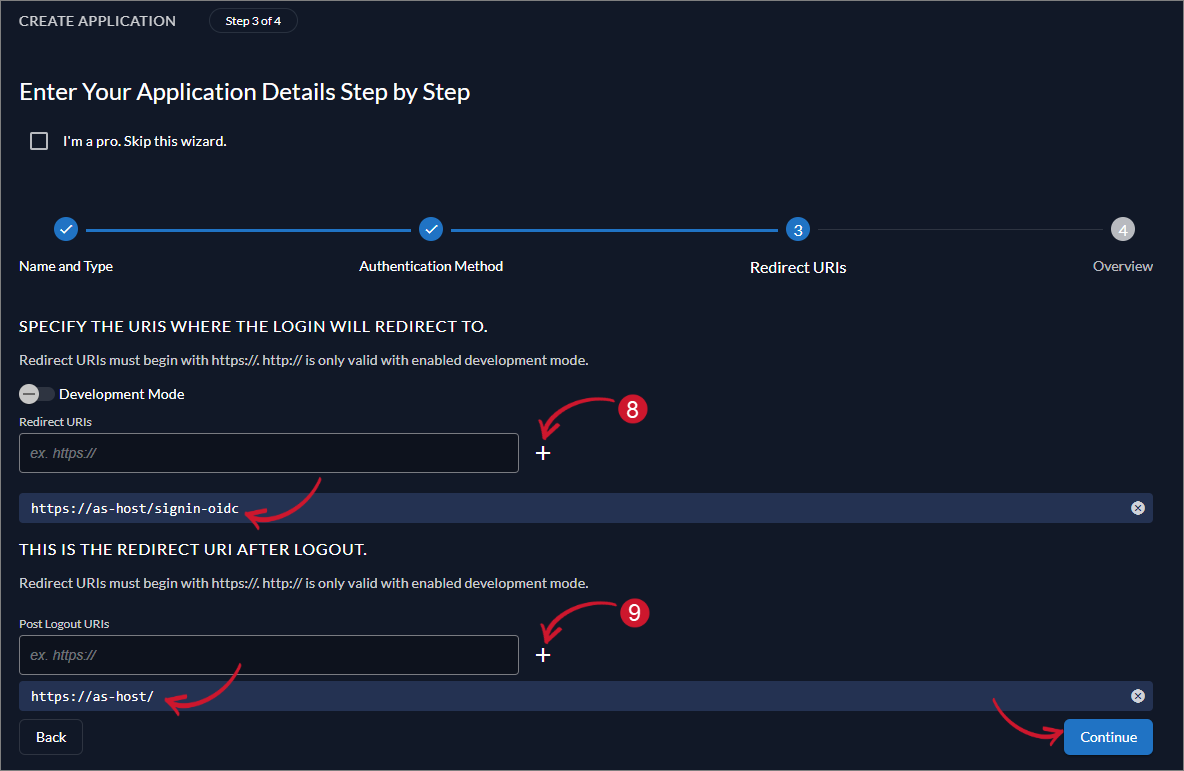 Zitadel Application Redirect URI
-
Review the configuration of the web application, then click Create.
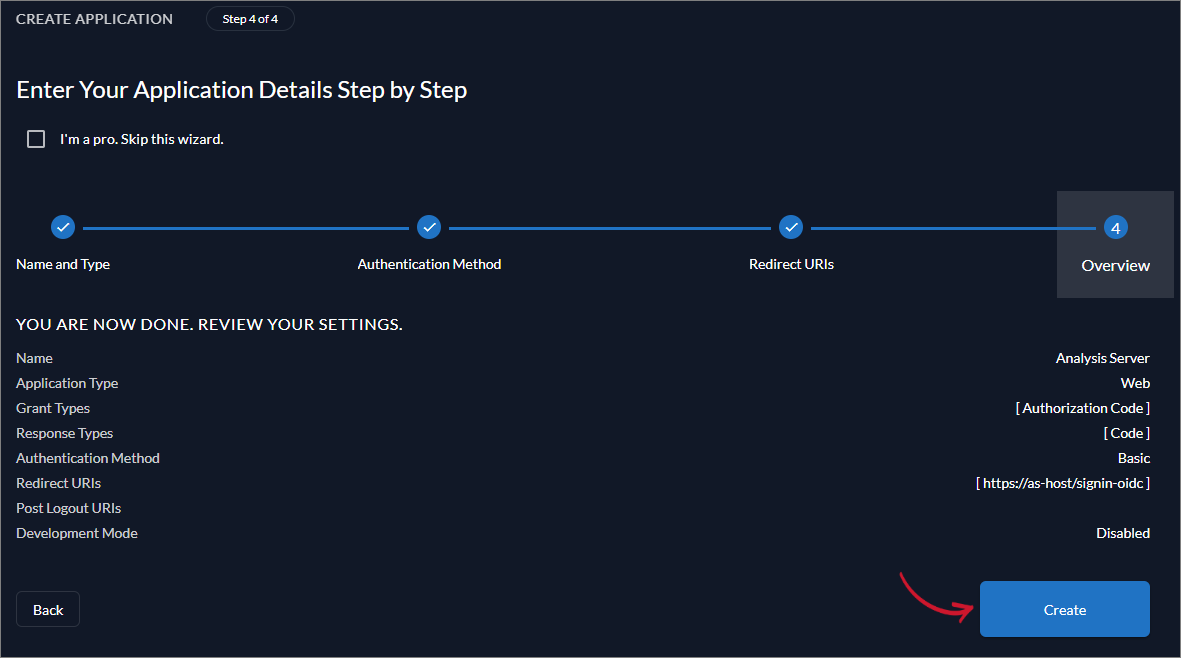 Zitadel Application Configuration Review
-
A prompt containing the ClientId and ClientSecret will be displayed. Please take note of these important keys by clicking the associated Copy to clipboard button.
Cick Close.
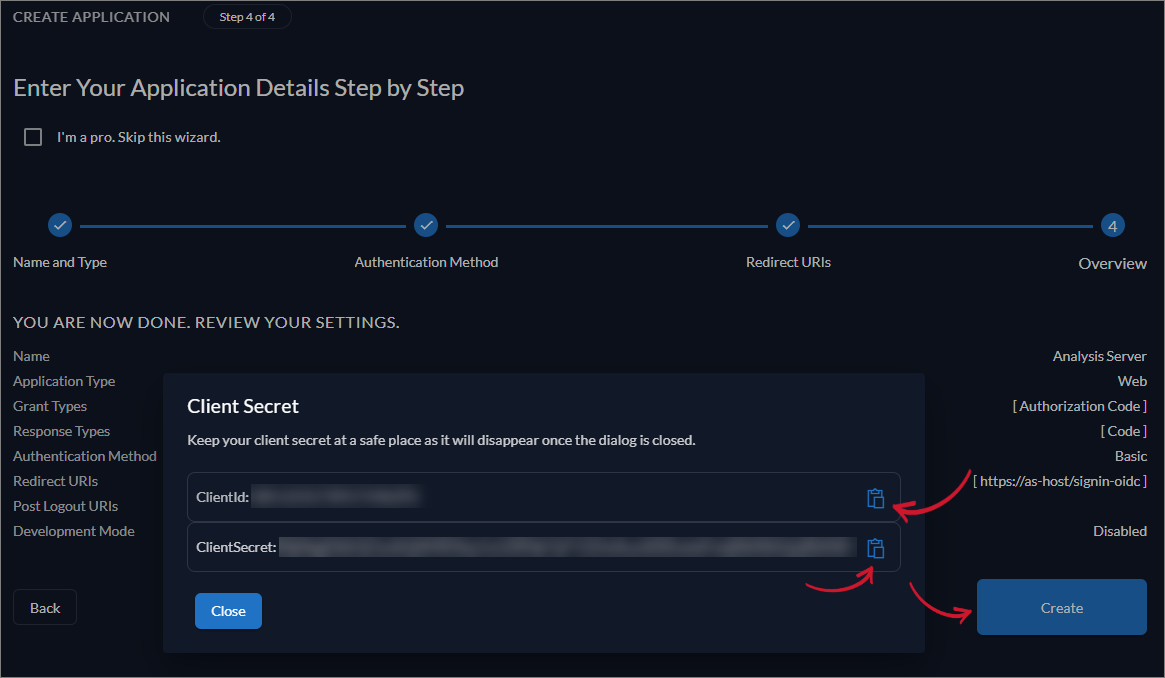 Zitadel Application Client ID and Client Secret
-
Once redirected to the web application dashboard, edit the Response Type and set it to ID Token.
-
Set the Grant Types to Implicit. Click Save.
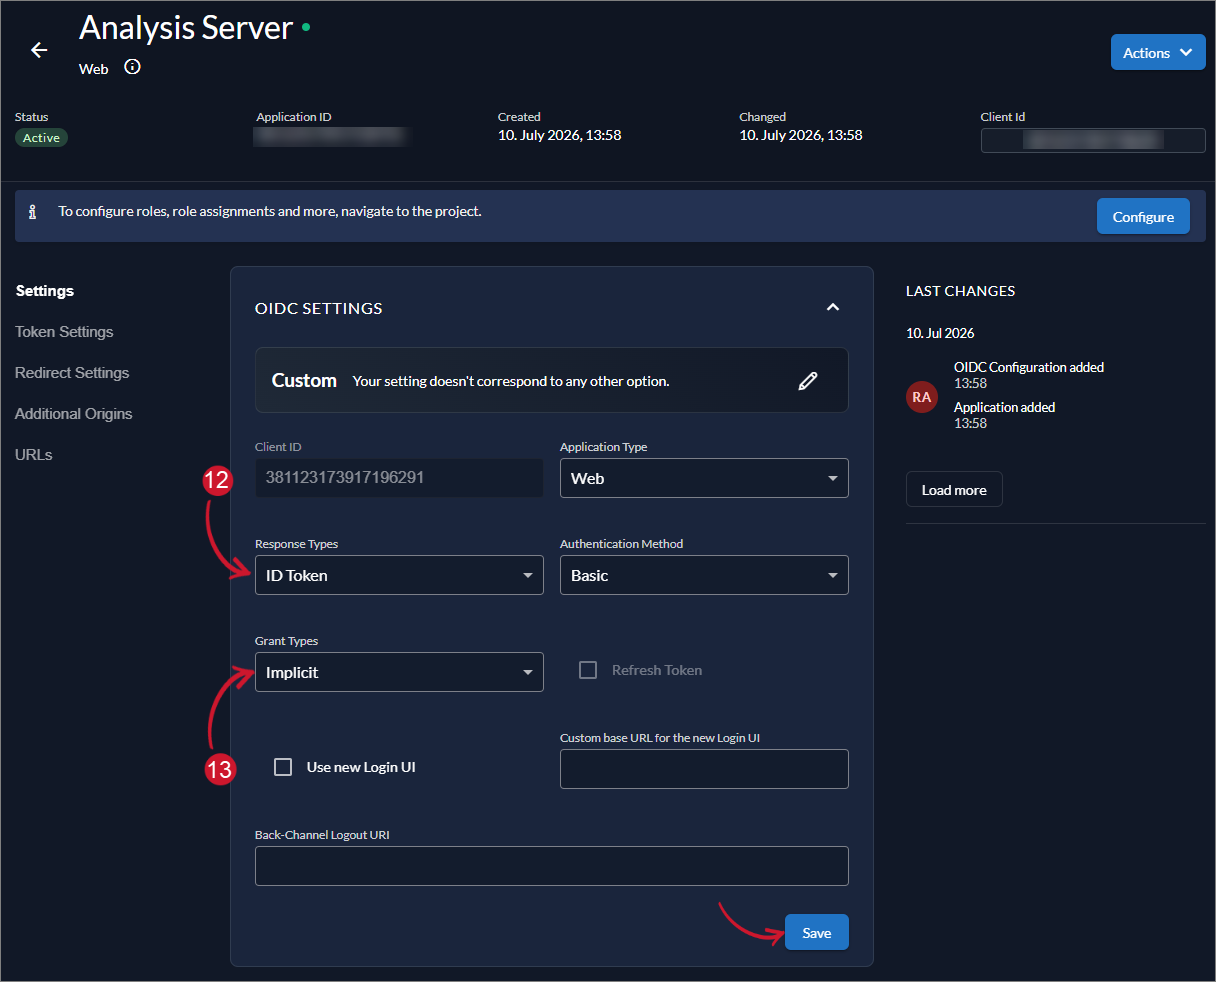 Zitadel Customize Application
-
Click Token Settings. Set Auth Token Type to JWT and tick the option Include user's profile info in the ID Token.
Click Save.
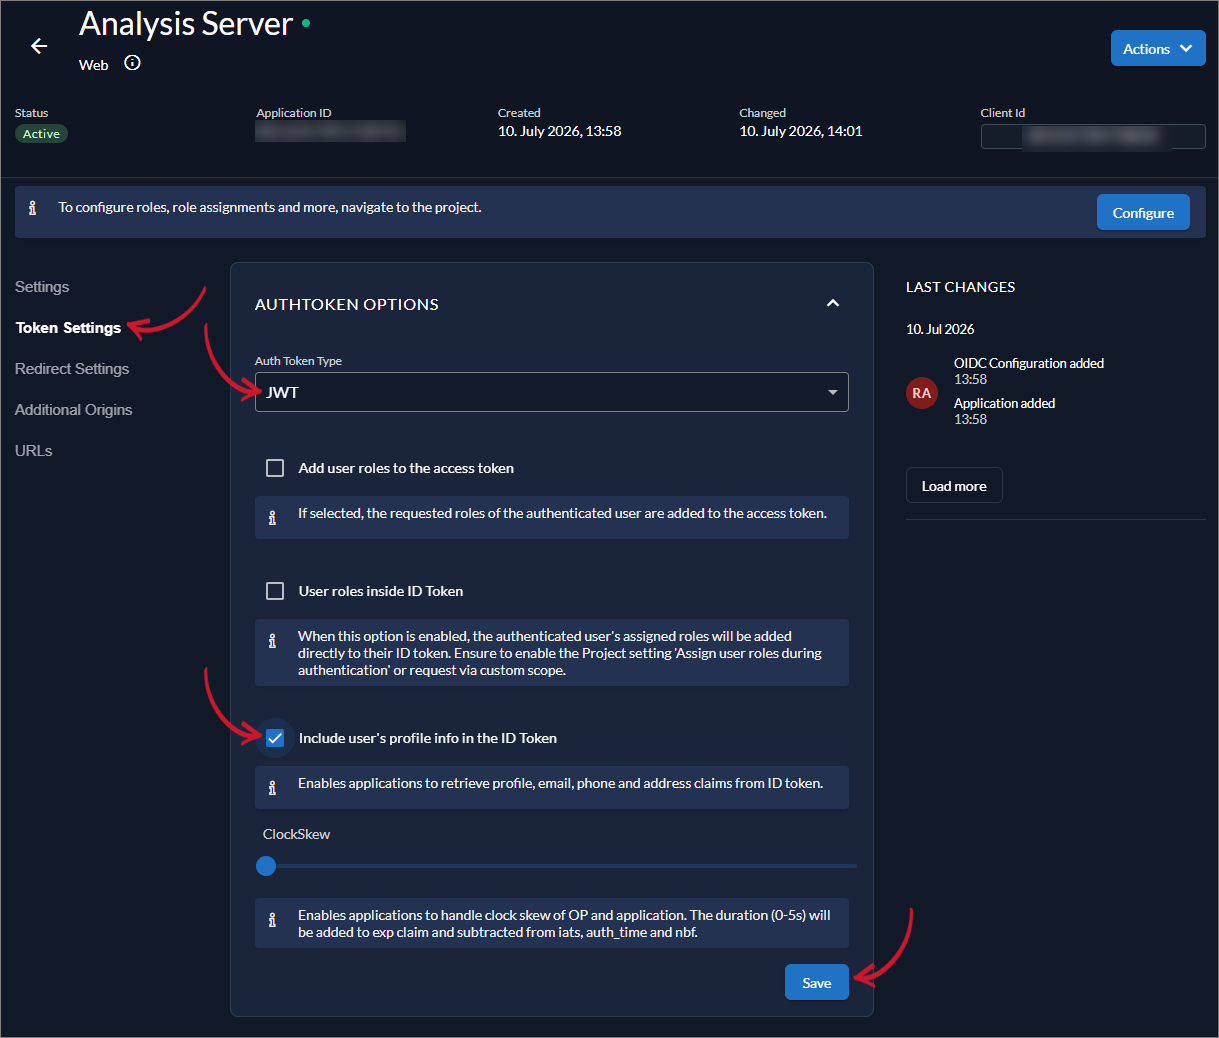 Zitadel Application Token Settings