Keycloak Administration Console - Client Registration
This assumes that you have a Keycloak server configured and accessible.
Follow these steps to register a client in the Keycloak Administration Console:
-
Access the Keycloak Administration Console. (e.g.,
https://keycloak.example.com/admin) -
Select the appropriate Realm where you want to register the Open iT Analysis Server client. To switch to a different realm, click Manage realms, then select the desired realm.
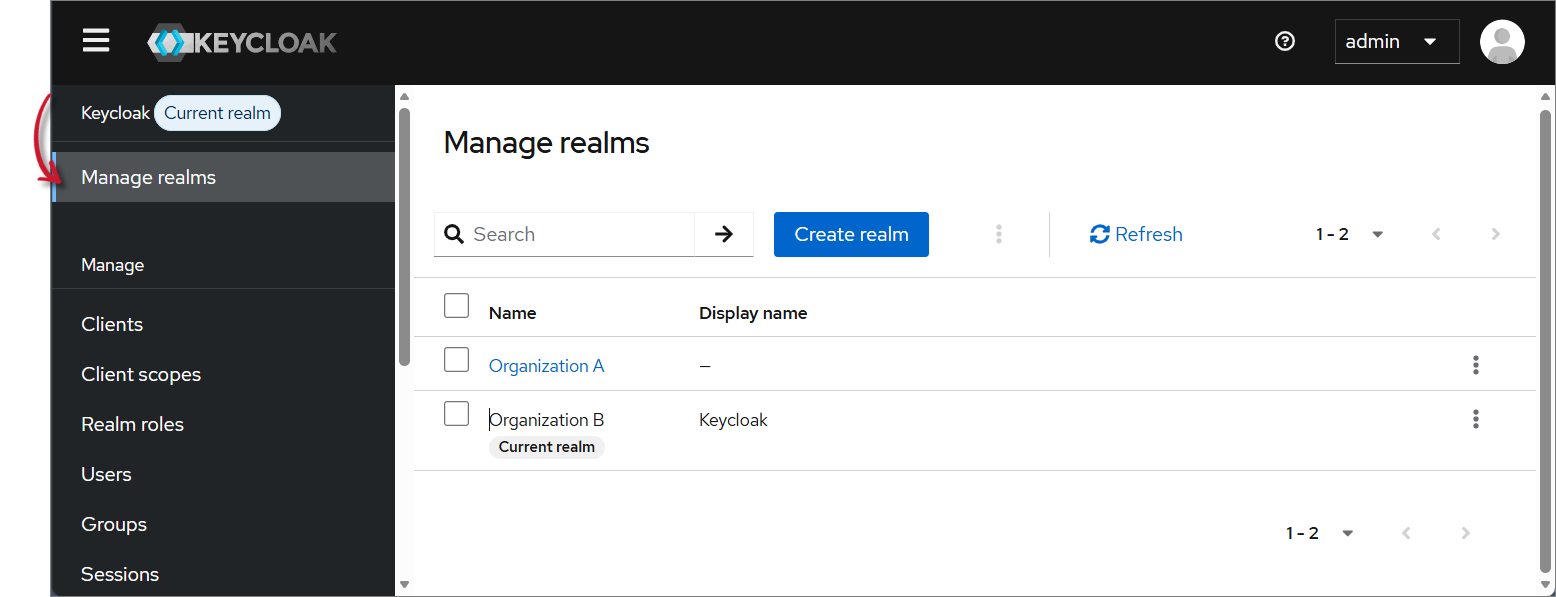 Manage Realm
If the required realm does not exist, click Create realm and provide the necessary details to create one.
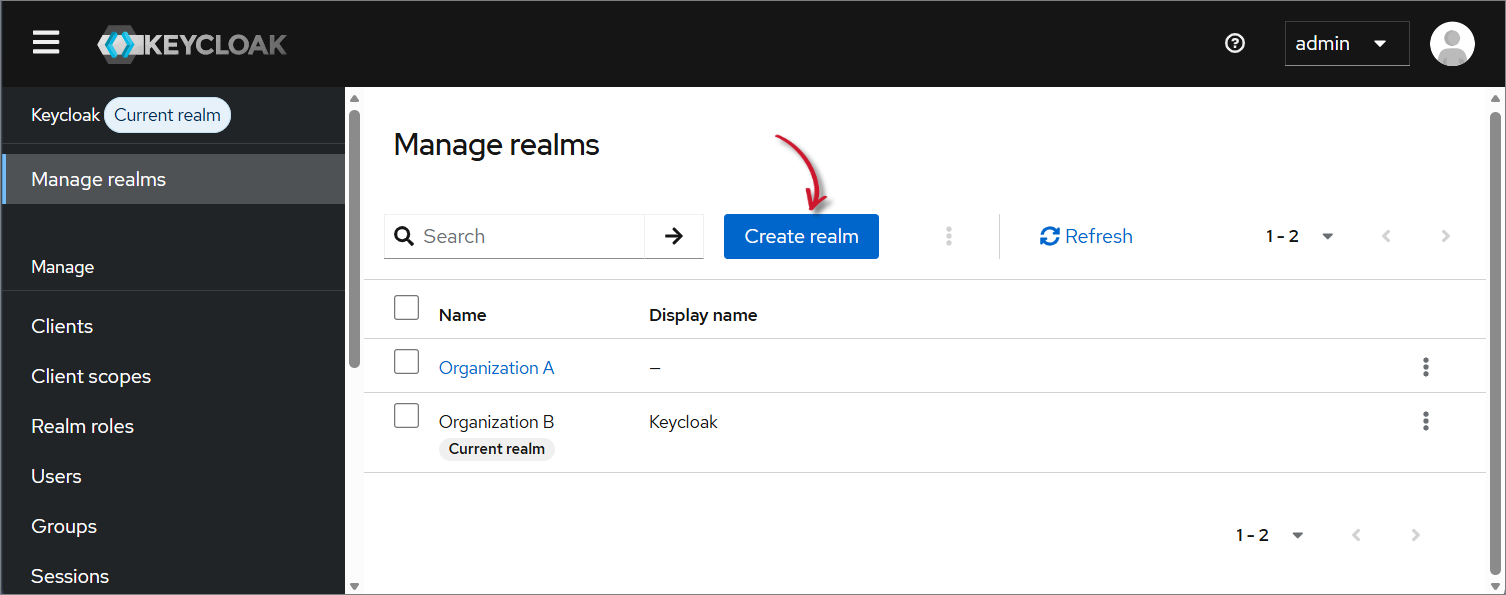 Create Realm
-
In the left navigation pane, click Clients, then click Create client.
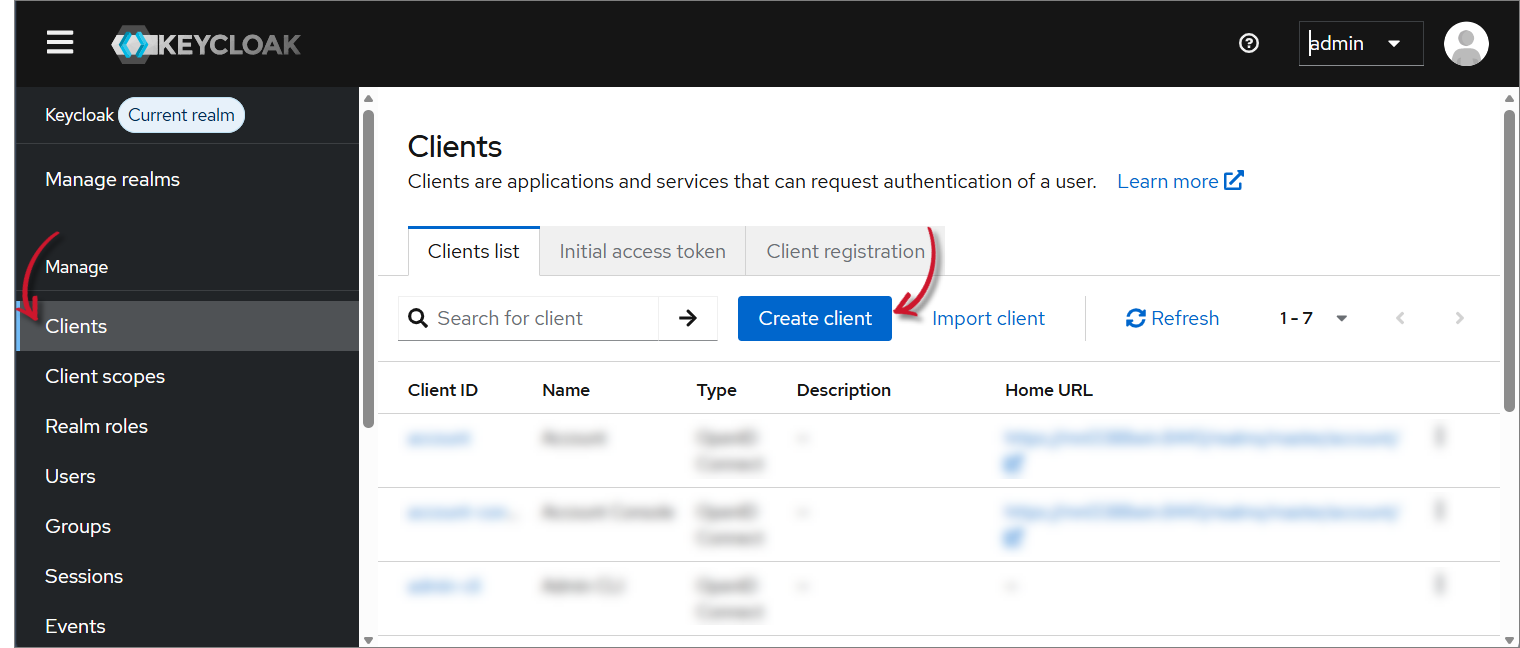 Create Client
-
Configure the following values:
- Client type - OpenID Connect
- Client ID - openit-client (or any descriptive client identifier preferred by admin)
- Client Name - Open iT Analysis Server (or any name preferred by admin)
Click Next after filling the details.
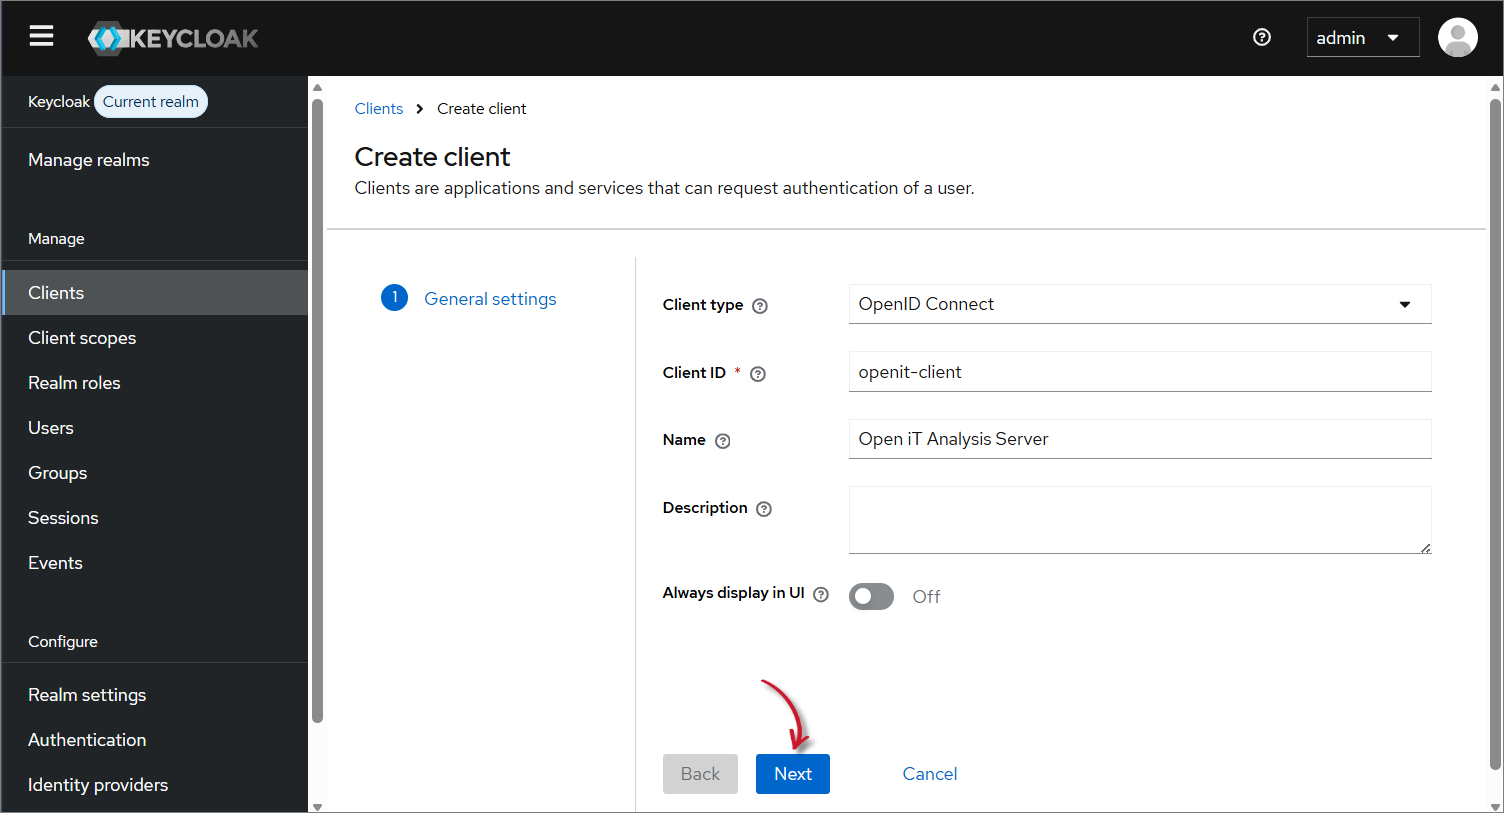 Configure General Settings
-
Configure the following client capability settings:
- Client authentication: Enabled
- Authorization: Disabled
- Standard flow: Enabled
- Implicit flow: Enabled
Click Next.
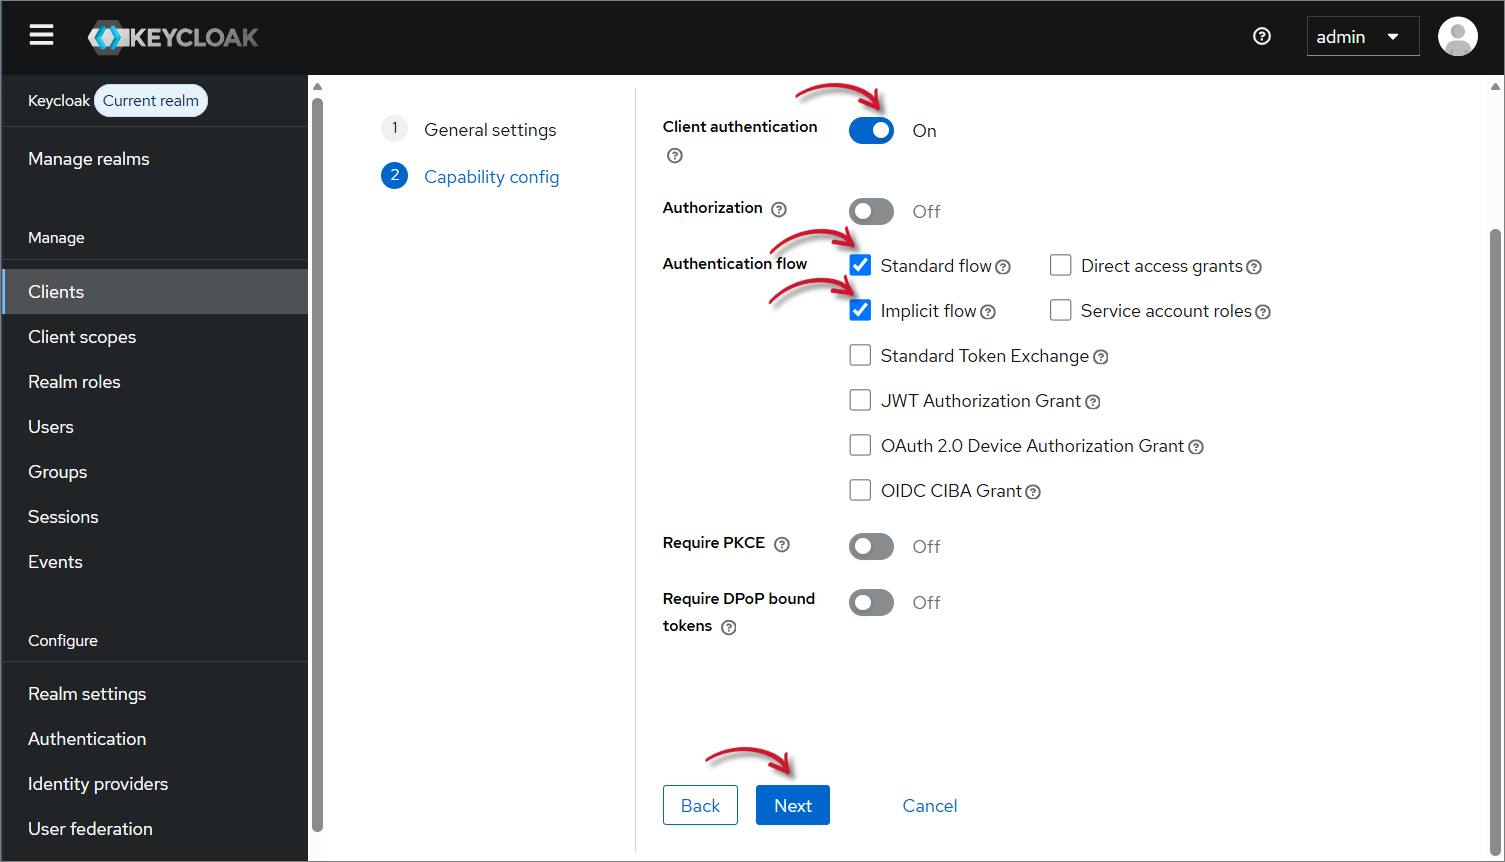 Configure Client Capability Settings
-
Configure the login settings:
- In the Root URL field, specify your Analysis Server base URL using the following format:
Root URL Formathttps://<as_hostname>:<port_number>/Examplehttps://as.openit.com:8443/- In the Home URL field, specify your Analysis Server base URL using the following format:
Home URL Formathttps://<as_hostname>:<port_number>/Examplehttps://as.openit.com:8443/- In Valid redirect URIs field, specify your Analysis Server sign-in endpoint using the following format:
Valid Redirect URI Formathttps://<as_hostname>:<port_number>/signin-oidcExamplehttps://as.openit.com:8443/signin-oidc- In Valid post logout redirect URIs field, specify your Analysis Server base URL using the following format:
Valid Post Logout Redirect URIhttps://<as_hostname>:<port_number>/Examplehttps://as.openit.com:8443/- In the Web origins field, enter
+to automatically allow the origins associated with the configured redirect URIs.
Once done, click Save.
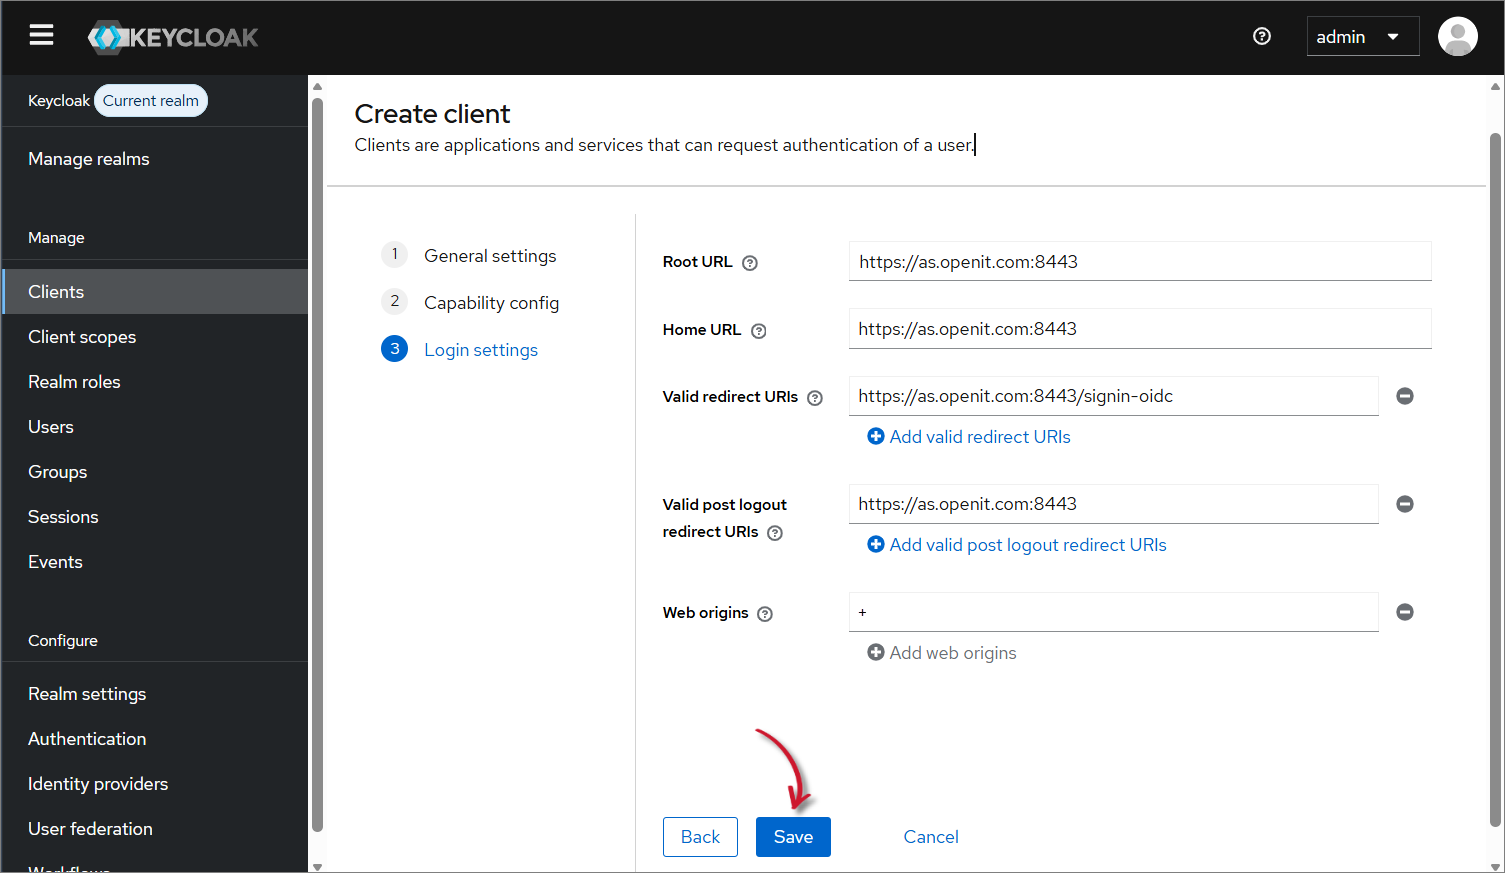 Configure Login Settings
-
Click Save.
-
Open the Settings tab, then take note of the Client ID.
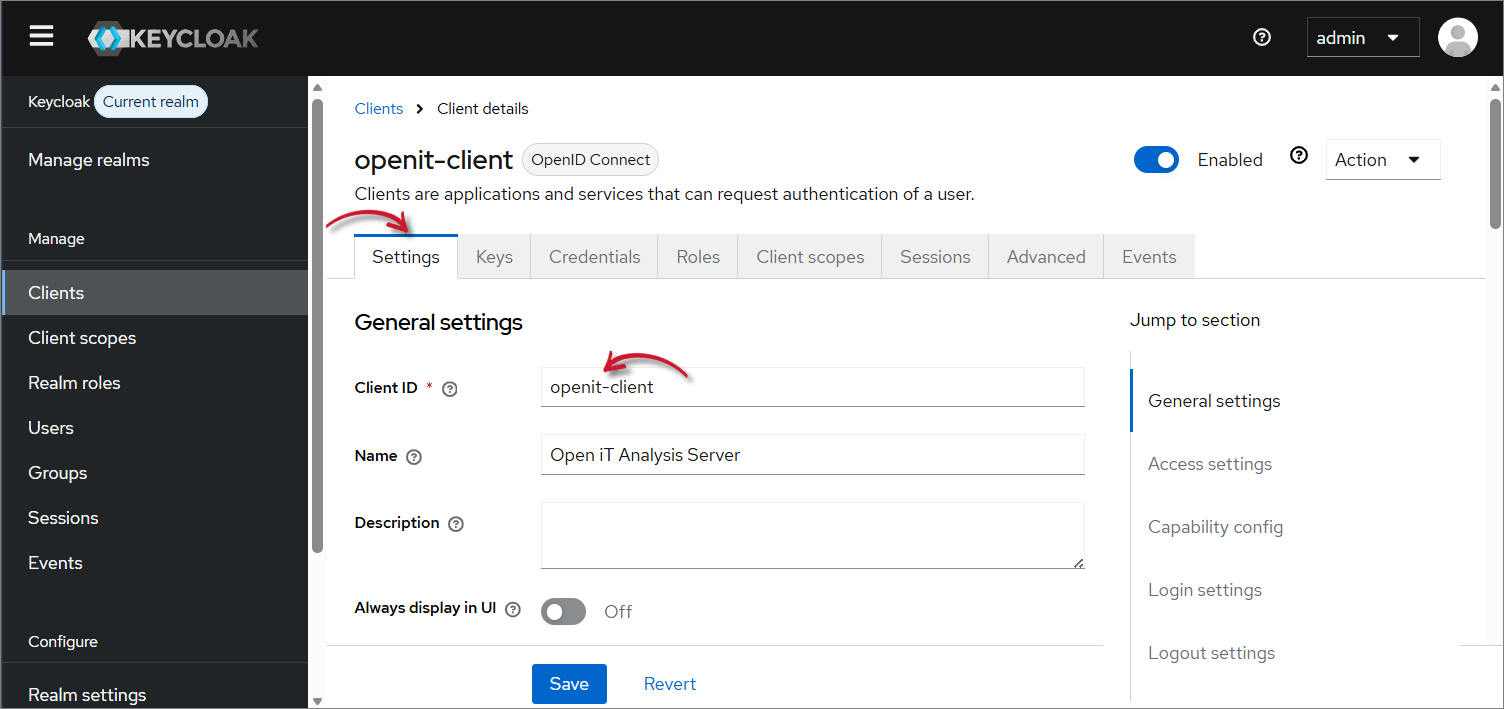 Get Client ID
-
Open the Credentials tab, then take note of the generated Client Secret.
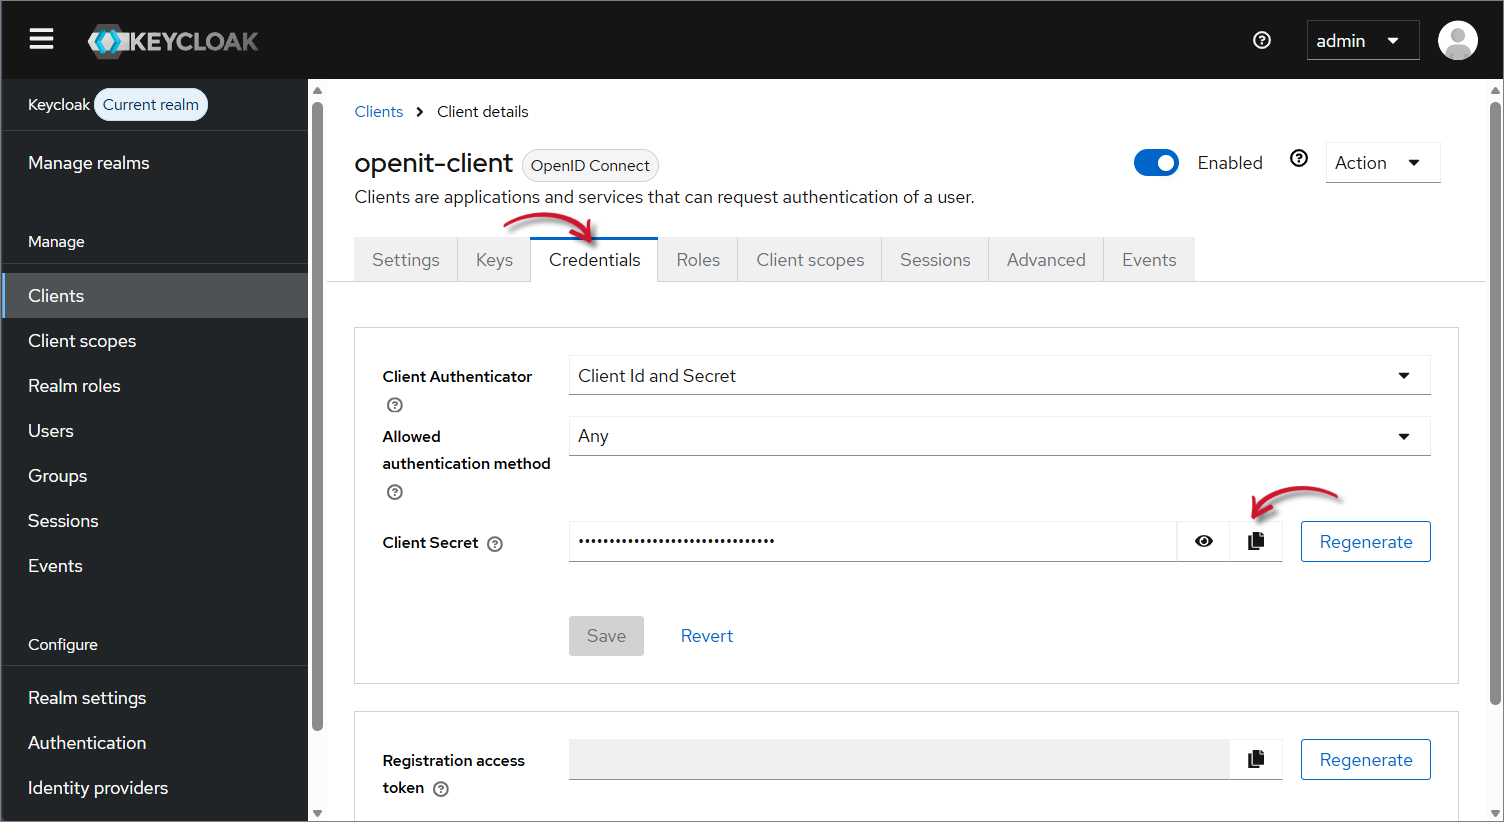 Get Client Secret
-
Assign users or configure groups according to your organization's access policy if required.