Okta Admin Console - Application Registration
This assumes that you have an Okta properly configured.
Follow these steps to register an application in the Okta Admin Console:
-
Access the Okta Admin Console. (e.g., https://integrator-*******-admin.okta.com/)
-
In the left navigation, navigate to Applications > Applications. Click Create App Integration.
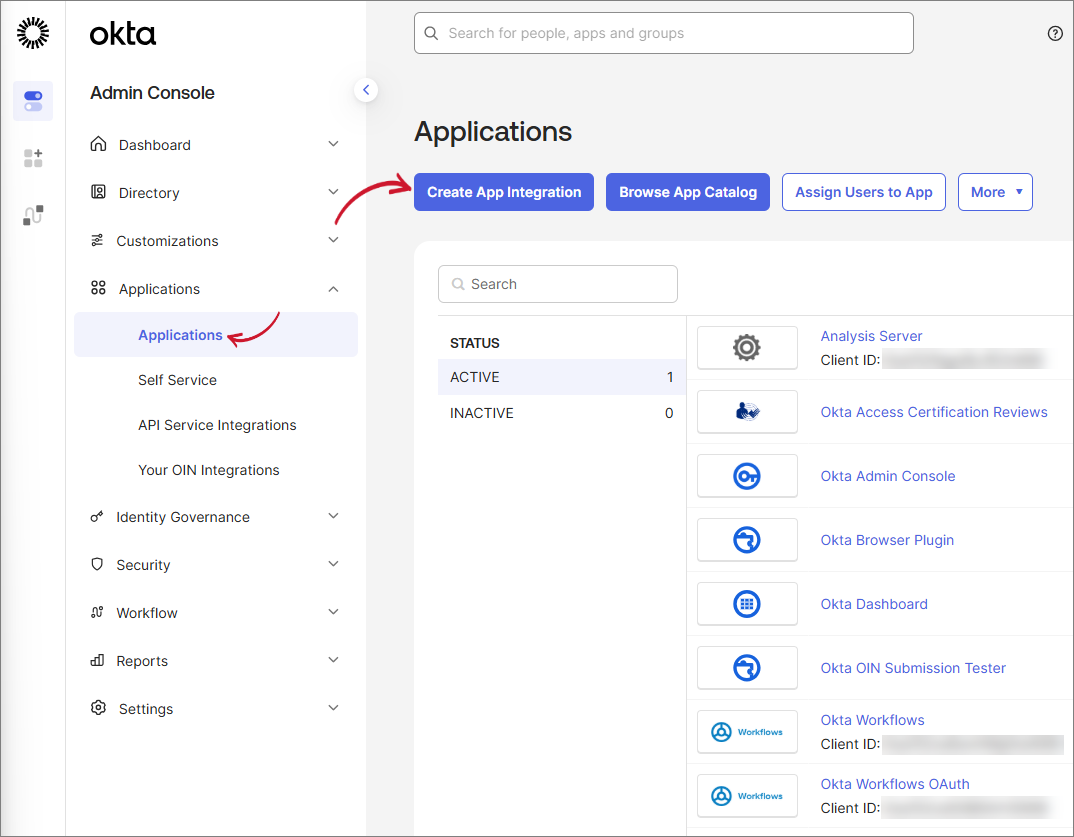 Okta Create App Integration
-
The Create a new app integration dialog will appear. Select the following options:
- Sign-in method - OIDC - OpenID Connect
- Application type - Web Application
Click Next.
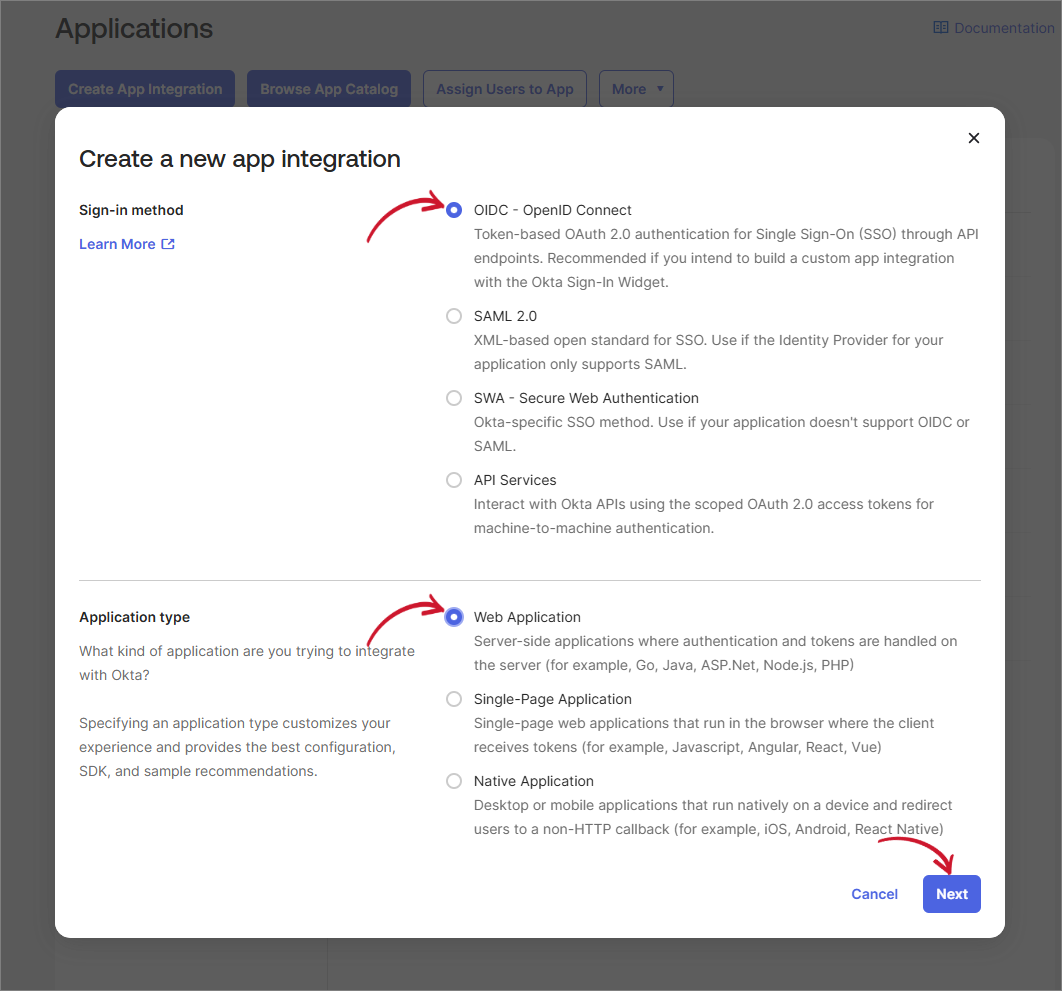 Okta New Web App Integration
-
The New Web Application page appears. Provide the App integration name (e.g., Open iT Analysis Server)
-
Select the following options in the Grant type:
- Non-interactive grants - Token Exchange
- Other grants - Implicit (hybrid)
-
In the Sign-in redirect URIs, provide your Analysis Server instance in the following format: https://<as_hostname>:<port_number>/signin-oidc. (e.g., https://as.openit:8443/signin-oidc)
-
In the Sign-out redirect URIs, provide your Analysis Server instance in the following format: https://<as_hostname>:<port_number>/. (e.g., https://as.openit:8443)
-
In the Assignments, if you have controlled roles or groups, select what is applicable to your organization. Otherwise, select Skip group assignment for now.
-
Click Save.
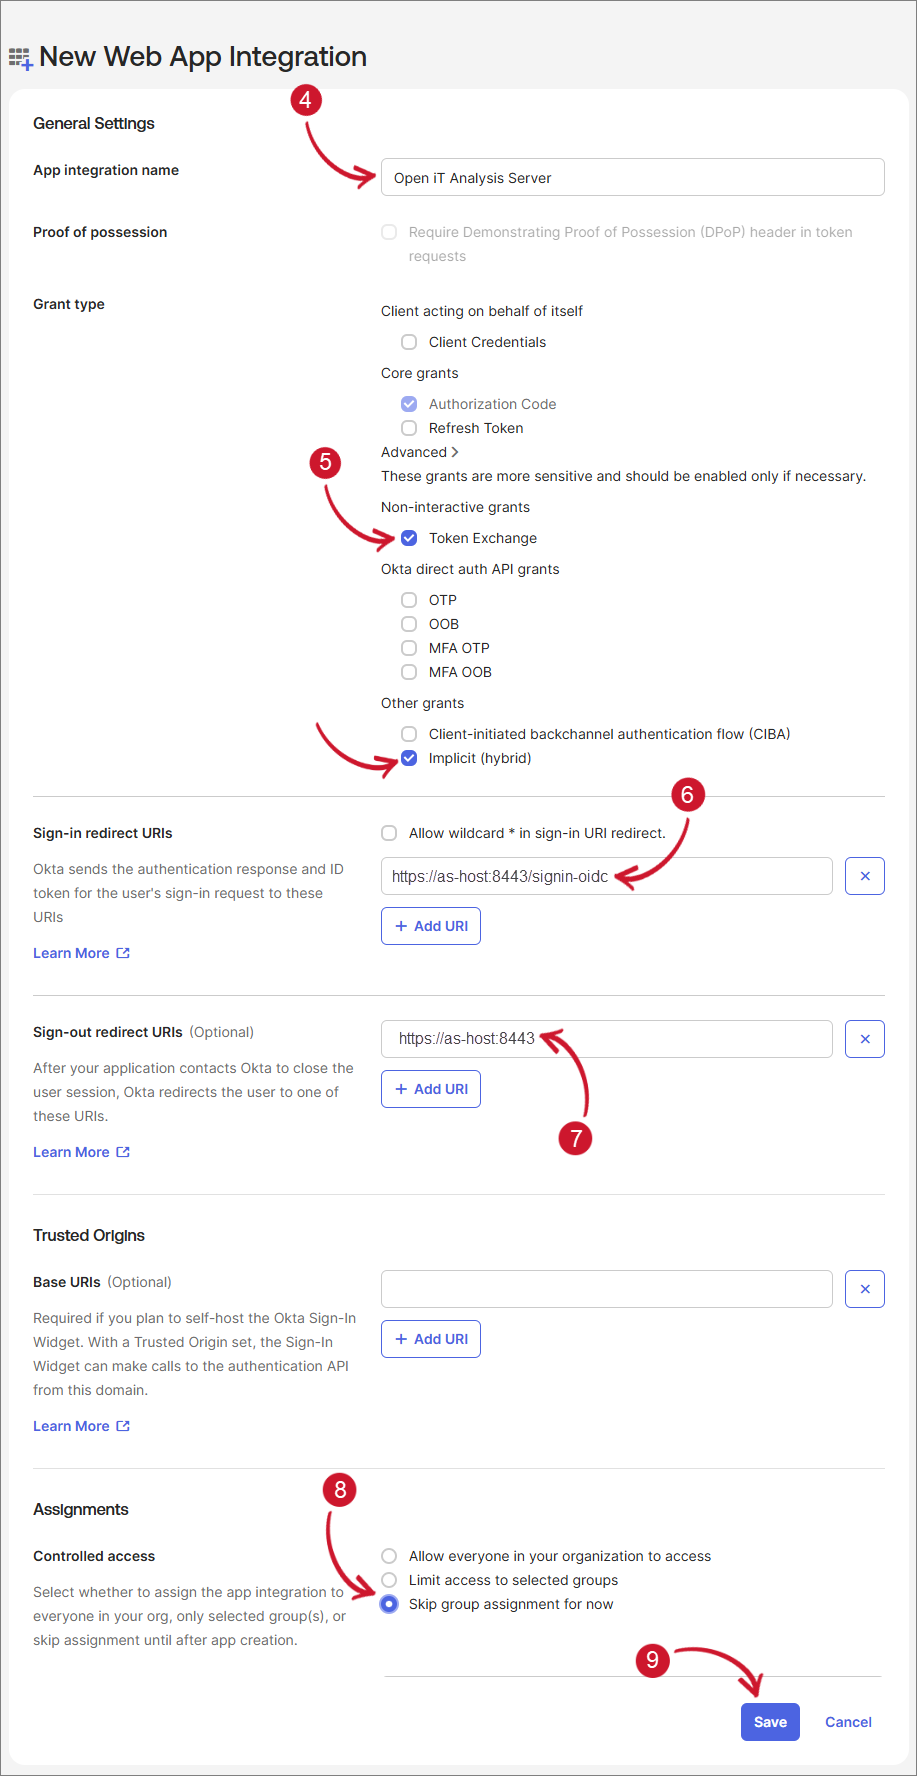 Okta Web App Integration Details
-
Once redirected to the newly created application dashboard, take note of the Client ID and Client Secret.
-
Click Assignments.
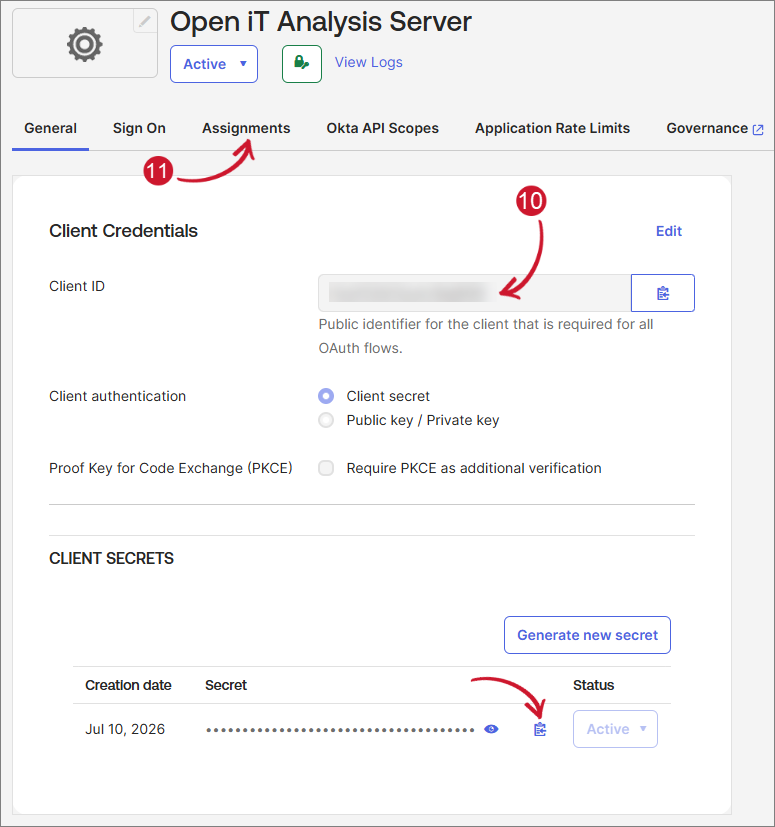 Okta Web App Integration Overview
-
Click Assign > Assign to People or if you have groups, click Assign to Groups.
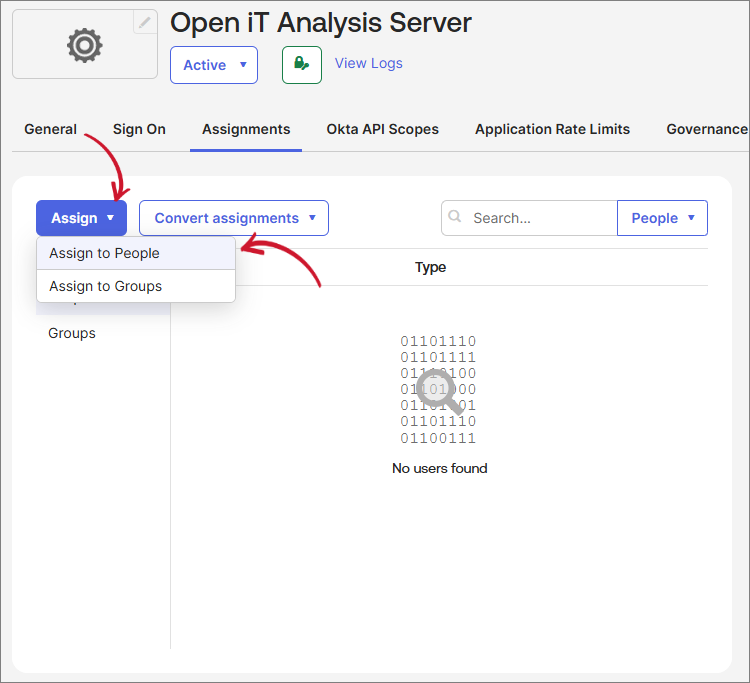 Okta Web App Integration Assignments
-
A dialog will appear containing the list of users or groups. Assign users or groups to the client application that should have access. Click the Assign button associated with the item.
-
Click Done.
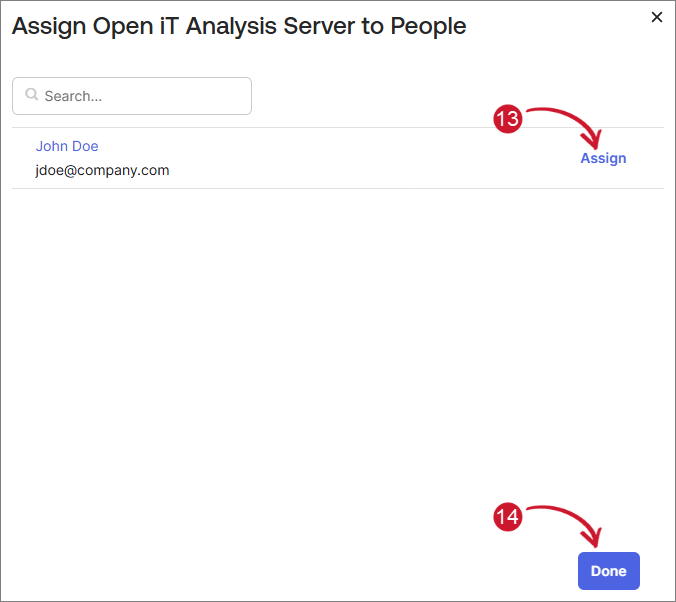 Okta Web App Integration Assigning Users