Verifying the Open iT LicenseAnalyzer (ServiceNow Store Application) Deployment
Use the following guides to verify that the Open iT LicenseAnalyzer application is deployed successfully and processing data as expected.
Checking Successful Data Receipt
Verify that all the sent data is received and loaded into the Import Set Tables.
-
Log in to the ServiceNow instance with an Administrator account.
-
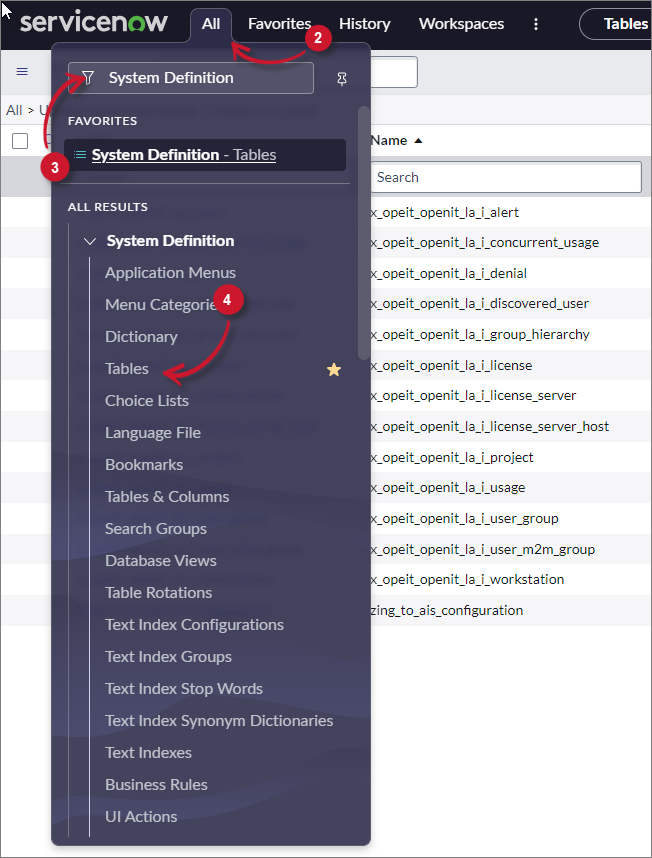
In the upper-left corner of the page, click All.
-
In the filter option, type
System Definitionto filter the displayed items. -
Go to System Definition > Tables to open the list of all system-defined tables.
 Navigate to System-defined Tables
-
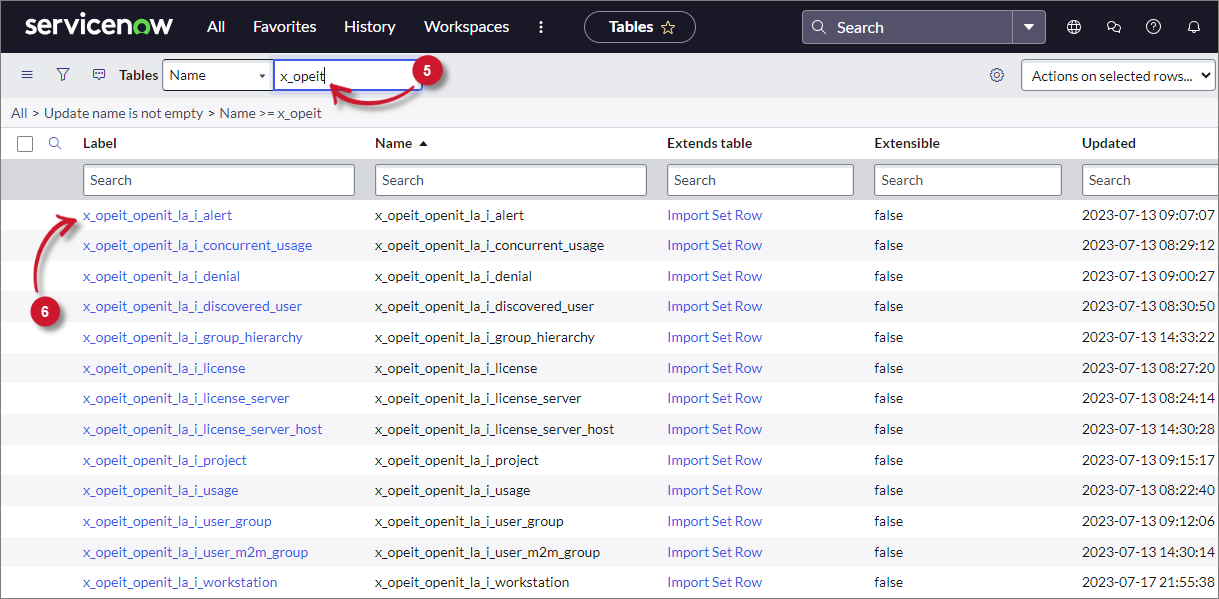
In the search bar, set the criteria to Name, type
x_opeit, and press Enter. -
Choose a table and click its label to open its definition and configuration details.
 Data Receipt
-
Scroll down to Related Links and click Show List to open the table's data view.
-
Verify that the sent data is already loaded.
Checking Data Receipt Logs
Check the status of all data receipt transactions.
-
Log in to the ServiceNow instance with an Administrator account.
-
In the upper-left corner of the page, click All.
-
In the filter option, type
Import Setsto filter the displayed items. -
Go to Advanced > Import Sets to open the
sys_import_settable view.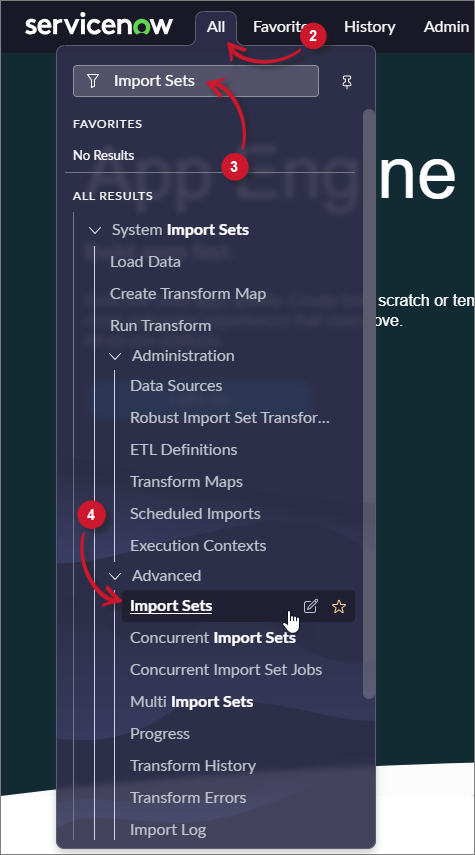 Navigate to Import Sets
-
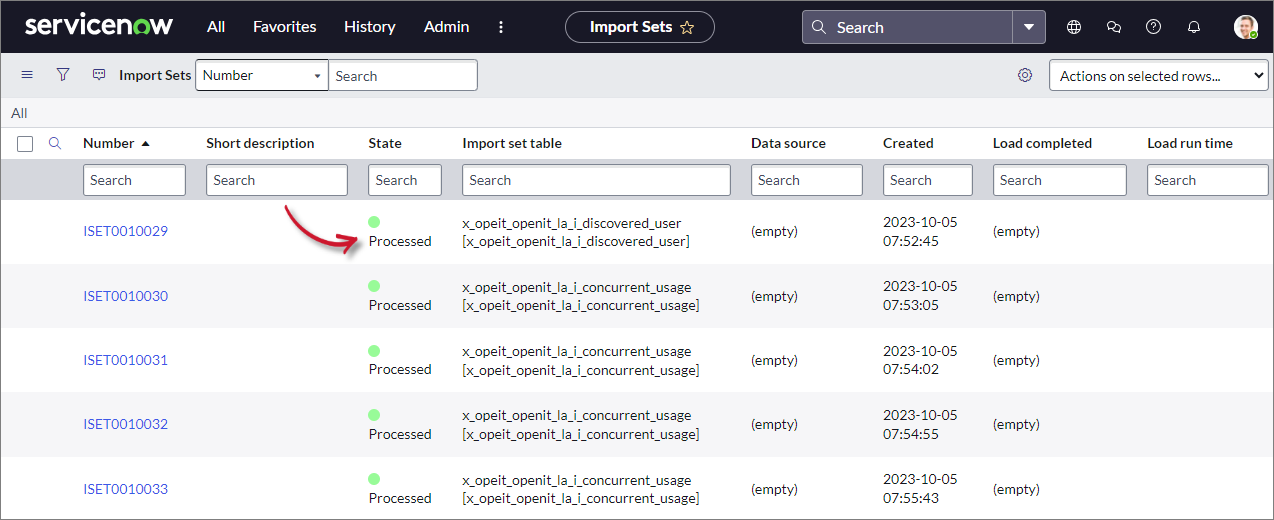
Check the State column to monitor the status of the data receipt:
- Loading - data is being loaded
- Processed - data was successfully loaded
 Data Receiving Logs
Checking Successful Data Transformation
Make sure that data is successfully transformed and loaded into the SAM tables.
-
Log in to the ServiceNow instance with an Administrator account.
-
In the upper-left corner of the page, click All.
-
In the filter option, type
System Definitionto filter the displayed items. -
Go to System Definition > Tables to open the list of all system-defined tables.
Navigate to System-defined Tables
-
In the search bar, set the criteria to Name, type
samp_eng, and press Enter. -
Click the table Label to open its definition and configuration.
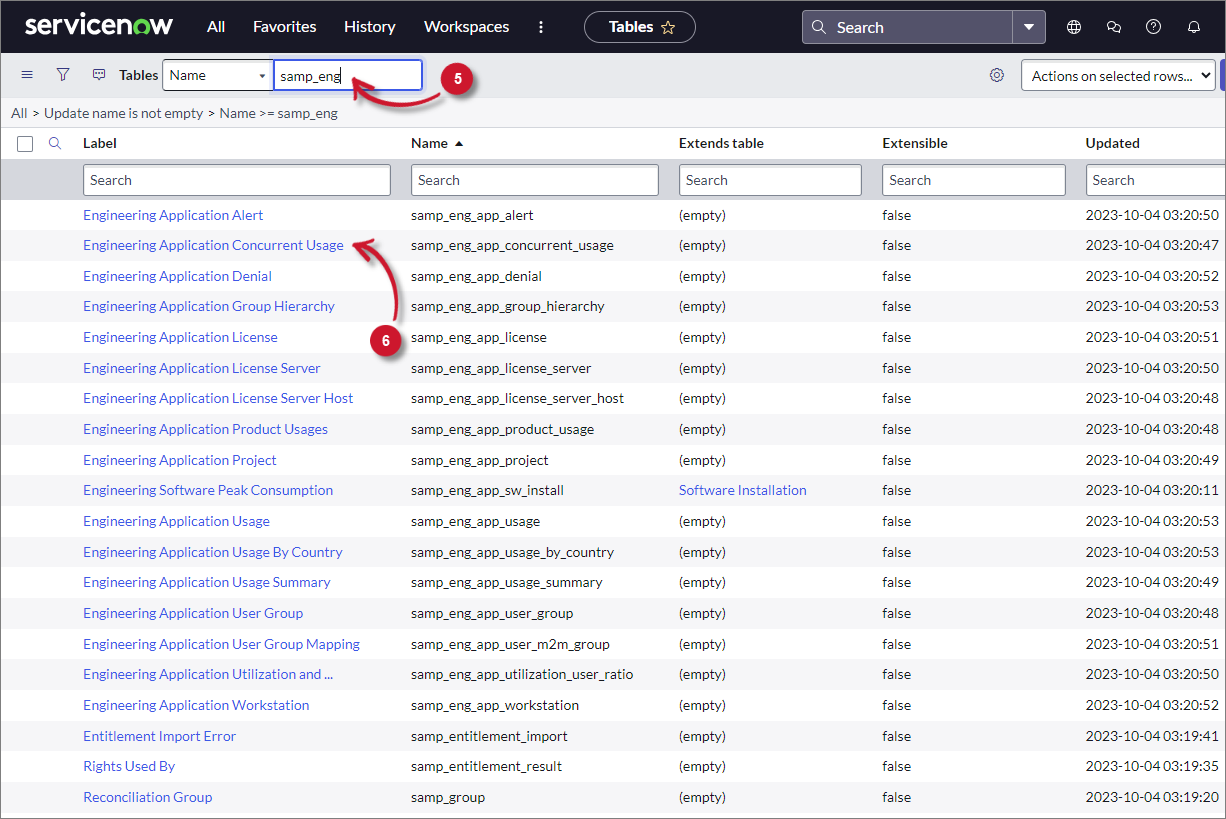 Table Selection
-
Scroll down to Related Links and click Show List to open the table's data view.
-
Verify that the transformed data is already loaded.
Checking Data Transformation Logs
Check the status of all the data transformation processes.
-
Log in to the ServiceNow instance with an Administrator account.
-
In the upper-left corner of the page, click All.
-
In the filter option, type
Job Resultsto filter the displayed items. -
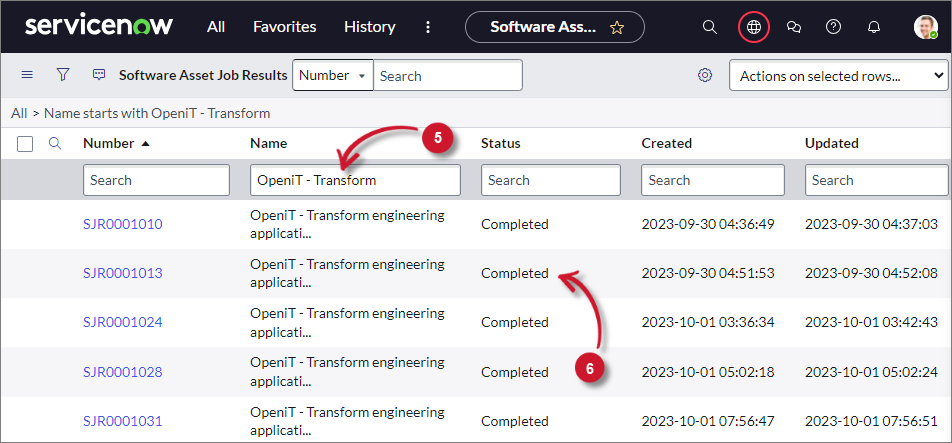
Go to Software Asset > Administration > Job Results to open the
samp_job_logtable view. Navigate to Job Results
-
Filter the column Name for
OpeniT - Transform. -
Check the Status column to monitor the status of the data transformation:
- Completed - data transformation is completed
 Data Transformation Logs
Checking Data Normalization
ServiceNow requires normalized data from its data source. Unrecognized products are excluded from dashboard reports.
Identifying Unnormalized Products
-
Log in to the ServiceNow instance with an Administrator account.
-
In the upper-left corner of the page, click All.
-
In the filter option, type
System Definitionto filter the displayed items. -
Go to System Definition > Tables.
Navigate to System-defined Tables
-
In the Label column, type
Software Discovery Modelin the search bar and press Enter. -
Click Software Discovery Model to open its definition and configuration.
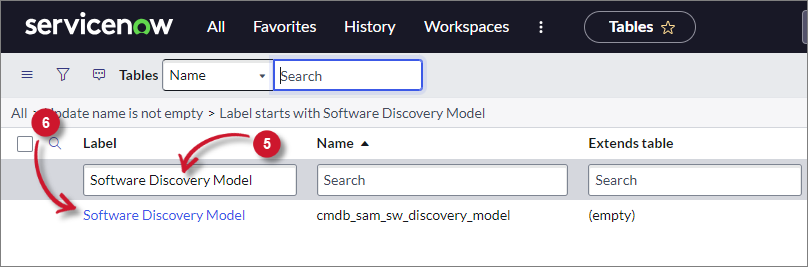 Software Discovery Model
-
Scroll down to Related Links and click Show List to open the table's data view.
-
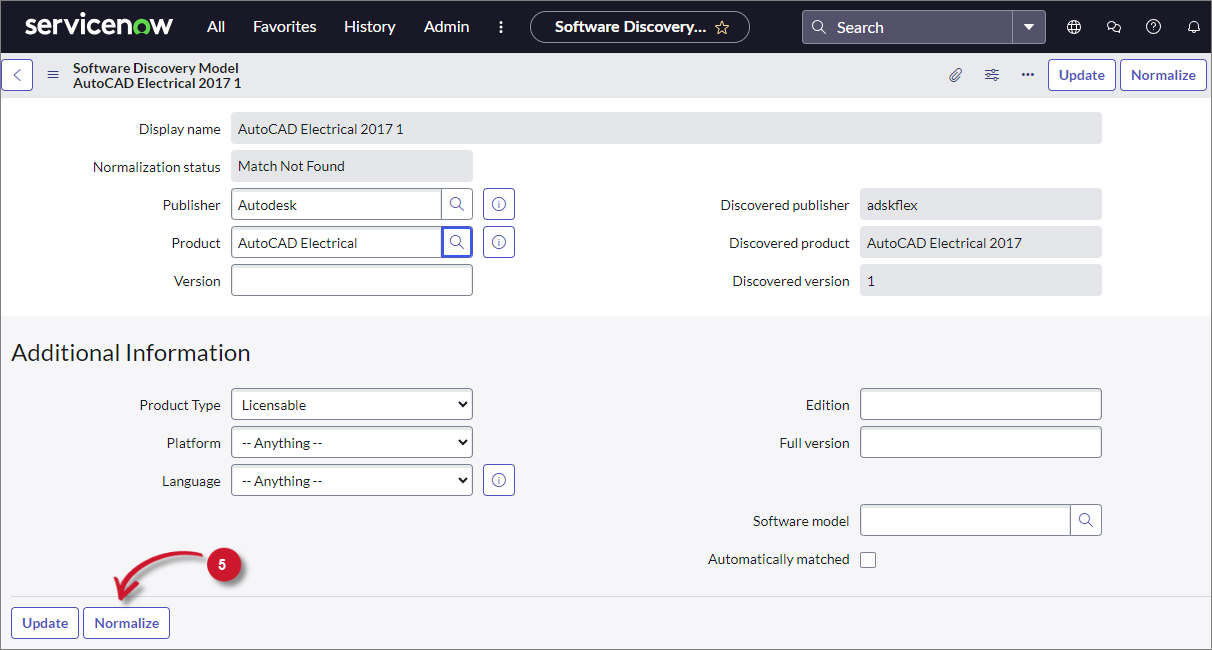
Locate the products where Normalization status = Match Not Found.
Manually Normalizing an Existing Product
-
Click the Display name to open the product information page.
-
In the Product field, click the search icon to open the Normalized Software Products list.
-
In the Product column, search for the product name and press Enter.
-
Click the product name if it exists. This will automatically close the window and set the value to the Publisher and Product fields.
-
Click Normalize and wait for confirmation.
The Normalization status should now be Manually Normalized.
 Confirm Product Normalization
-
Click Update.
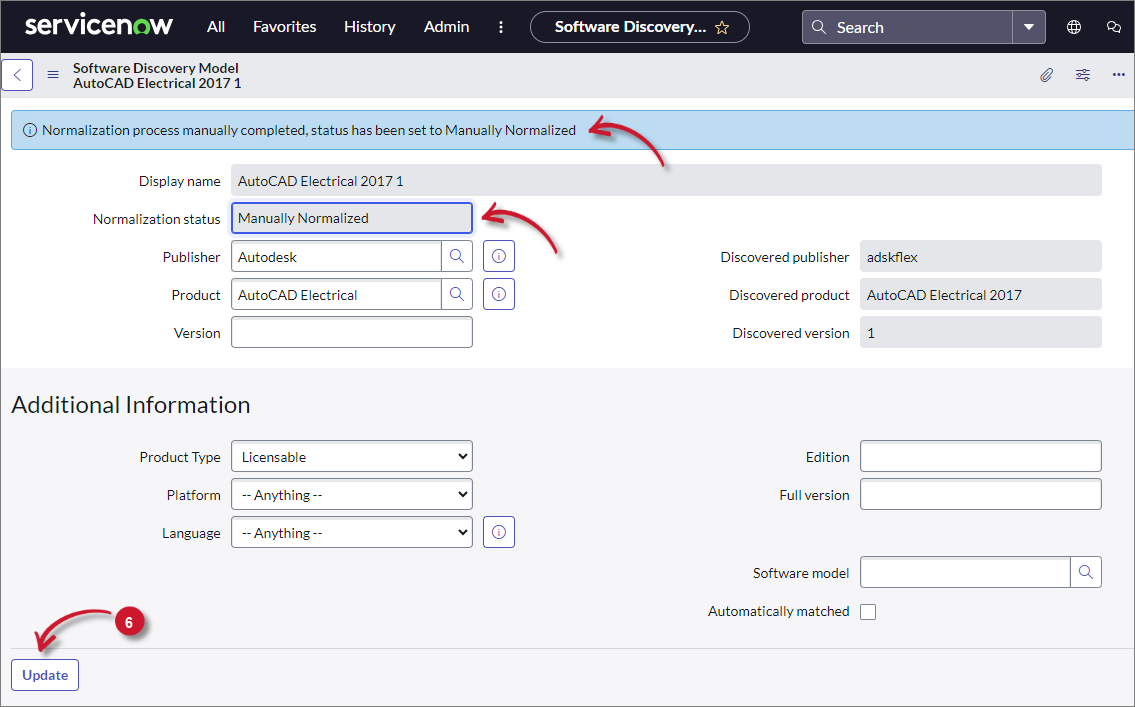 Save Product Normalization
Adding a Missing Product
-
In the Publisher field, click the search icon to open the Normalized Software Publishers list.
-
In the Name column, search for the publisher name and press Enter.
-
Click the publisher name if it exists. This will automatically close the window and set the value to the Publisher field.
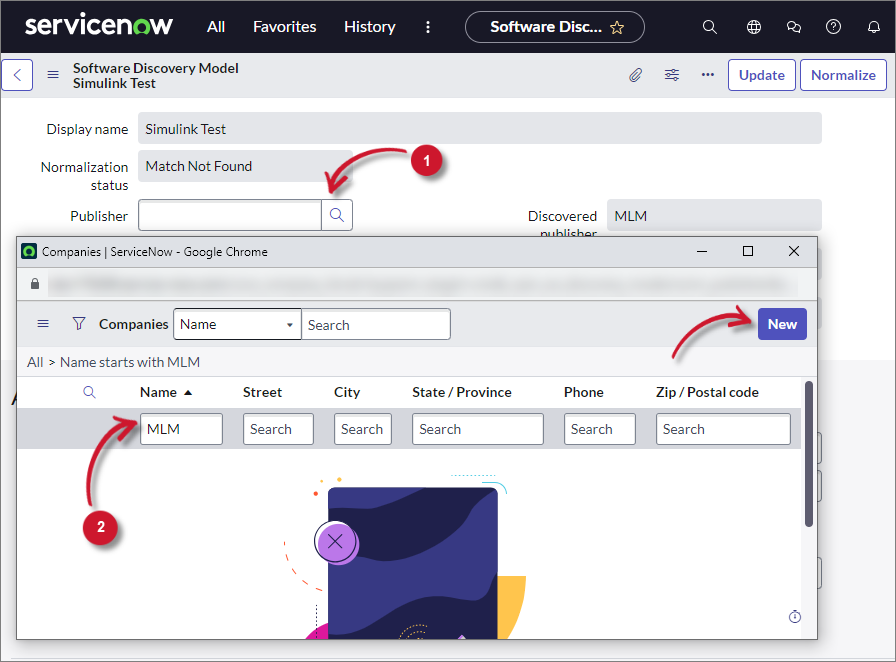 Search for Publisher
If the publisher does not exist, click New from the upper-right corner of the window, fill out the New Company Record form, and Click Submit.
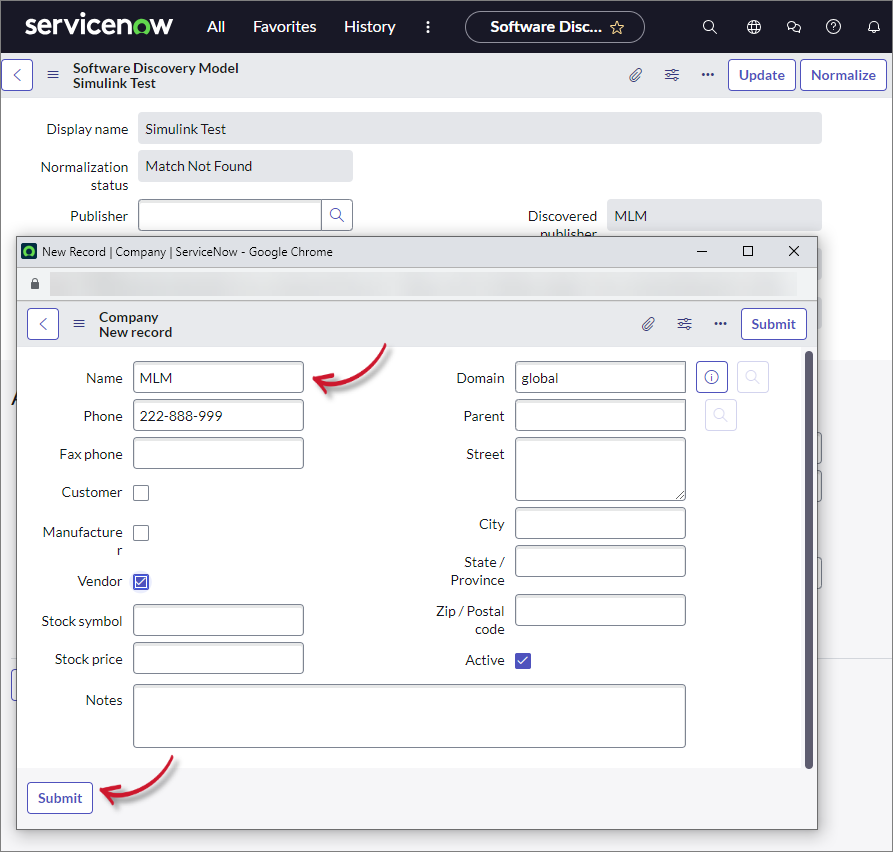 Add New Record for Publishe
The window will close and automatically set the value of the created publisher in the Publisher field.
-
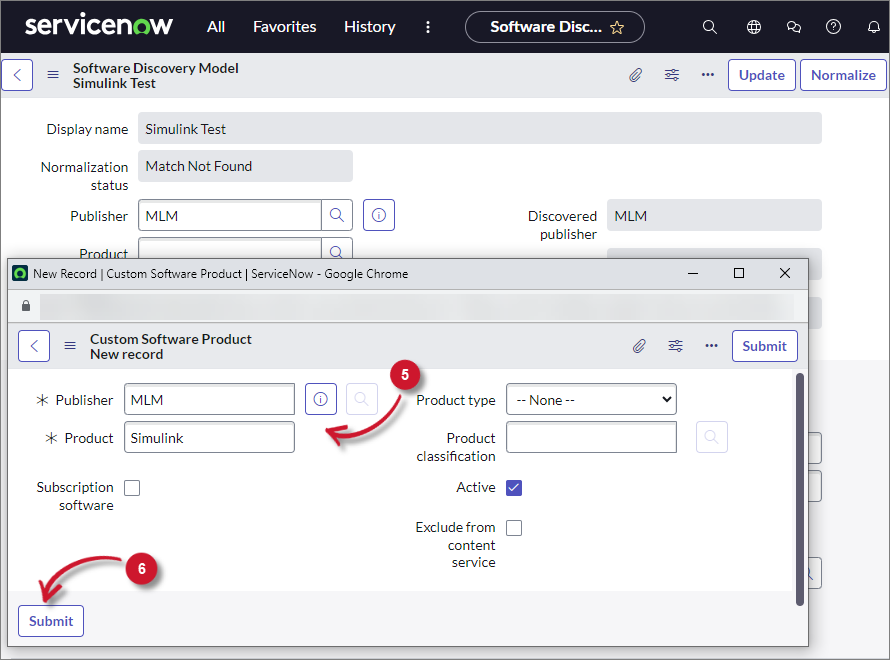
In the Product field, click the search icon to open the Normalized Software Products list. Click New to open the Custom Software Product - New Record form.
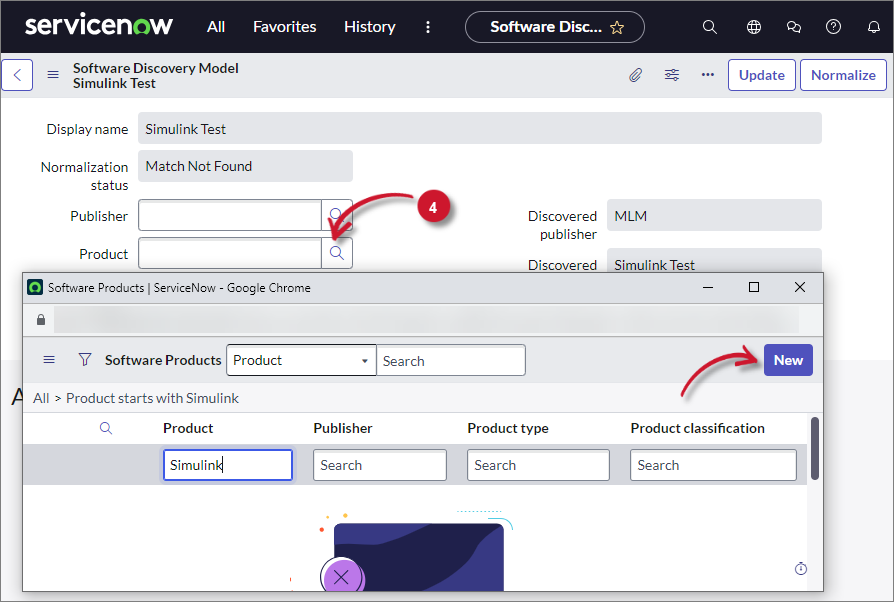 Add New Record for Product
-
Provide the required fields (Publisher and Product) and any additional details.
-
Click Submit. This will close the window and automatically set the value to Product and Publisher.
 Save New Record for Product
-
Click Normalize and wait for confirmation.
The Normalization status should now be Manually Normalized.
-
Click Update.