We’re upgrading your documentation experience!
A new doc website is live at docs.openit.cloud — a temporary preview during our transition. This website is now in maintenance-only mode (only critical issues will be addressed).
Explore the new website and send us your feedback!
#
Requirements
This section provides instructions on installing and using the store application to report Open iT data in the ServiceNow platform.
Make sure to meet the following requirements for setting up Open iT LicenseAnalyzer:
A working ServiceNow Vendor Instance with the following components:
- Installed Open iT LicenseAnalyzer
- Version should be Vancouver or latest
- Activated Software Asset Management Professional for Engineering Applications (
com.sn_samp_eng_app) plug-in - Activated Software Asset Management Playbook and Guided Setup (
sn_sam_playbook) plug-in
The Software Asset Management Playbook and Guided Setup plug-in is not available in Xanadu. Use the official ServiceNow documentation on how to Activate a plugin to learn more.
- Activated Domain Support - Domain Extension Installer plug-in
This plug-in is applicable for ServiceNow instance Vancouver and higher.
- Import the update set from XML. Follow the instructions in the section
Download and Upload Update Set from XML . - Time Zone of the ServiceNow instance must be the same as the Open iT Core Server (data source of the Open iT Analysis Server).
Follow the instructions in the ServiceNow Knowledge Base article, System and User Timezones in ServiceNow, for detailed steps on changing the Time Zone.
- Created Customer Login Credentials with the following roles:
- sam_eng_app_integrator
- x_opeit_openit_la.openit_integrator
#
Download and Upload Update Set from XML
Upload an update set from XML in the ServiceNow Vendor License to set up the integration smoothly. This update provides fixes for the issues that may affect the integration.
To download the XML files update set, follow these instructions:
Go to ServiceNow Update Sets to download the compressed file containing the XML files.
Once downloaded, extract the contents of the file. This will contain two (2) folders named after a specific version of ServiceNow: Vancouver, and Washington.
If you are using Xanadu, the file in the Washington folder is backward compatible, meaning you can use them interchangeably with both versions.
The folder for Vancouver contains three (3) XML files, while the Washington folder contains only one (1) file.
To upload the XML file update set in the ServiceNow Vendor Instance, follow these instructions:
Log in to the ServiceNow instance with an Administrator account.
The required role is sys_admin. Verify that the version of the ServiceNow instance is Vancouver, Washington, or Xanadu.
In the upper-left corner of the page, click All.
In the filter option, type in System Update Sets. This will filter the displayed items.
Go to System Update Sets > Retrieved Update Sets. This will redirect you to the list of uploaded update sets.
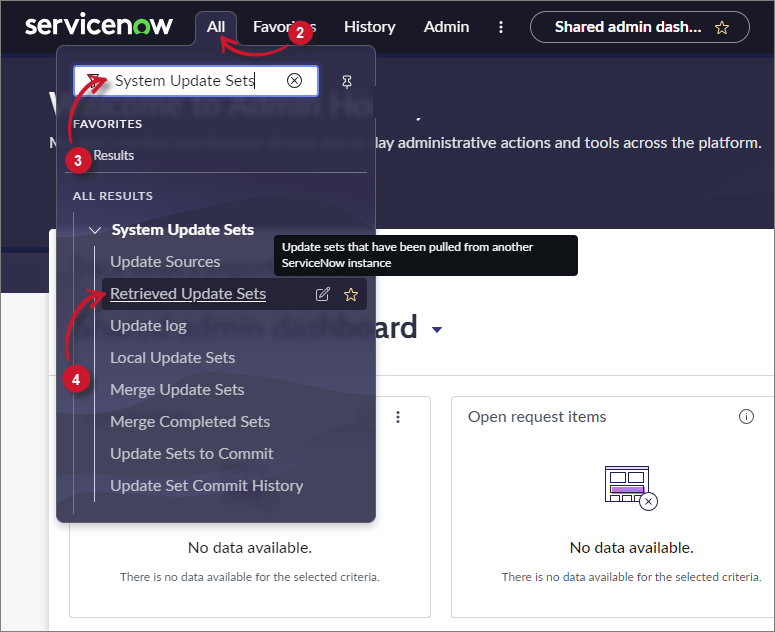 ServiceNow Integration: Navigate to Import Update Set from XML
Under Related Links, click Import Update Set from XML. This will redirect you to the Import XML page.
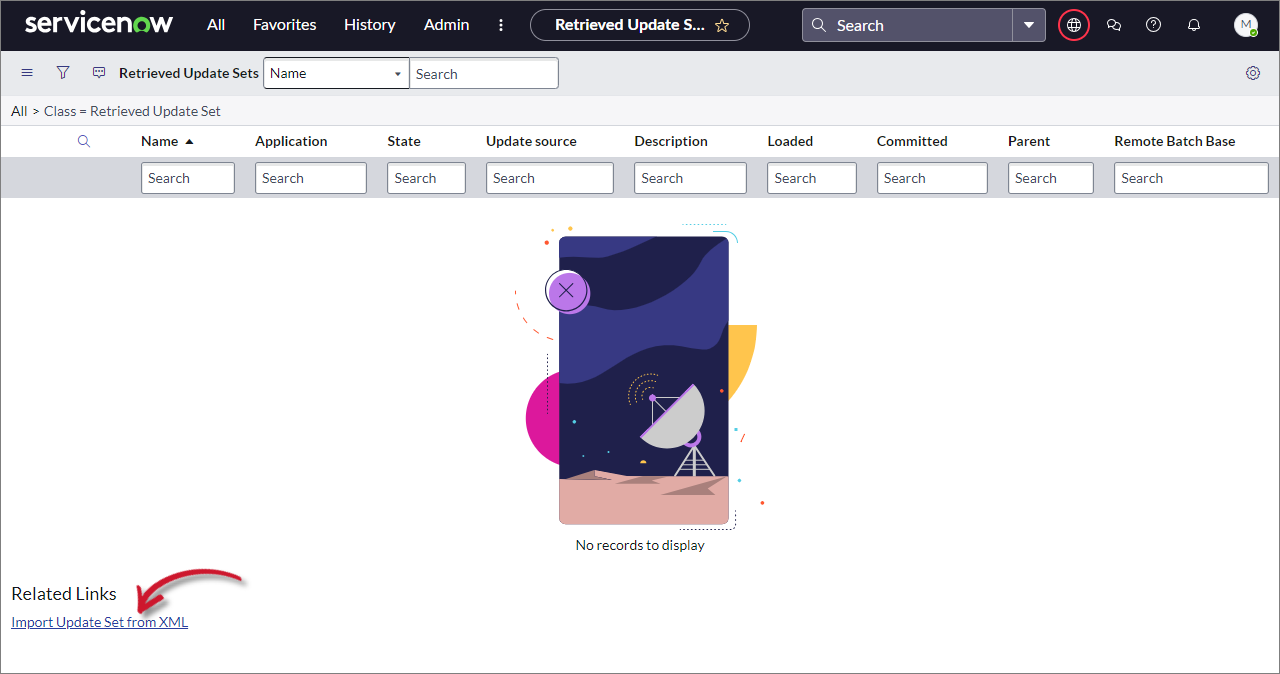 ServiceNow Integration: Import Update Set from XML
Click Choose File, then browse for the downloaded update set XML files.
Make sure to browse for the correct version of ServiceNow instance. If the ServiceNow Instance is Vancouver, choose vancouver; and if Washington or Xanadu, choose Washington.
- For Vancouver, upload the following file first:
sys_remote_update_set_2b742fd0f4423110f877a83b810eeaf1
- For Washington and Xanadu, upload the following file:
sys_remote_update_set_5dca12a4b7013110c911ff98ee11a978
Notice that the XML file name is displayed beside the button.
- For Vancouver, upload the following file first:
Click Upload. This will redirect to the list of uploaded update sets. Notice that Eng App Update Set -
is in the list. 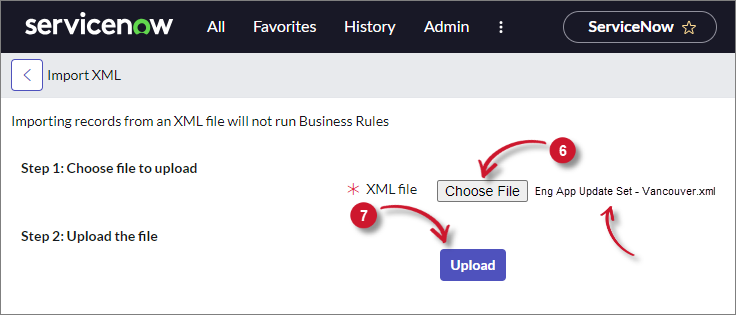 ServiceNow Integration: Upload Update Set from XML
Make sure that the Application column is set to Global and the State column is set to Loaded.
 ServiceNow Integration: Upload State and Application Update Set from XML
Repeat these steps for the two (2) remaining update set XML files. All of the update sets will be listed after successful upload.
For Washington and Xanadu instances, only one (1) update set XML file needs to be uploaded.
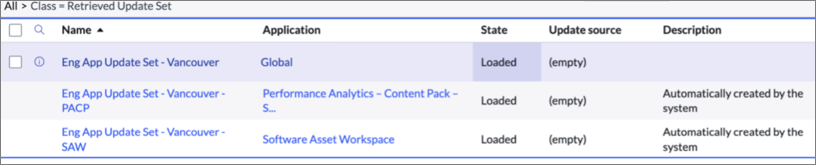 ServiceNow Integration: Uploaded Update Set from XML
Use the Preview action to view the update set. Fix any reported issues before committing the update set.