We’re upgrading your documentation experience!
A new doc website is live at docs.openit.cloud — a temporary preview during our transition. This website is now in maintenance-only mode (only critical issues will be addressed).
Explore the new website and send us your feedback!
#
Access Management
#
Adding Accounts to the Administrator Group
Go to the installation directory, which is
C:\Program Files\OpeniT\Launcherby default.Create a copy of
appsettings.jsonand rename the duplicate file toappsettings.Override.json.Open the existing
appsettings.Override.json, if there is already one.In the override file, add the new account(s) under Administrators following the format:
appsettings.Override.json"Administrators": [ "HOSTNAME\\user", "user@email.com", "DOMAIN\\user" ]Make sure to follow the
domain\\nameformat and provide a valid email address or Okta account.Save the changes.
#
Setting the Authentication Method to SAML2
Application Launcher supports Negotiate and SAML2 authentication protocols. By default, it uses the Negotiate protocol for Windows Authentication.
To set up SAML2:
Go to the installation directory, which is
C:\Program Files\OpeniT\Launcherby default.Create a copy of
appsettings.jsonand rename the duplicate file toappsettings.Override.json.Open the existing
appsettings.Override.json, if there is already one.In the override file, set the value of AuthenticationMethod to Saml2.
Under the Saml2 block, input IdPMetadata and Issuer.
appsettings.Override.json"AuthenticationMethod": "Saml2", "Saml2": { "IdPMetadata": "", "Issuer": "", "SignatureAlgorithm": "http://www.w3.org/2001/04/xmldsig-more#rsa-sha256", "CertificateValidationMode": "ChainTrust", "RevocationMode": "NoCheck", "ClaimAttribute": "nameidentifier" }
Follow the instructions to
Get the IdPMetadata and Issuer in Okta .Save the changes.
#
Getting the IdPMetadata and Issuer in Okta
Log in to Okta.
In the left pane, expand Applications and click Applications.
Click the created application for Application Launcher (in this case, Open iT Web Launcher).
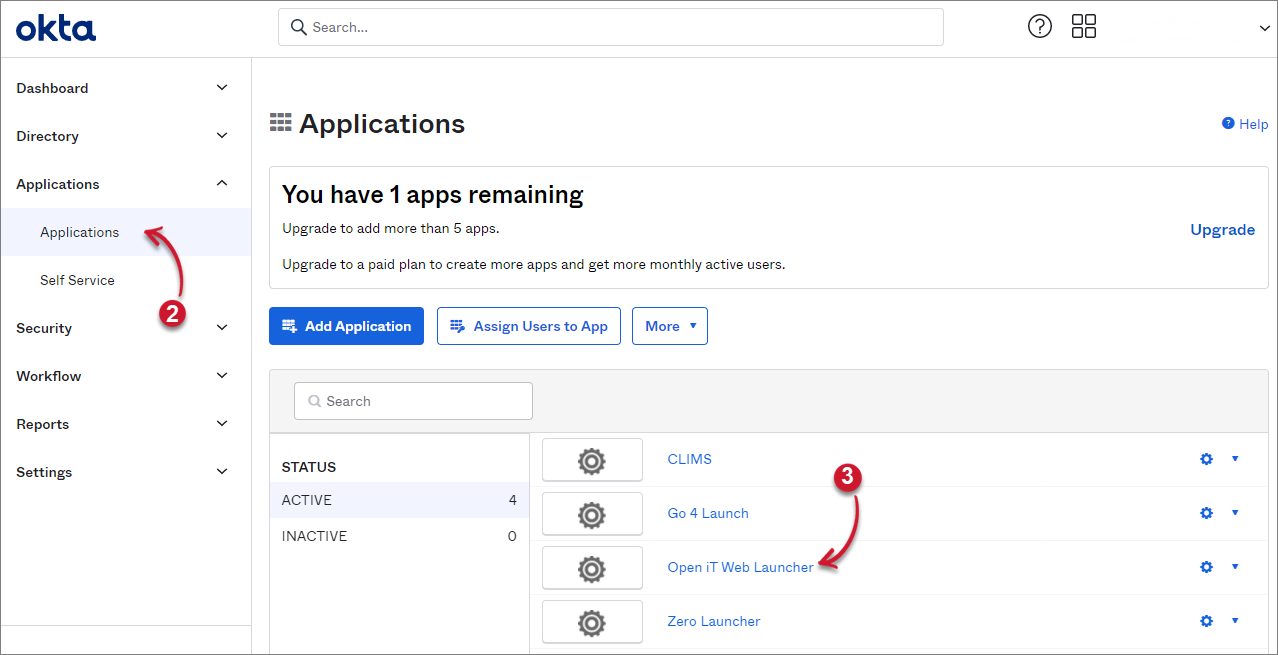 Application Launcher in Okta
Click the Sign On tab and copy the link of Identity Provider metadata.
This is the required
IdPMetadatatoset up SAML2 in Application Launcher .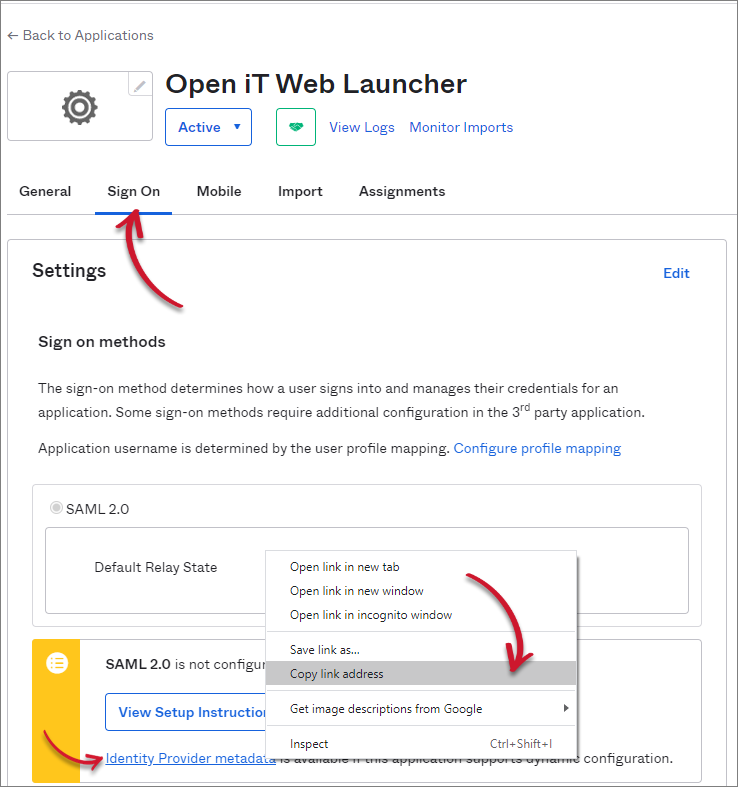 Getting the IdPMetadata
Click the General tab.
Under the SAML Settings, copy the value of Audience Restriction.
This is the required
Issuertoset up SAML2 in Application Launcher .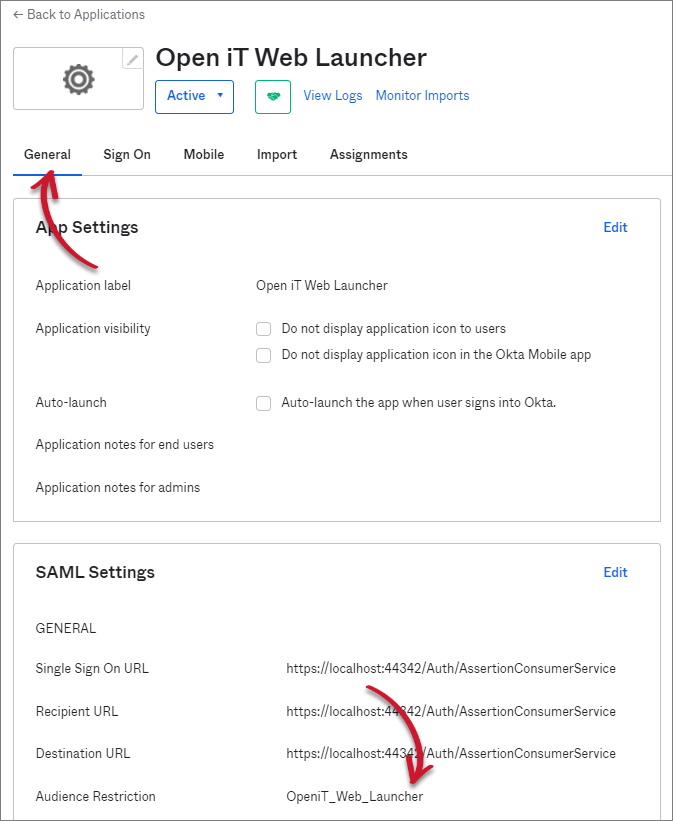 Getting the Issuer