Hello friend!
The beta release of Open iT version 10.1 is now available!
Try it out and help us enhance your Open iT experience. Contact support@openit.com to get started.
#
Configuring Open Database Connectivity (ODBC) Driver for Power BI Gateway
The Open Database Connectivity (ODBC) Driver facilitates convenient access to data from the Open iT Cloud-based Collection Service (CBCS) within Amazon Web Services (AWS) Athena.
#
Requirements
Before configuring Open Database Connectivity (ODBC) Driver for Power BI Gateway, make sure to have the following in place:
- Installed Amazon Athena ODBC 2.x
- Server machine that meets the following minimum requirements:
- .NET Framework 4.8
- 64-bit version of Windows 10 or a 64-bit version of Windows Server 2019
- 4GB disk space
- Open Database Connectivity (ODBC) Credentials issued by OpeniT (the same credentials utilized in configuring User Data Source Name (DSN))
#
Configuring and Testing System Data Source Name (DSN)
In the Windows search bar, type ODBC Data Sources (64-bit), then select it from the search results to launch the application.
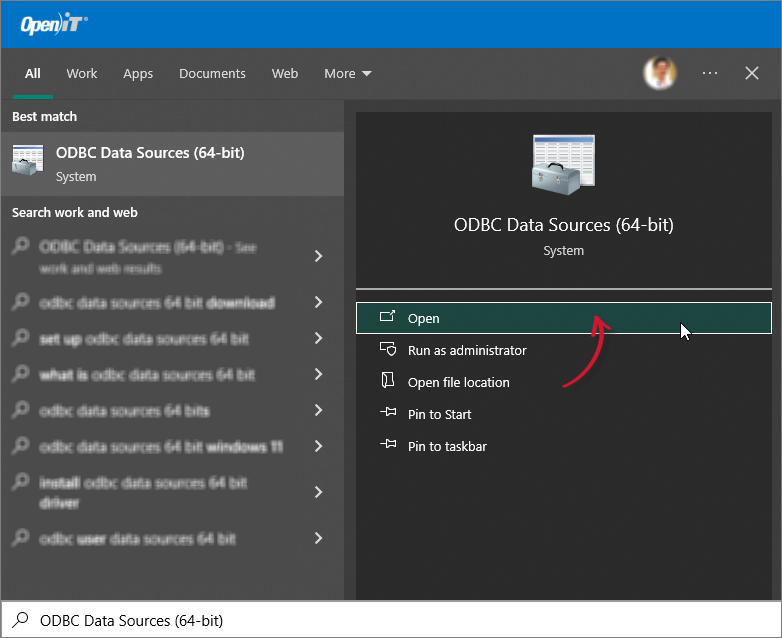 Configuring and Testing System DSN: Launching ODBC Application
In the opened window, navigate to the System DSN tab, then click the Add… button to proceed.
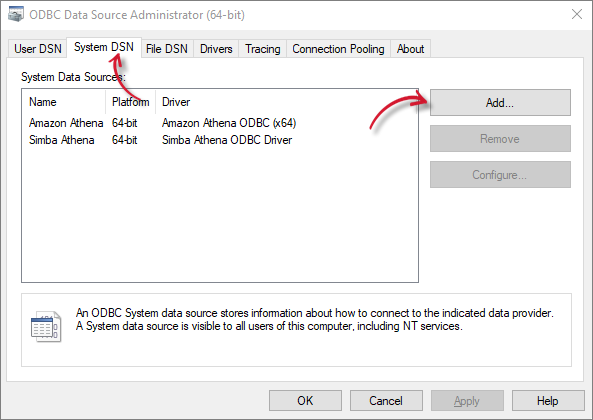 Configuring and Testing System DSN: Adding System Data Source
From the list of available drivers, choose Amazon Athena ODBC (x64). After selecting, click the Finish button.
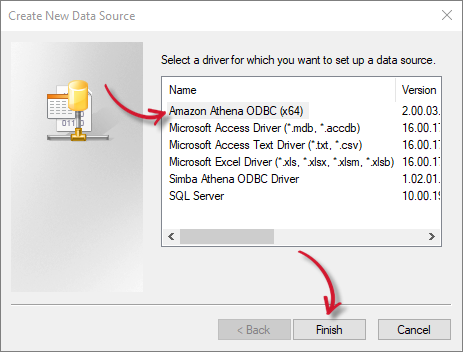 Configuring and Testing System DSN: Selecting Amazon Athena ODBC (x64)
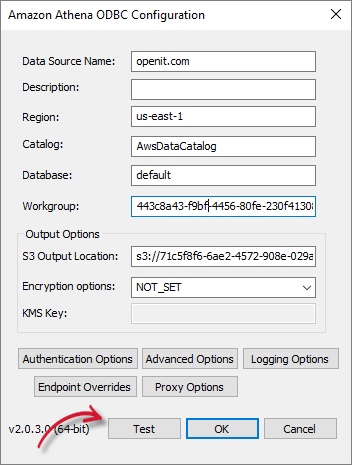
Fill in the fields with the Open Database Connectivity (ODBC) credentials provided by Open iT. After entering the credentials, click Authentication Options.
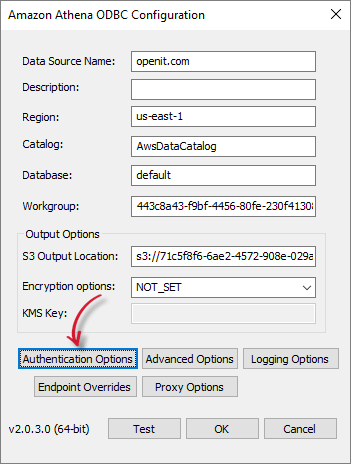 Configuring and Testing System DSN: Configuring Amazon Athena ODBC Configuration
In the Authentication Options window, set the Authentication Type to IAM Credentials. Provide the Access Key to the Username field and Secret Access Key to the Password Field. Once done, click the OK button.
 Configuring and Testing System DSN: Filling Fields in Authentication Options
Utilize the Open Database Connectivity (ODBC) access keys provided by Open iT.
Click the Test button to initiate the connectivity test.
 Configuring and Testing System DSN: Testing System DSN Connectivity
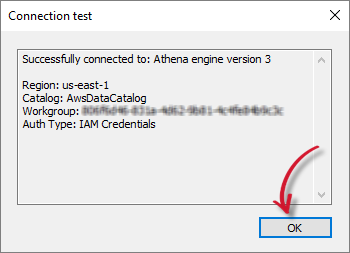
Upon completion of the test, make sure the result reflects as SUCCESS!. Click the OK button to close the Connection test window.
 Configuring and Testing System DSN: Successful Test Result
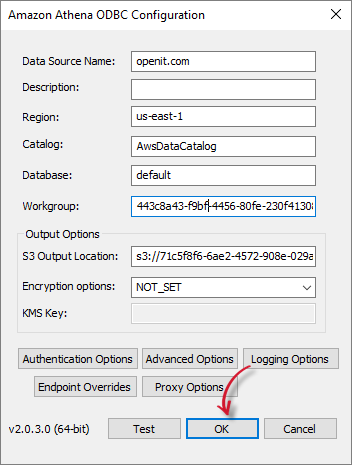
To retain the configured settings, click the OK button to save the Data Source Setup.
 Configuring and Testing System DSN: Retaining Configuration
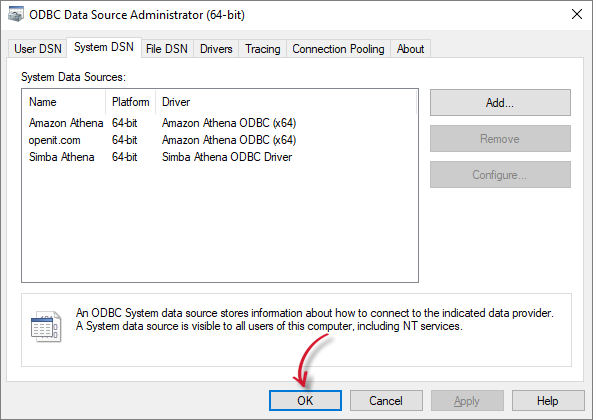
To finalize the configuration, close the ODBC Data Source Administrator (64-bit) window by clicking the OK button.
 Configuring and Testing User DSN: Finalizing Configuration
#
Next Steps?
Once Open Database Connectivity (ODBC) Driver is configured, proceed in installing On-premises Data Gateway.
Installing On-premises Data Gateway