We’re upgrading your documentation experience!
A new doc website is live at docs.openit.cloud — a temporary preview during our transition. This website is now in maintenance-only mode (only critical issues will be addressed).
Explore the new website and send us your feedback!
#
Configure Templates
Open iT provides a web-based editor to easily create new report templates based on generated reports or to modify report templates. Configure Templates lists all the report templates available in the simpleReports directory, which is by default in C:\ProgramData\OpeniT\Data\openit_html_data\simpleReports.
Before proceeding, make sure the Configure Templates page is activated.
#
Modifying a Report Template
Go to Reporting > Configure Templates.
Click the report to modify.
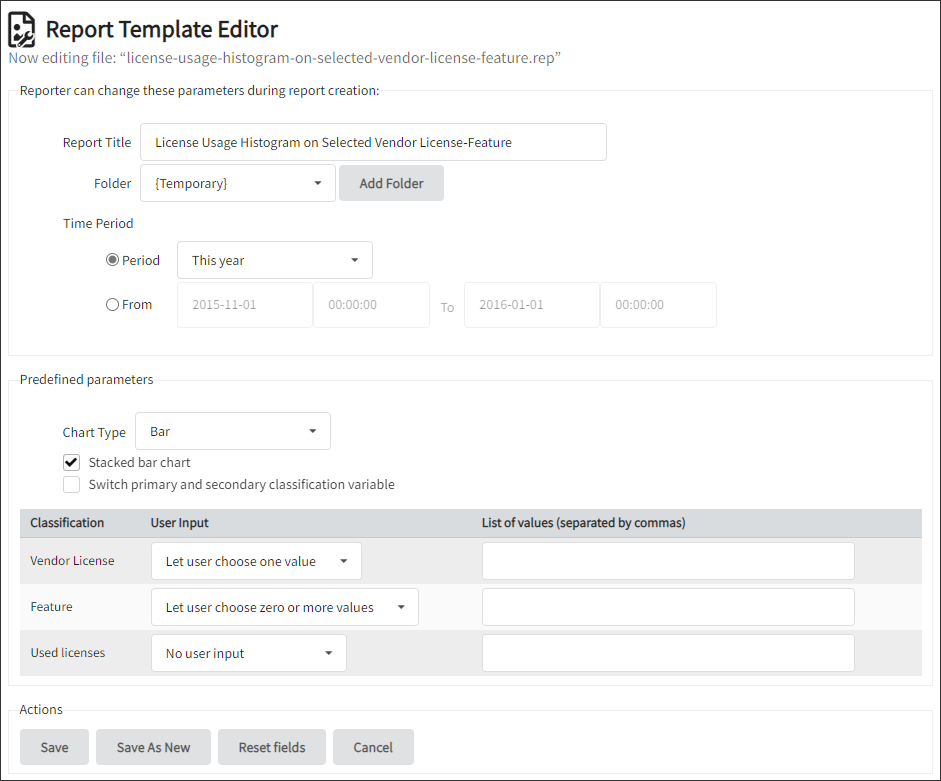
Use the following details as a guide to modify the report template:
Report Title - This is the default report title that the administrator may edit.
Folder - This is the default folder for storing the generated report. Choose another folder if needed.
Time Period - Click the Period radio button to enable the predefined period list from which the relevant reporting period may be selected. To enter the reporting period with From and To, date and time, click the From radio button. When Time is selected as a classification variable, an additional entry, Resolution, will be present:
Resolution - This is the default time resolution in the generated report.
For chart report templates, the following entries may also be edited:
Chart Type - This determines what type of chart to display.
Stacked bar chart - Tick this to present the report with a stacked bar chart.
Switch primary and secondary classification variable - Selecting this entry switches the classification variable on the X-axis and the one in the color-coding. That is, if Host is placed along the X-axis and Command is coded with different colors, selecting this entry places the Command along the X-axis and Host in color-coded.
For table report templates, the following entry may be edited:
- Sort by - If only vertical classifications are selected in the reporting interface, this determines the measurements by which to sort the table rows.
At the bottom of the template editor is a list of all the selected classification variables. There is one line for each variable, and every line consists of these three entries:
Classification - This is the name of the classification variable as it appears in the reporting interface.
User Input - The selection in this entry affects the appearance of the Input tab. There are four possible selections:
“No user input” - In the reporting interface, the user will not be allowed to select between the values for this classification variable. Either all values or the ones listed in List of values are used.
“Let user choose zero or more values” - A pull-down menu is displayed in the reporting interface. The default is to use all values, but the user may choose from a list instead. The list consists either of all values or the ones listed in List of values.
“Let user choose one or more values” - A list of all values or the ones listed in List of values is displayed in the reporting interface, allowing the user to select one or more values.
“Let user choose one value only” - Same as "Let user choose one or more values", except the user cannot choose multiple values.
List of values - This entry is optional, but if a comma-separated list of values is entered here, it will be the values used in the Input tab. The Report Template Editor does not attempt to verify the values.
Click Save to proceed with the changes.
Click Save As New to make a new template based on the selected template.
Click Reset fields to undo the changes made on the parameters.
Click Cancel to disregard the changes made.
Templates will only be listed if there is data for the corresponding data types to be used; otherwise, the overview will be empty.
#
Removing Report Templates
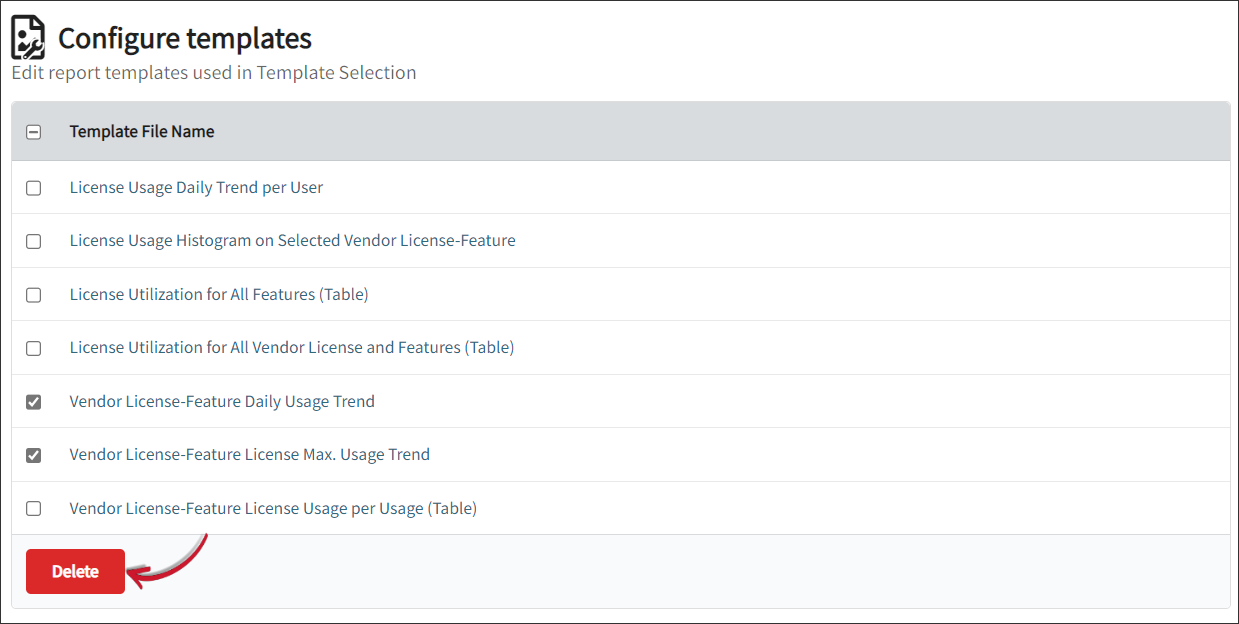
Go to Reporting > Configure Templates.
Tick the checkbox(es) beside the report(s) to remove.
Click the Delete button then press OK on the prompt to proceed.
Templates will only be listed if there is data for the corresponding data types to be used; otherwise, the overview will be empty.