We’re upgrading your documentation experience!
A new doc website is live at docs.openit.cloud — a temporary preview during our transition. This website is now in maintenance-only mode (only critical issues will be addressed).
Explore the new website and send us your feedback!
#
Installation Requirements
#
Software Requirements
#
Version Compatibility
Core Server version 10.2 requires the following versions of Ingress:
- 1.0.22 and later
Core Server version 10.2 is tested and verified to be compatible with the following versions of the Analysis Server:
- 9.17.570 and later
- 9.19.550 and later
- 10.1.140 and later
Core Server version 10.2 is tested and verified to be compatible with the following versions of the Client:
- 9.17.650 and later
- 9.19.550 and later
- 10.1.140 and later
Analysis Server version 10.2 is tested and verified to be compatible with the following versions of the Core Server:
- 9.17.650 and later
- 9.19.550 and later
- 10.1.140 and later
If you are managing clients using versions 9.19 and 10, please note that a new CPU calculation feature is enabled by default in version 10. This feature was also introduced in version 9.19.480 but is disabled by default in that version.
To ensure consistent CPU utilization values, please refer to the Configuring CPU Calculation section.
#
Operating System
#
Administrative Rights
The Open iT Core Server and Client installation requires Administrative Access Rights to the host machine for successful directory and file creation. In the Analysis Server, these rights must include the ability to create logins and catalogs on the following database server(s): SQL Server and Analysis Services server.
#
Visual C++ Redistributable Packages
Download and install Visual C++ Redistributable for Visual Studio 2015 for Open iT Windows installation.
#
Service Account and Administrative Group
The Analysis Server installation requires the following Active Directory accounts:
Service Account - an Active Directory domain account used for:
- IIS Web Server - the Analysis Server Application Pool web application runs under the context of the service account, all connections to the SQL Server will be performed as
Domain\<service_account>. - SQL and OLAP database - the dedicated service account will be used for SQL Server database access, removing the need for a separate SQL Server logins for every end user.
The service account requires the following permissions:
- db_owner - to run queries needed for SQL database deployment.
- Log on as service - to access web server applications, data loading, shared storage space; add the Service Principal Names Active Directory to use the HTTP protocol on the hostname.
- Log on as batch job - to allow users to log on via batch-queue facility; when a user submits a job via task scheduler, the task scheduler logs on the said user as a batch user rather than an interactive user.
To configure the service account with Log on as a service and Log on as batch job rights:
- Open Local Security Policy.
- Expand Local Policies and select User Rights Assignment on the left pane.
- Locate Log on as a service and add the service account including the password on the right pane.
- Locate Log on as batch job and add the service account including the password on the right pane.
- IIS Web Server - the Analysis Server Application Pool web application runs under the context of the service account, all connections to the SQL Server will be performed as
Administrator Group - an Active Directory group of users with access to the Administration section of the Analysis Server web interface.
#
Internet Information Services and .NET Framework
To enable the Internet Information Services (IIS) and .NET Framework features on the host machine:
#
Windows Server Operating System
- Open Control Panel.
- Under Programs, click Uninstall a Program.
- Click Turn Windows features on or off in the left-side pane.
- In the Add Roles and Features wizard, click Next.
- Select Role-based or feature-based installation on the installation type dialog. Click Next.
- Select Select a server from the server pool and choose the local server host name from the Server Pool list on the destination server dialog. Click Next to see the list of roles.
- Locate Web Server (IIS) and make sure that the following roles are selected:
- Web Server (IIS):
- Web Server:
- Common HTTP Features:
- Static Content
- Security:
- Windows Authentication
- Application Development:
- .NET Extensibility 4.x
- Application Initialization
- ASP.NET 4.x
- ISAPI Extensions
- ISAPI Filters
- WebSocket Protocol
- Common HTTP Features:
- Management Tools:
- IIS Management Console
- Web Server:
- Web Server (IIS):
In Windows Server 2019 and 2022, there is a new section in the left pane of the wizard showing the Role Services under the Web Server Role (IIS) where you can configure the roles selected for the Web Server (IIS).
Click Next. This will open a list of additional features.
Select the following items:
- .NET Framework 4.x Features (any version available):
- .NET Framework 4.x
- ASP.NET 4.x
- .NET Framework 4.x Features (any version available):
Click Install.
#
SQL Server Software Packages
Install Microsoft SQL Server 2016 (Standard, Business, or Enterprise Edition) or later with the following components:
- SQL Server Database Engine
- SQL Server Analysis Services (Multidimensional deployment mode)
- SQL Server Reporting Services
The installation should have Windows Authentication Security Mode.
Apply all the latest service packs and hotfixes to all affected software packages when possible.
#
Stopping Default Web Site in IIS
Installing Internet Information Services (IIS) enables a website by default. This website uses port 80, which is also used by the Analysis Server web interface, by default.
It is required to stop the Application Pool and site of the Default Web Site before Analysis Server installation:
Open the Internet Information Services (IIS) Manager.
In the Connections pane, expand the root node and click Application Pools.
In the list of Application Pools, right-click the DefaultAppPool and choose Stop.
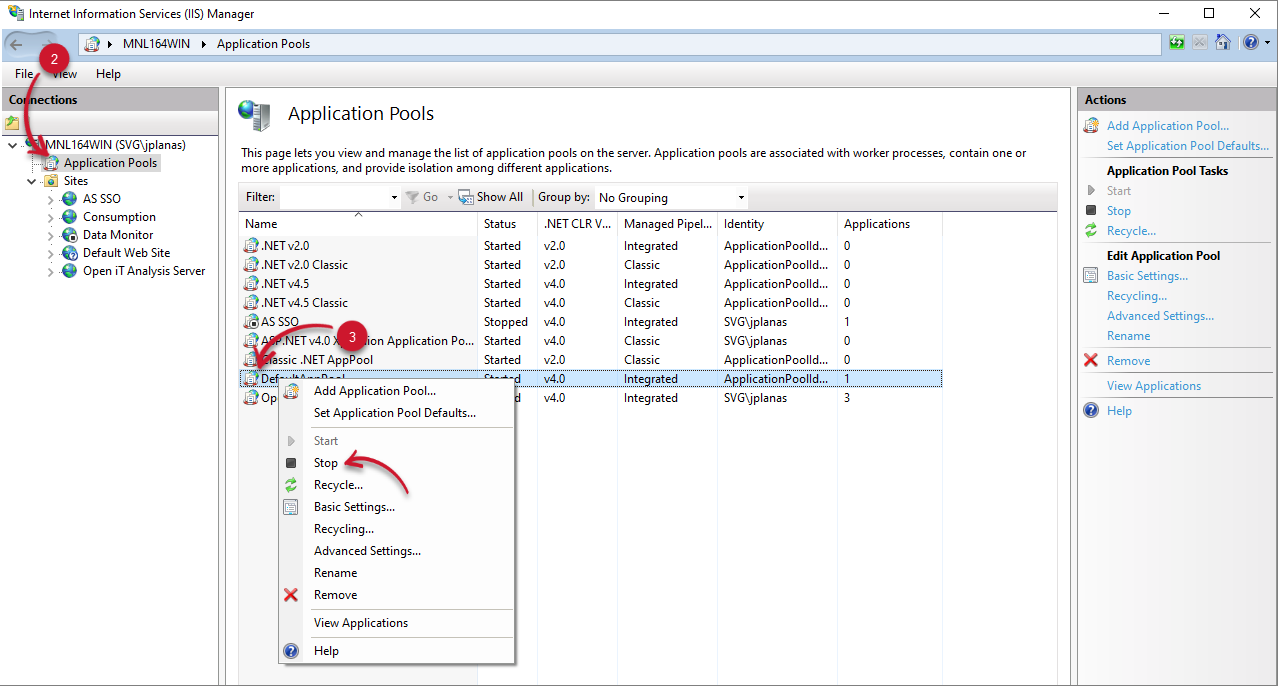 Stopping the Application Pool
In the Connections pane, expand Sites, then click Default Web Site.
In the Manage Website pane, click Stop.
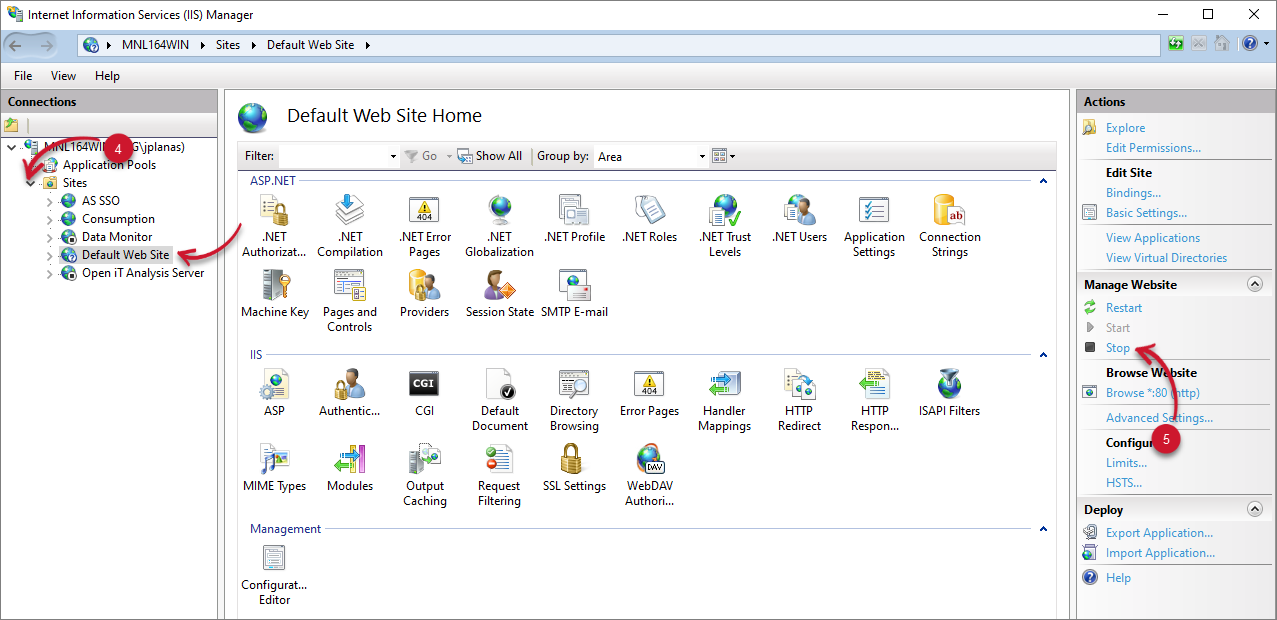 Stopping the Default Web Site
#
Open iT Software
Go to the Open iT Customer Portal.
When prompted, provide a valid email address. Click NEXT.
If you do not have an account, click the Request for an account link at the bottom of the dialog.
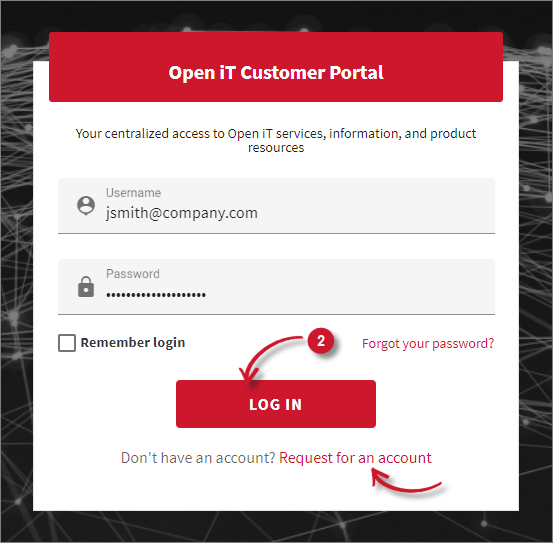 Customer Portal: Login
The link redirects to the Request Account dialog. Provide the required details, then click REQUEST. Please wait for our Sales Representatives to validate the request. Once validated, an email will be sent to the provided email address.
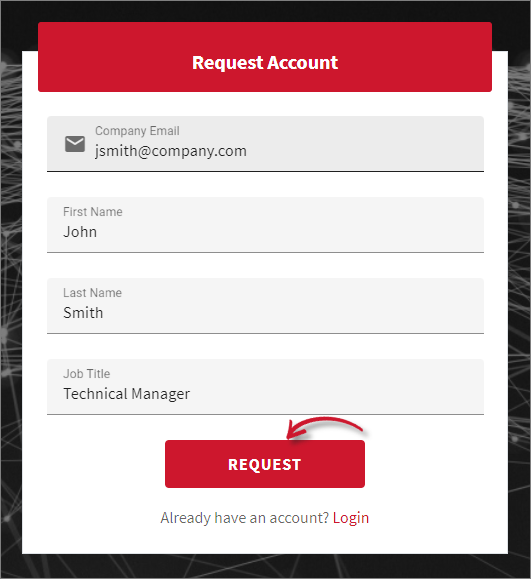 Customer Portal: Request Account
Once logged in, click Releases. This page shows the latest versions of the Open iT products.
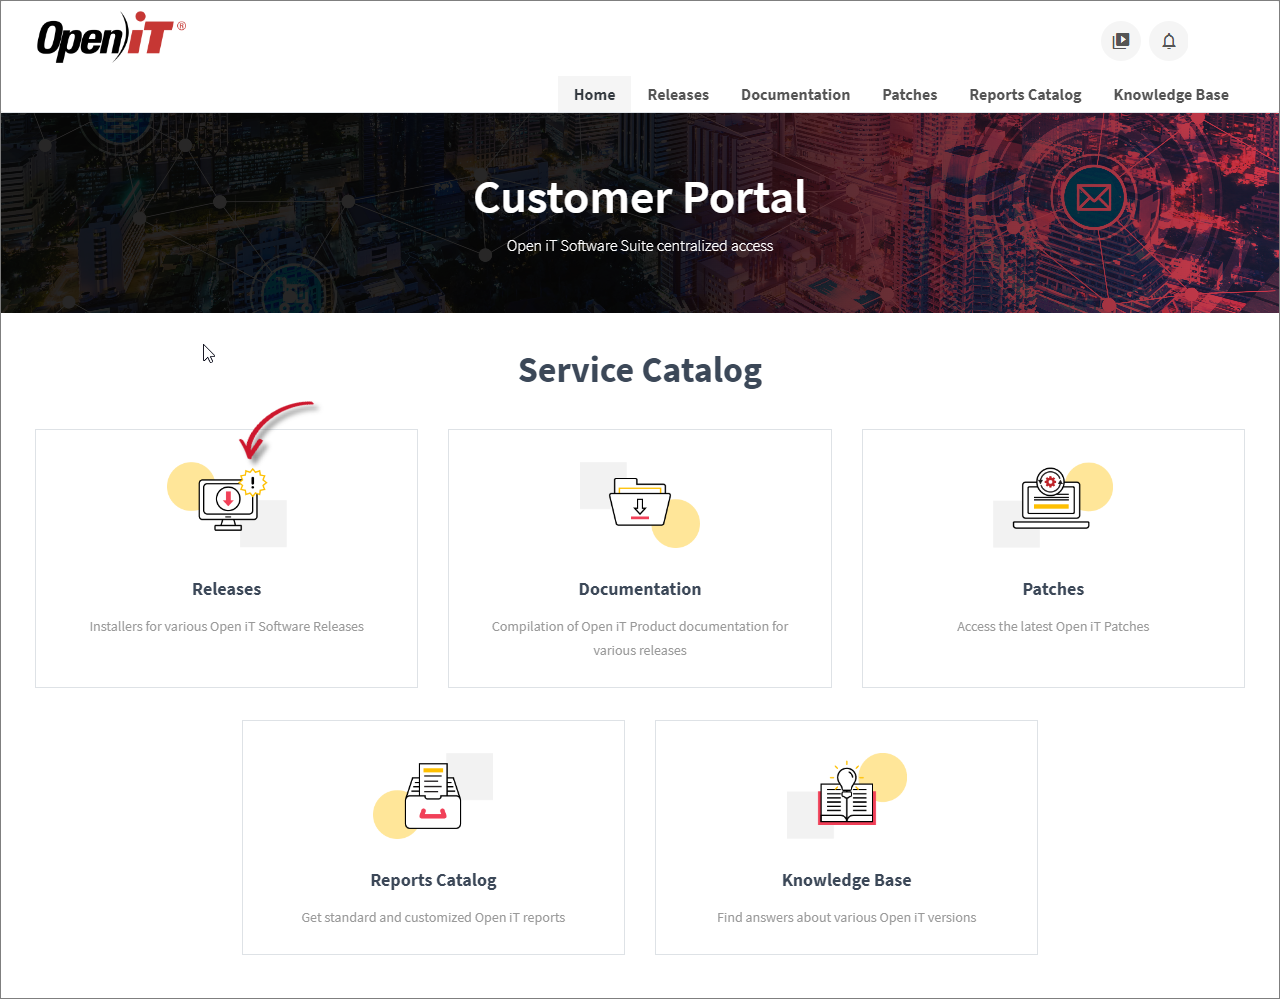 Customer Portal: Releases
Click the Download button of the specific product, then select the appropriate installer file to download.
It is recommended to install the current stable version for production purposes.
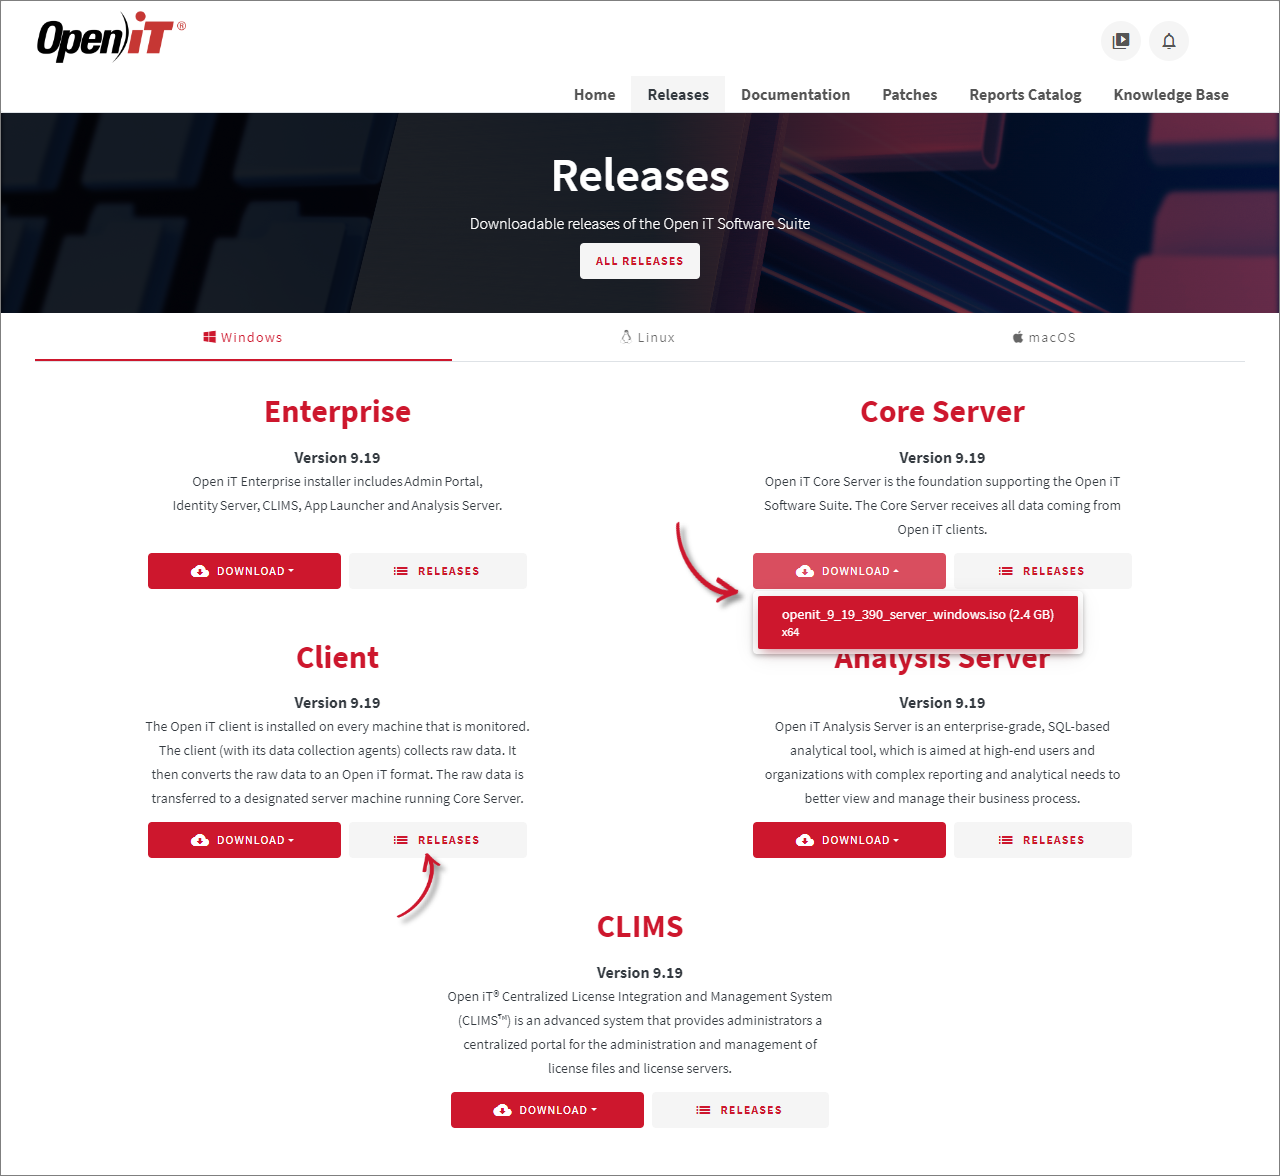 Customer Portal: Download
If you need a previous or specific version, click the Releases button of the desired product to see all the supported versions. Click the version number to be redirected to where you can download the installer.
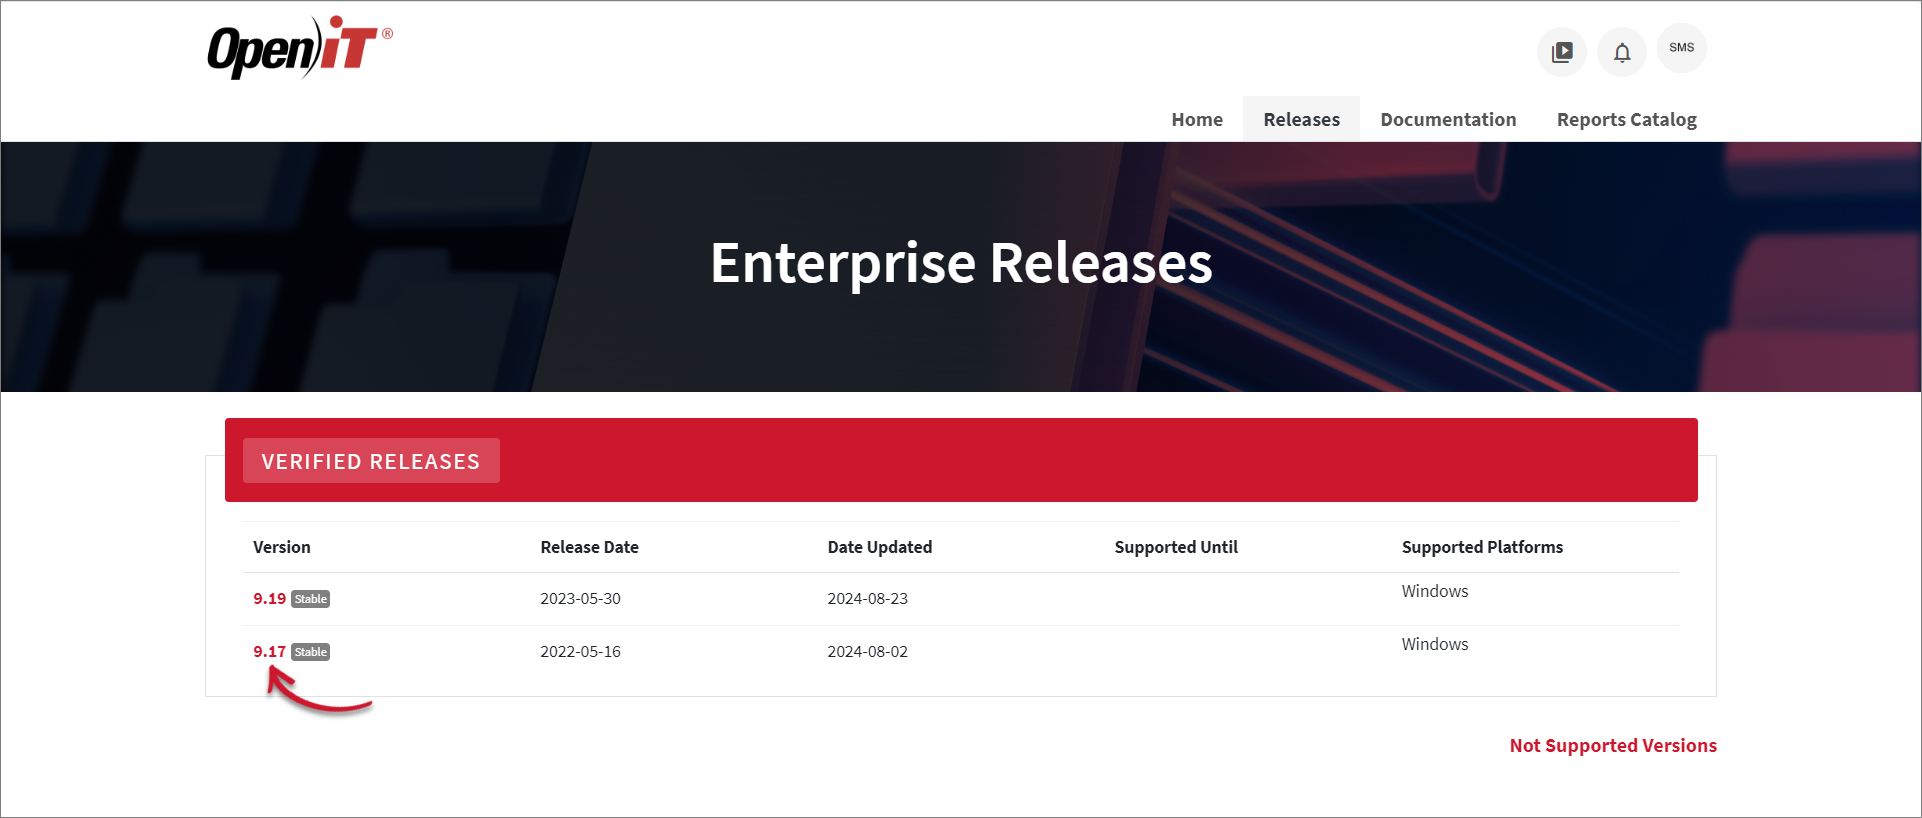 Customer Portal: Previous Version
#
Open iT Software License
The setup program installs the Open iT software with a temporary license to run it immediately. Install a proper license key as soon as possible.
Send an email request to license@openit.com to obtain a proper license key.
#
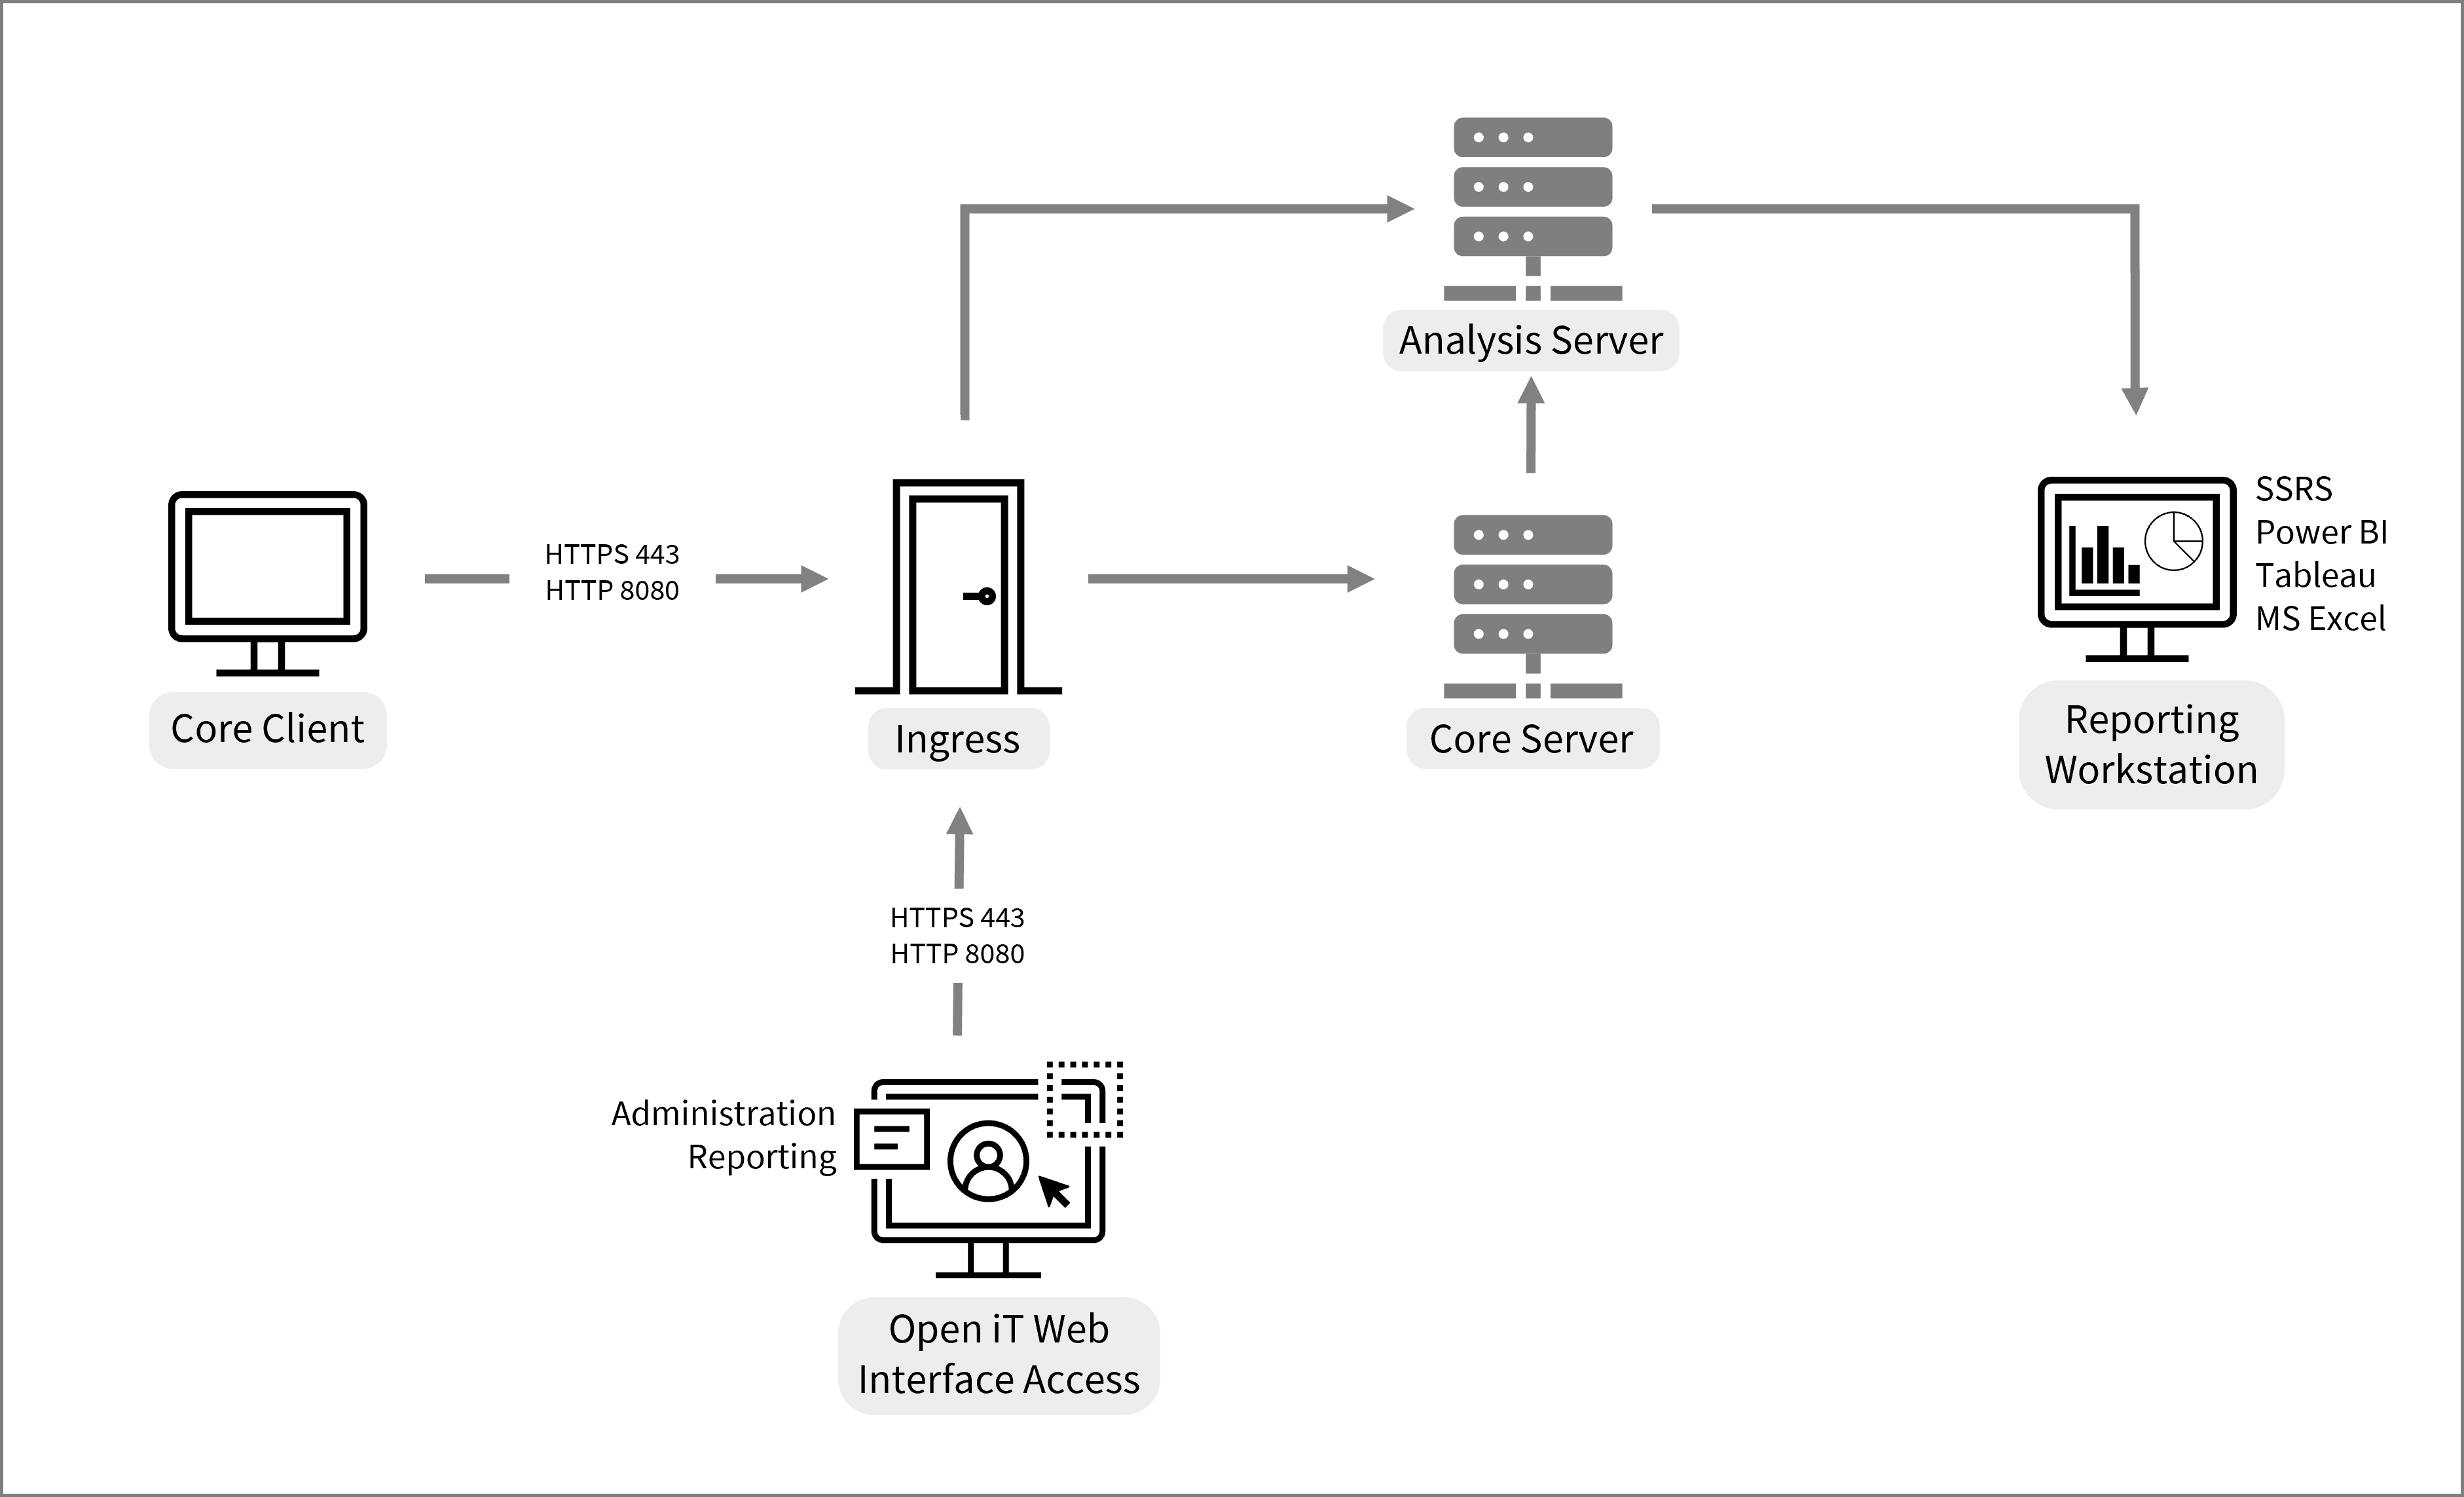
Port Numbers Used by Open iT
The unified navigation for Open iT web interface uses port 443 for HTTPS and port 8080 for HTTP as the primary entry points.