We’re upgrading your documentation experience!
A new doc website is live at docs.openit.cloud — a temporary preview during our transition. This website is now in maintenance-only mode (only critical issues will be addressed).
Explore the new website and send us your feedback!
#
Managing Roles
The Roles page is hidden on Analysis Server with Single Sign-On.
The Roles page manages OLAP database roles used to hide or show specific data to particular group or user. The page is only visible to users with administrative rights to Analysis Server.
#
Adding a New Role
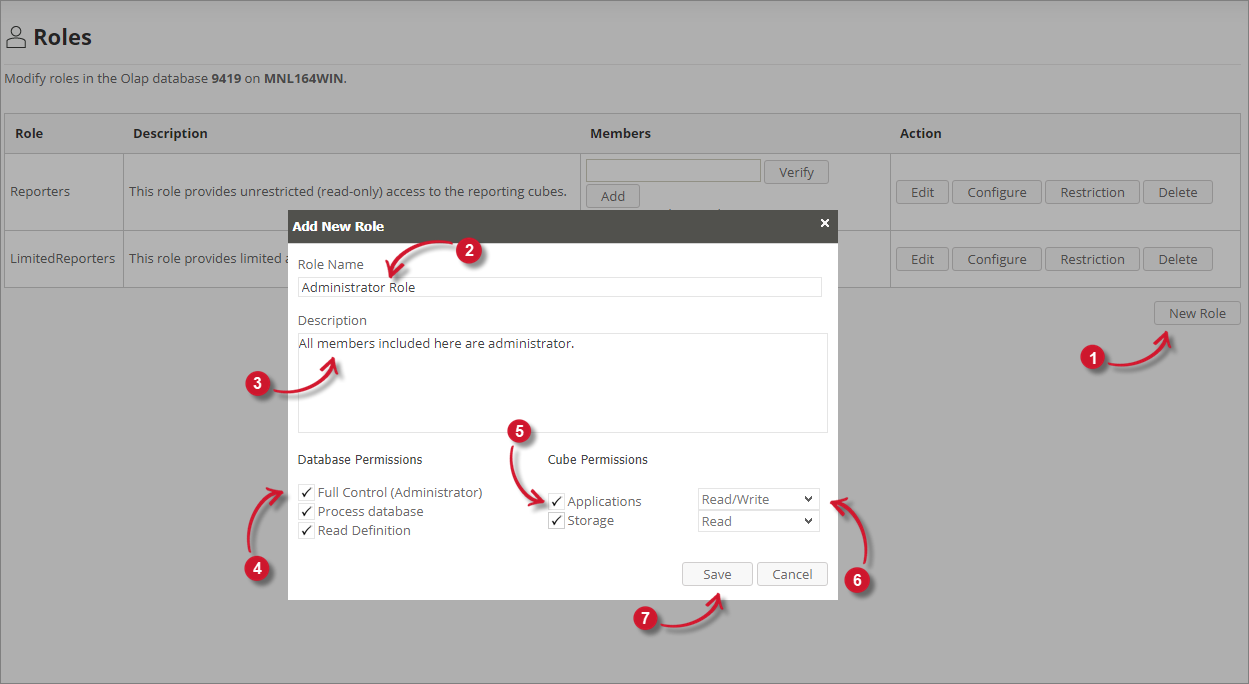
Click New Role located at the bottom-right of the list.
Add New Role dialog will appear.
Provide a descriptive name for the role in the Role Name textbox.
Provide description for the role in the Description text area.
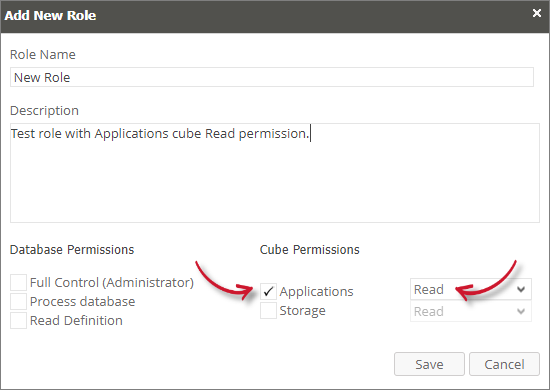
Choose among the Database Permissions options.
Administration: Roles Database Permissions
Choose among the available cubes - Applications and Storage.
Choose among the Cube Permission options.
Administration: Roles Cube Permissions
When adding new roles, it is important that least Read permission to Applications cube is selected. Configuring role without any permission to the OLAP cube will prohibit the included role members to view any data.
 Analysis Server Administration: New Role Permissions
Click Save to continue.
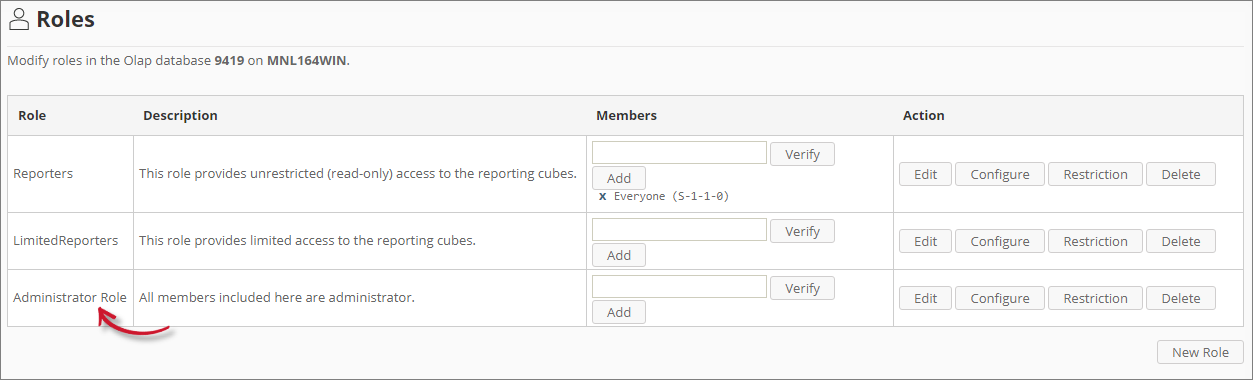
The newly crated role will appear in the list.
 Analysis Server Administration: New Role Added
#
Adding Role Members
To add members to a specific role:
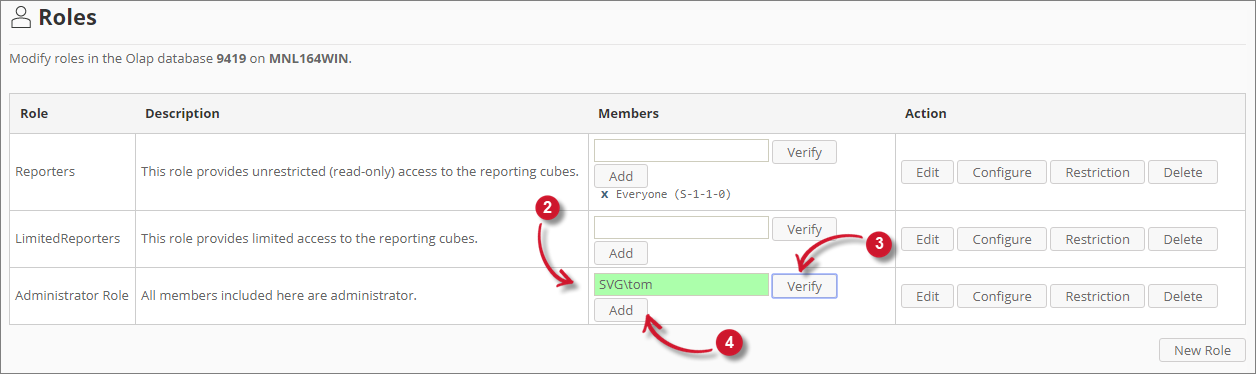
Choose the role to add members.
In the Members column, type the username of the member to add. This feature can only add members already included in the Active Directory or a registered local user.
Click Verify to confirm the identity of the member.
The text box will turn green if the identity search succeeded; red if it failed.
Once successful, click the Add button.
The list of members will automatically include the added username with its Security Identifier (SID).
#
Deleting Role Members
To delete members from a specific role:
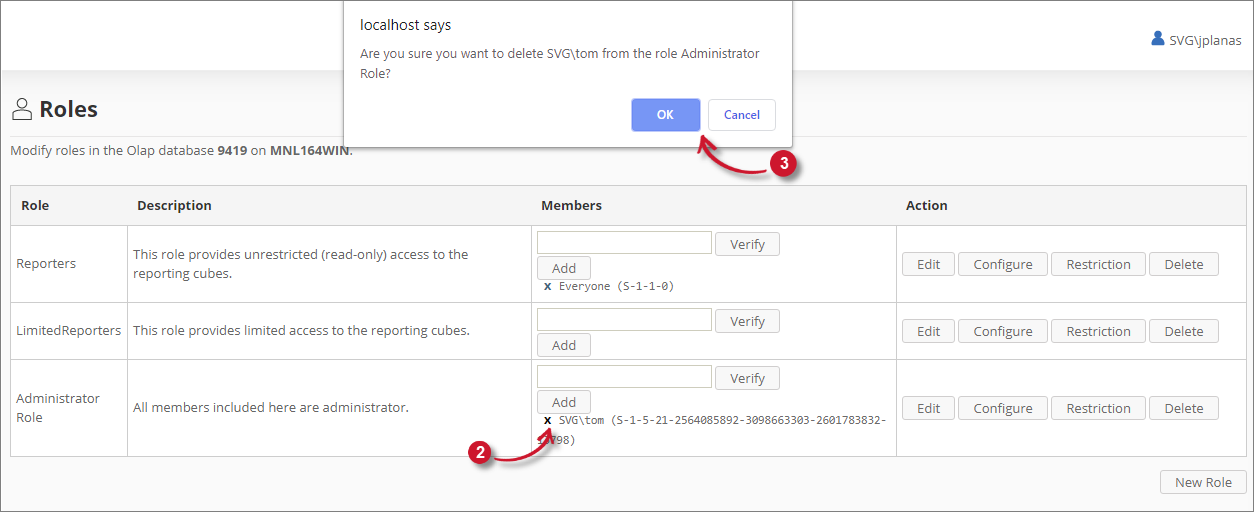
Choose the member to delete from a role.
Click the delete () symbol located on the left side of the role member.
A confirmation message will appear.
Click OK to continue.
#
Updating Role
To update the details of a specific role:
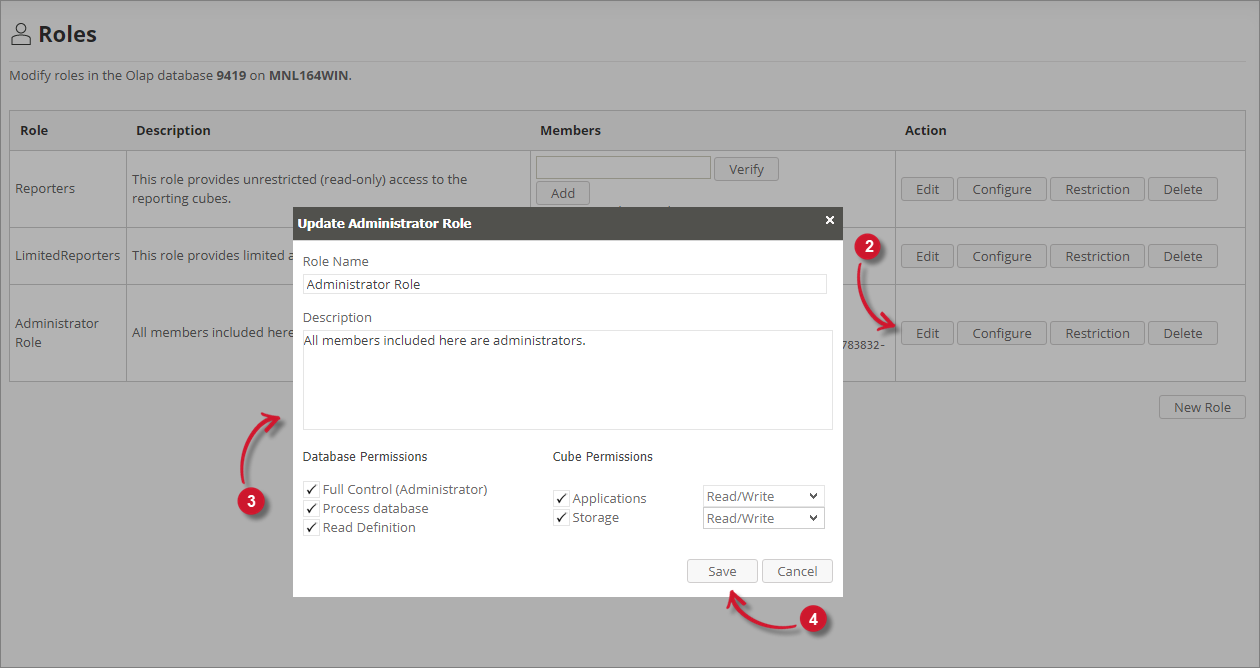
Choose the role to update.
Click the Edit button.
Update Role dialog will appear the details of the role.
Make the desired changes.
Click Save to apply changes.
#
Deleting Role
To delete a role:
Choose a role to delete.
Click the Delete button.
A confirmation message will appear.
Click OK to continue.