We’re upgrading your documentation experience!
A new doc website is live at docs.openit.cloud — a temporary preview during our transition. This website is now in maintenance-only mode (only critical issues will be addressed).
Explore the new website and send us your feedback!
#
Managing License Metadata
The License Metadata page contains various functionalities to configure and setup the details of license servers displayed in the License Monitor Portal.
Make sure that the License Metadata page is activated.
#
Updating Detail Name
There are three initially included details that can be configured - Vendor_ID, WBS_Code and Contract_ID. These fields are customizable and can be updated to comply with the needed information in the License Monitor Portal.
Follow these instructions to update the name of the detail:

In column header of the License Metadata table, click the edit icon. This should transform into a textbox.
Modify the value to the desired detail name.
Click the check () symbol to save the changes.
#
Adding Vendors
Follow these instructions to add vendors:

In the Vendor List pane located under the License Metadata table, type in the Vendor_ID column the desired value.
In the Vendor Name column, type the name of the vendor associated with the Vendor_ID.
Click the add () symbol to add the item in the list.
#
Updating Vendors
Follow these instructions to update vendors in the Vendors List:

In the list, look for the item to update.
Click the column value and it should transform into textbox.
Modify the value.
Click th Update Vendors button to apply the changes.
#
Deleting Vendors
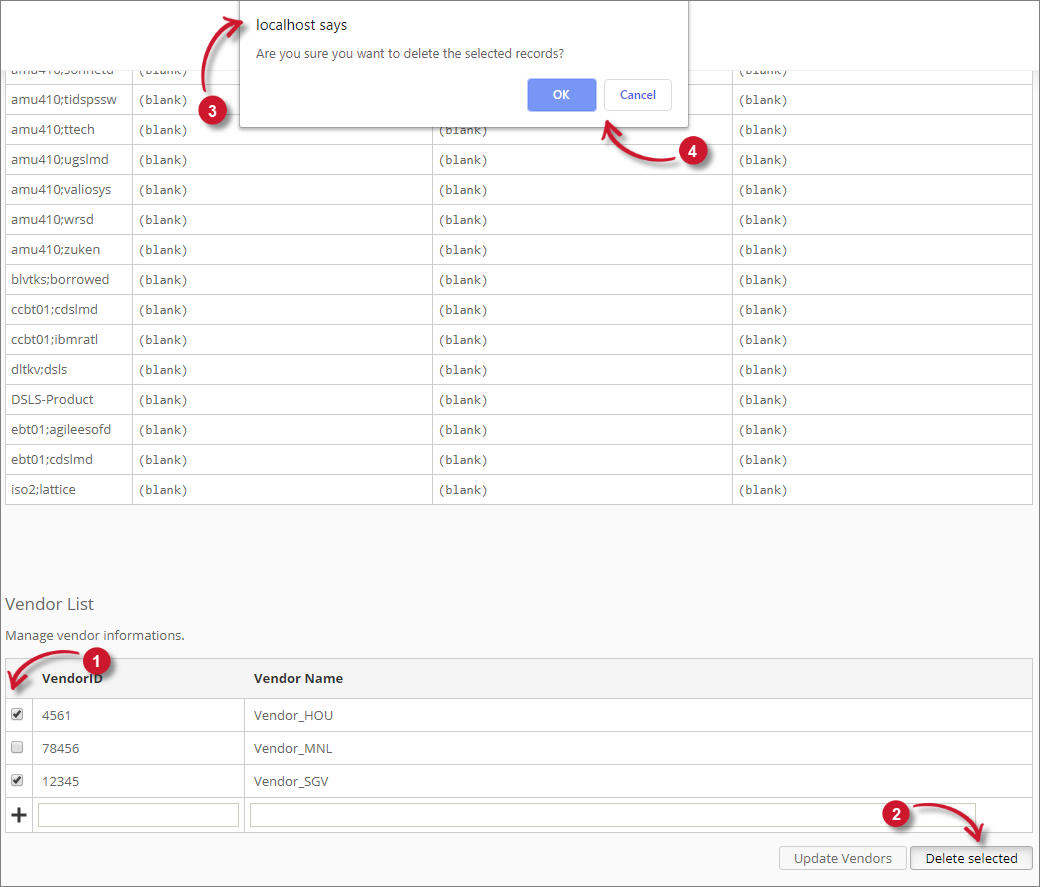
Follow these instructions to delete vendors:

In the list, click the tick box of the item to delete.
Click the Delete Selected button.
A confirmation message should appear confirming the deletion of the item.
Click OK to continue.
The list should automatically update.

