#
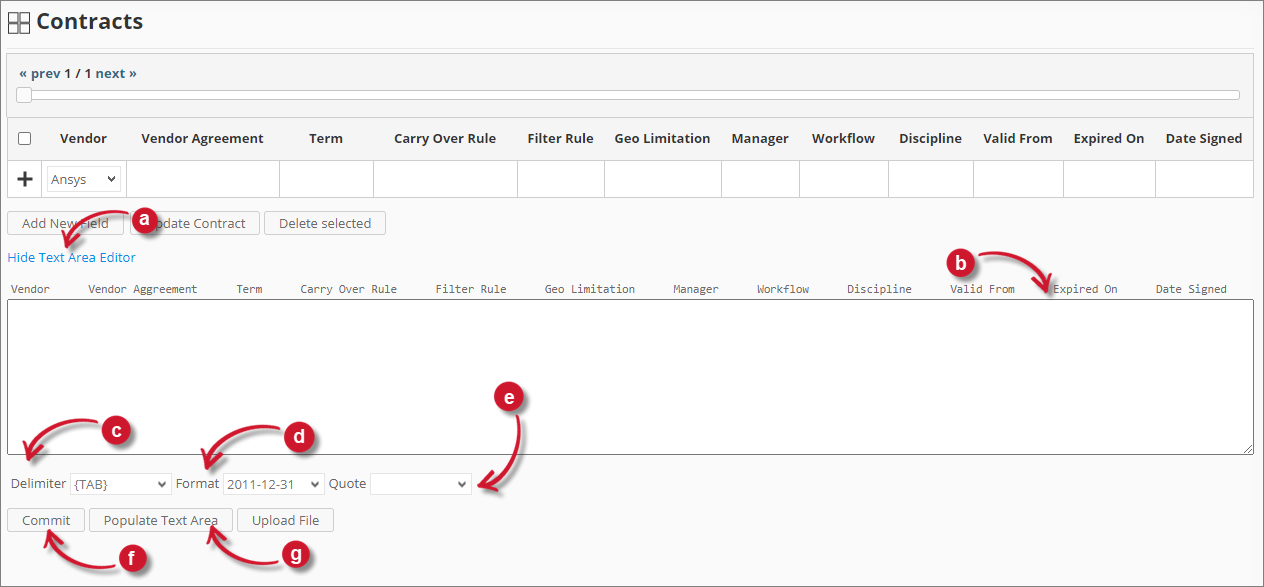
Text Area Editor
This page is intentionally hidden from navigation but remains accessible via direct link. It is retained for internal reference purposes only and may contain outdated or transitional content.
#
Text Area Editor Details
The text area editor is another way to add, edit and delete records in the list. The editor has the following components:
#
Using Text Area Editor
Follow these instructions to use the text area editor:
Click the toggle link Show/Hide Text Area Editor.
The Text Area Editor should be displayed.
Click the Populate Text Area button. The text area editor should be populated.
Modify the records as desired. Use the components for Delimiter, Format and Quote.
To add a record, simply add a new line.
To delete a record, simply delete the entire row of the record.
Click Populate Text Area to apply the selected formats. Notice that the selected delimiter, format and quote should be applied in the text area editor.
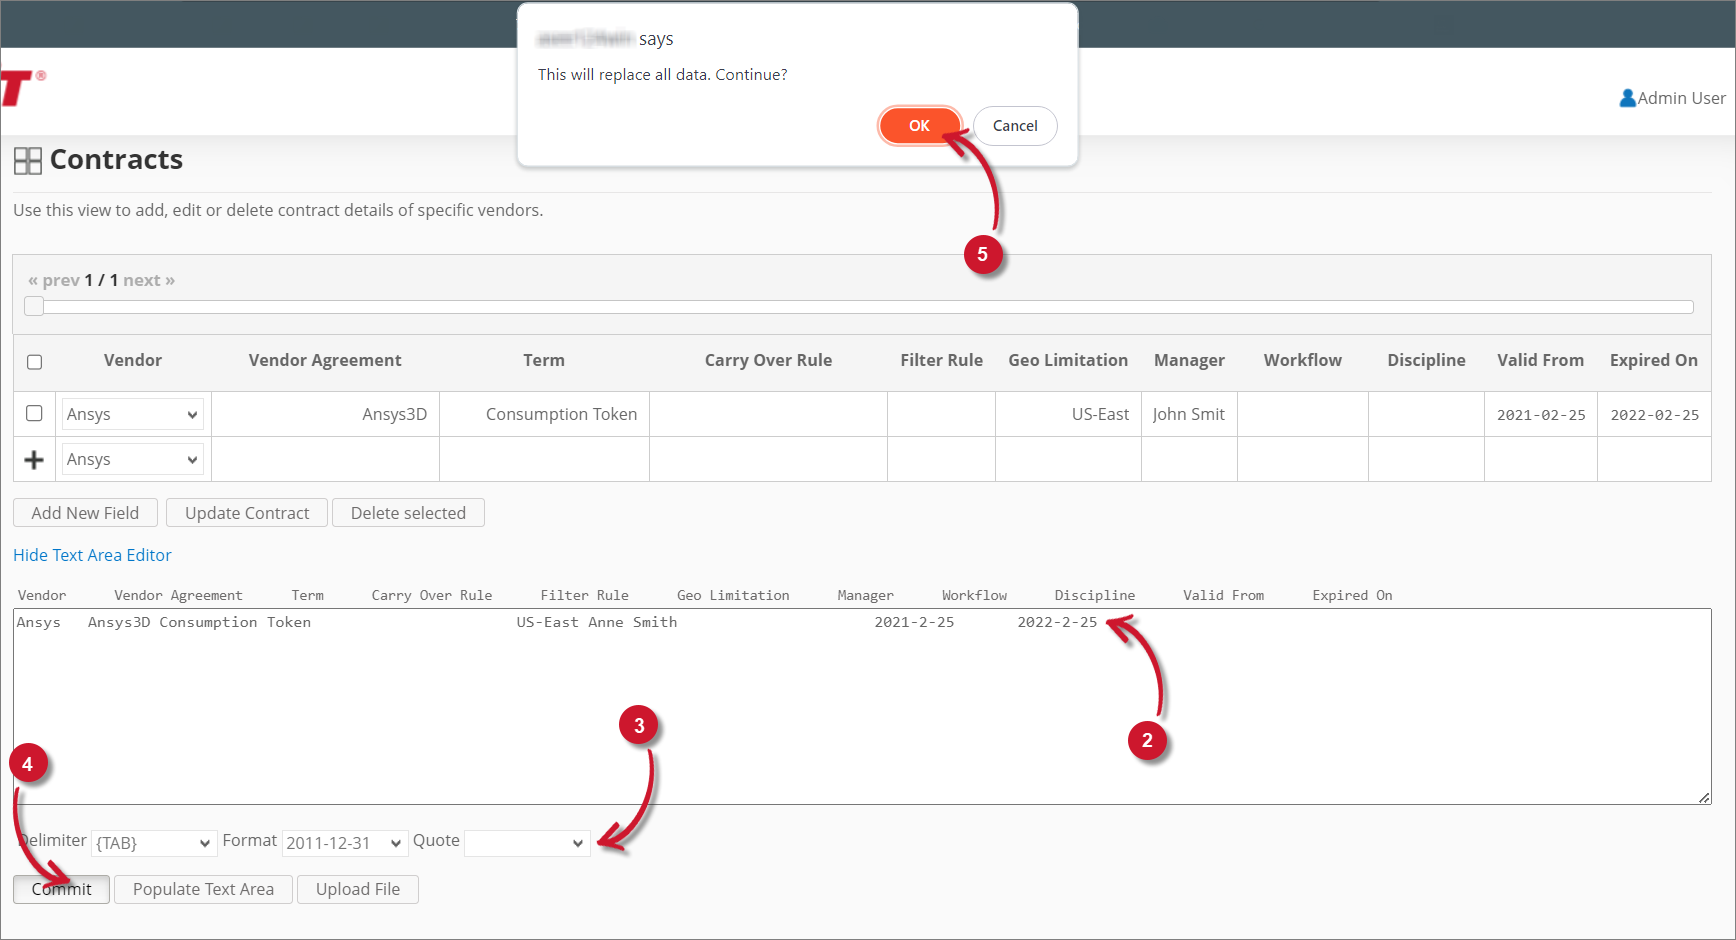
Click the Commit button.
A warning message should be prompted to confirm the application of the changes.
Click OK to continue.
The list should automatically be updated.
#
Uploading a Source File
Follow these instructions to upload a prepared source file of Contracts details:
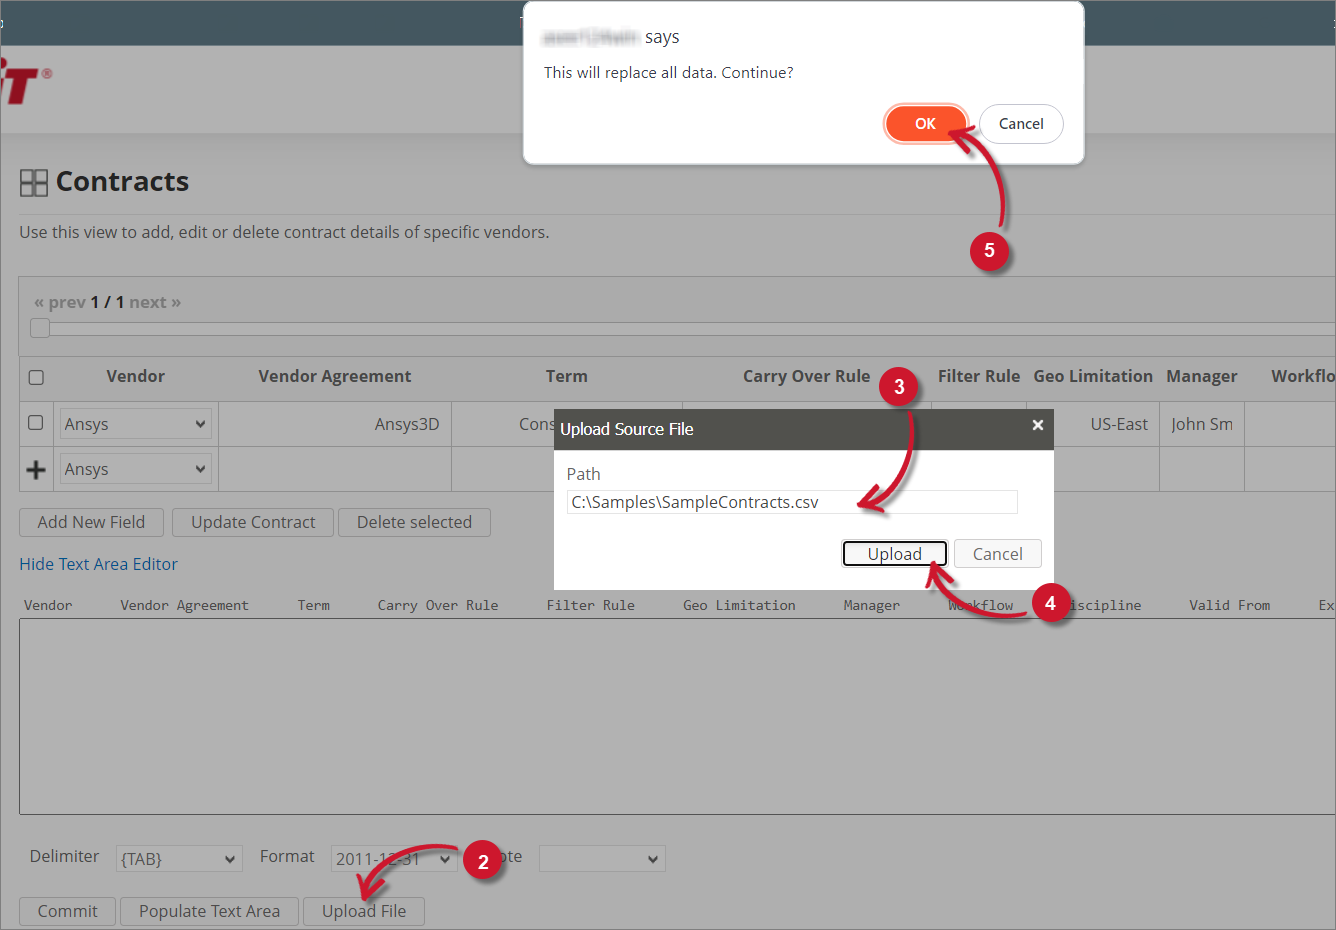
Click the Toggle Link of the Show/Hide Text Area Editor.
At the bottom of the page, click the Upload File button.
The Upload Source File dialog should appear.
Provide the valid path of the source file. The UNC path (
\\path_to_file) is accepted.Click the Upload button to continue.
A confirmation message of the upload process should appear.
Click OK to continue.