#
Basic Reporting
#
Creating a Basic Report using Power BI
Make sure that the Power BI data connection is established before creating a report.
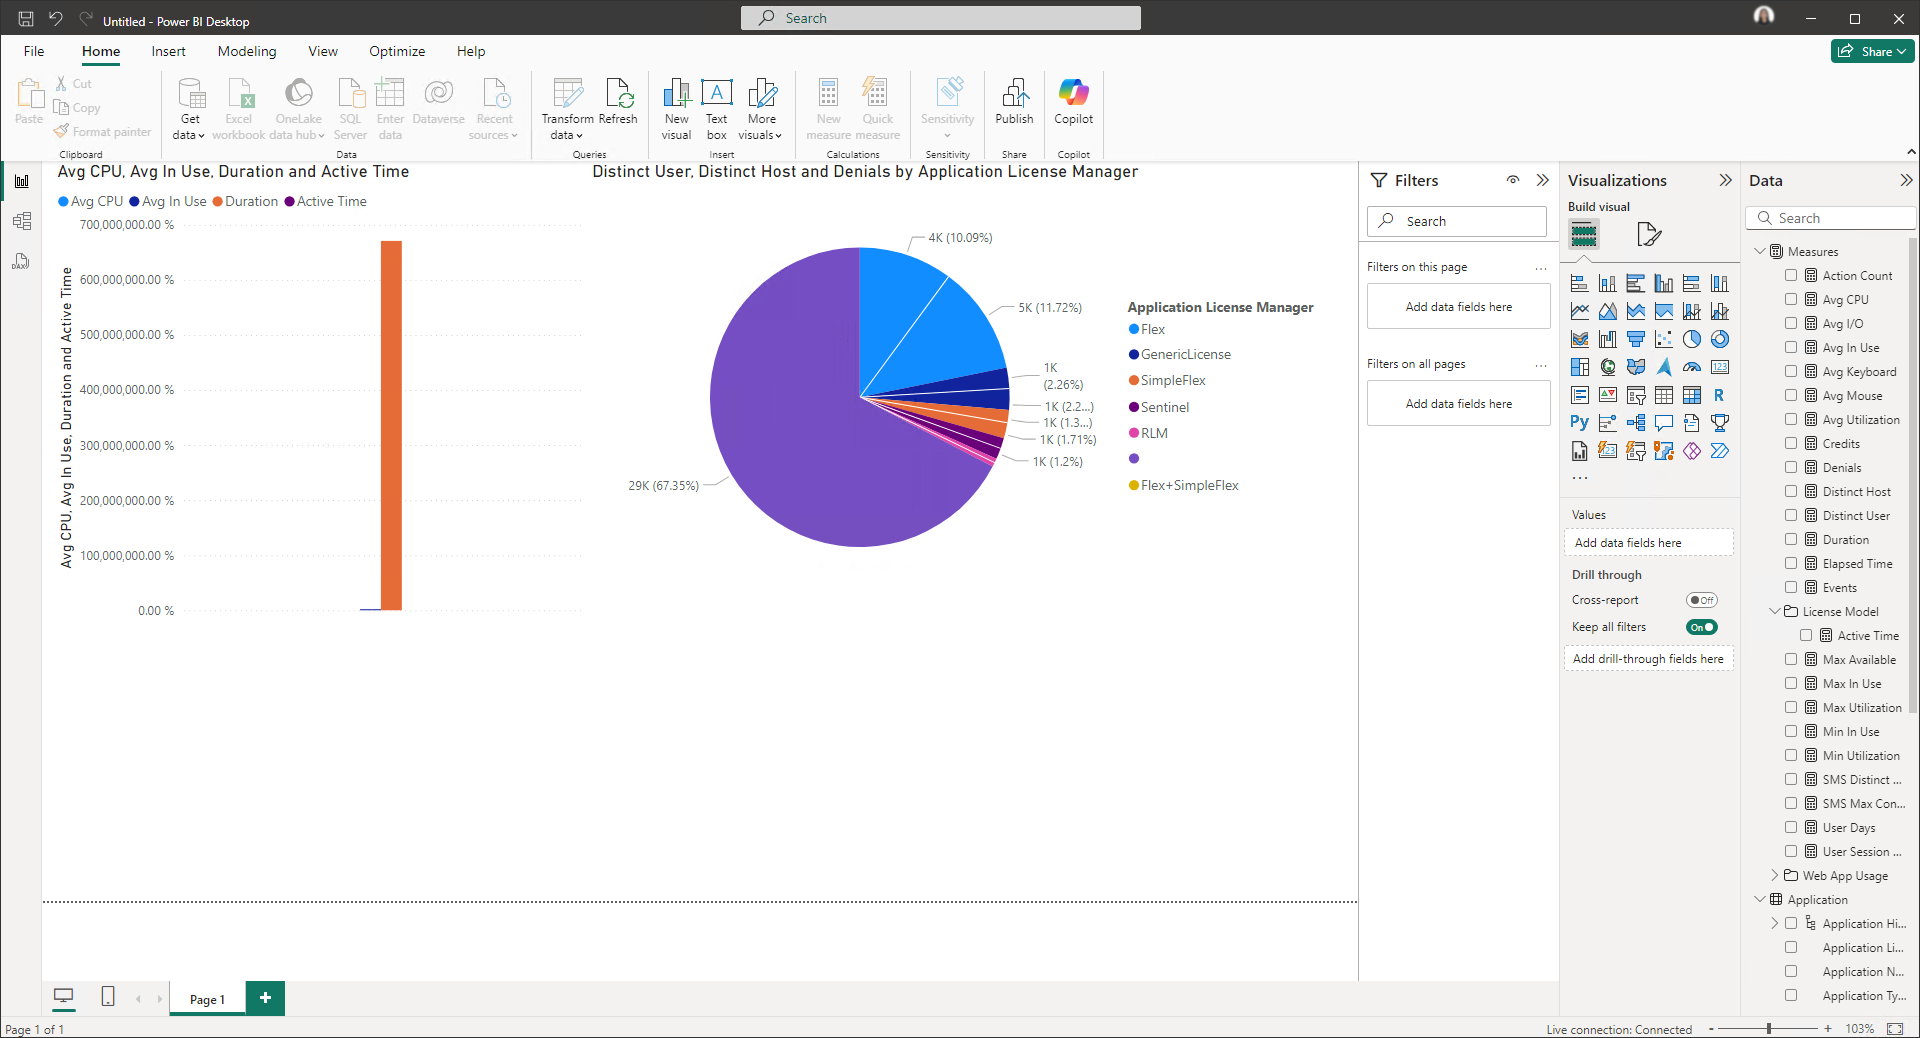
Drag a field to the canvas to start a new visualization to create a simple report, or drag fields to an existing visualization. Ticking the check box next to the field automatically adds that field to the active visualization.
Select a different visualization type from the Visualization pane and use the Filter pane to view, set, and modify persistent filters to the reports.
#
Publishing a Report to Power BI
To allow others within your organization to view the report, you must publish it to your Power BI account in the cloud. This guide will walk you through the steps to publish a report to Power BI.
In the Home tab, under the Share ribbon, click Publish.
A pop-up message will appear, prompting you to save the report. Click Save.
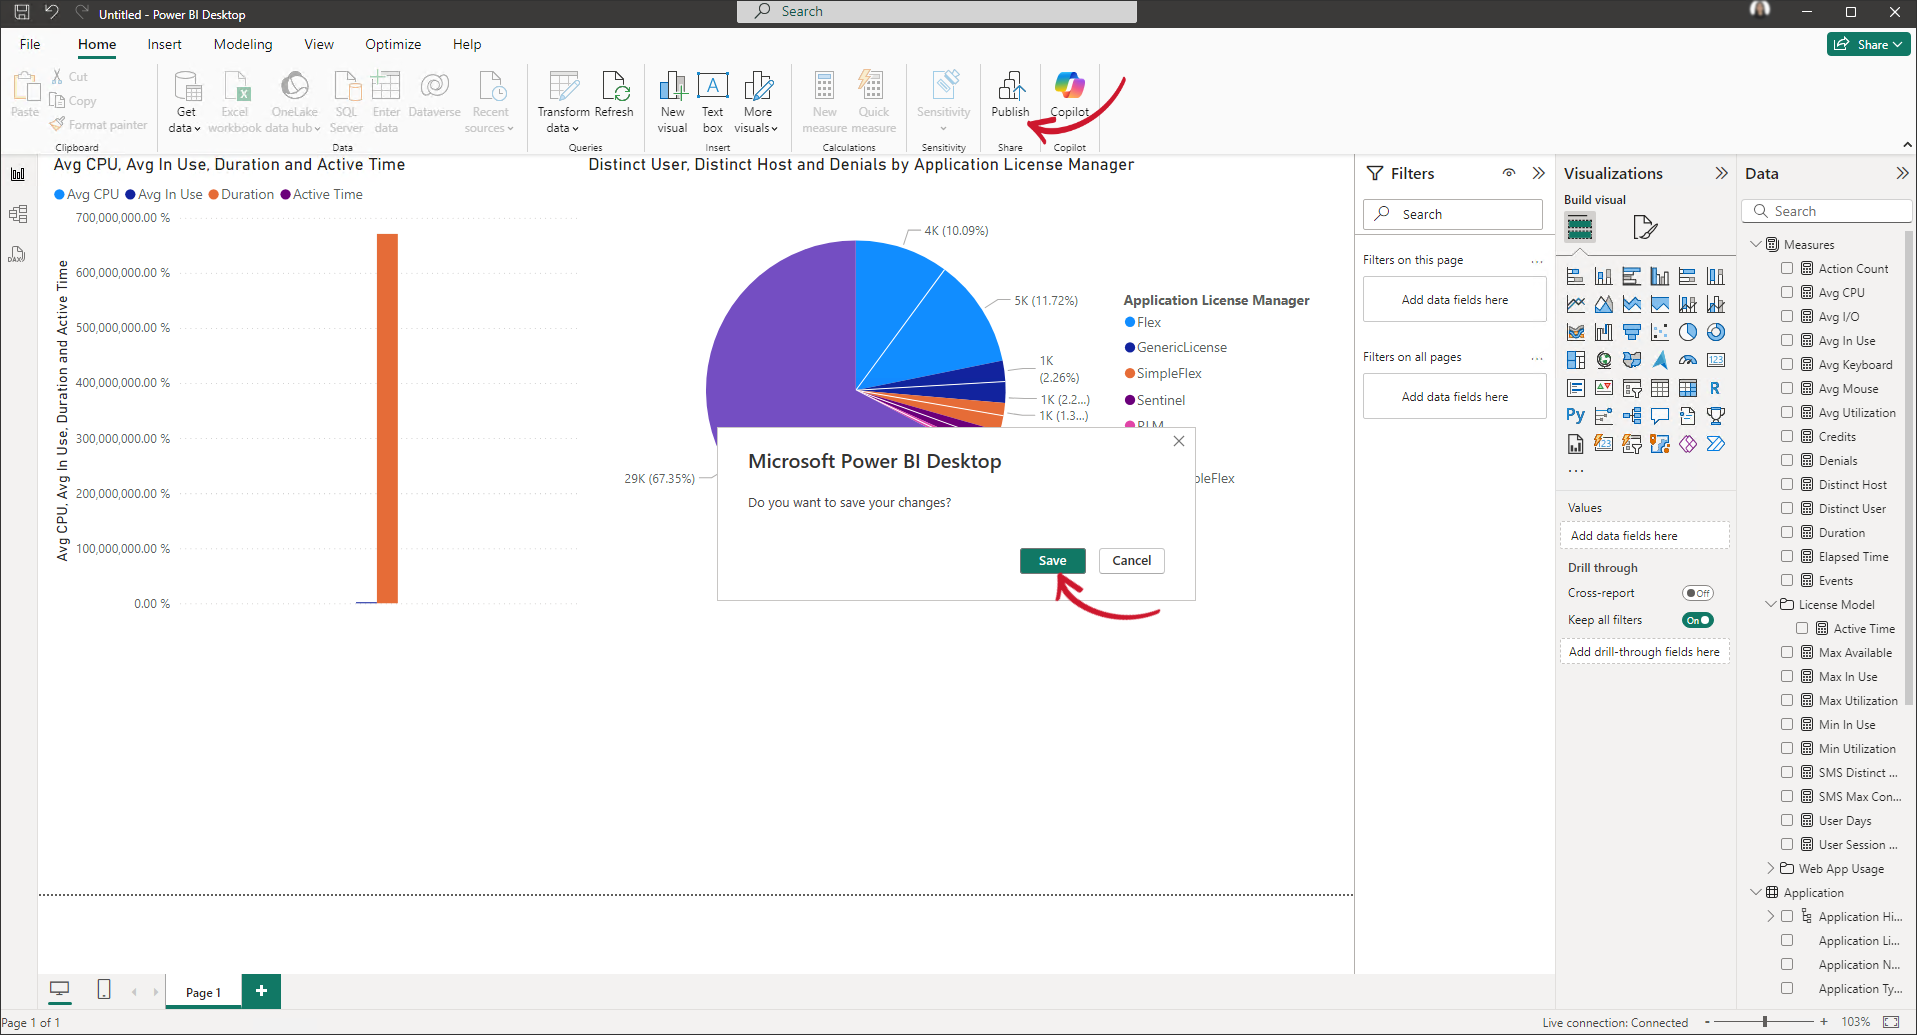 Power BI: Publishing a Report
Enter the desired name for the report, then click Save.
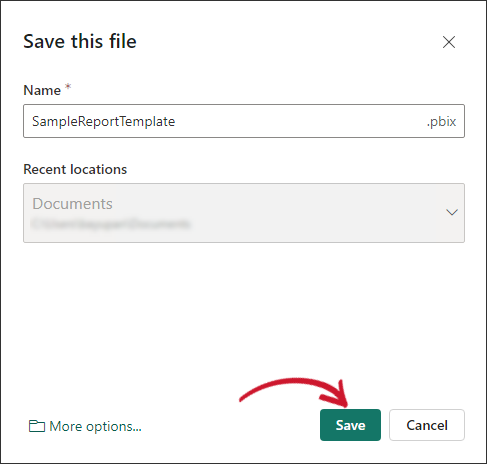 Power BI: Saving a Report
Select My workspace as the destination for the report to be published.
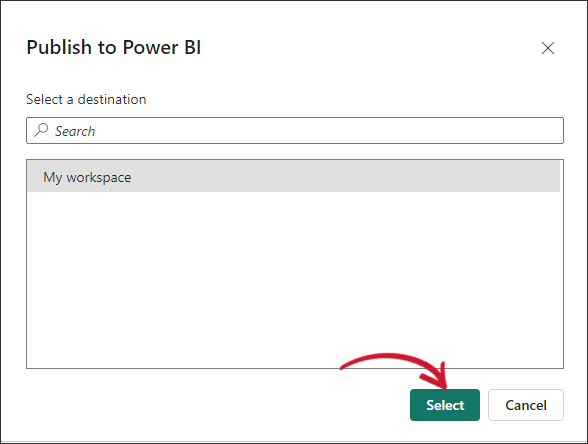 Power BI: Publish to Power BI
Your report has now been published but is disconnected from the gateway.
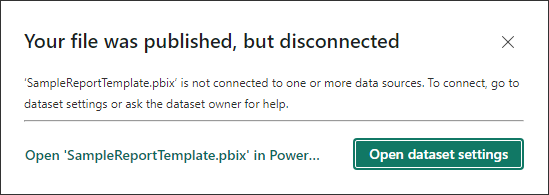 Power BI: Published Report Disconnected
If you open the dataset settings, you will be directed to Power BI on the web, where you can select an existing gateway and cloud connections.
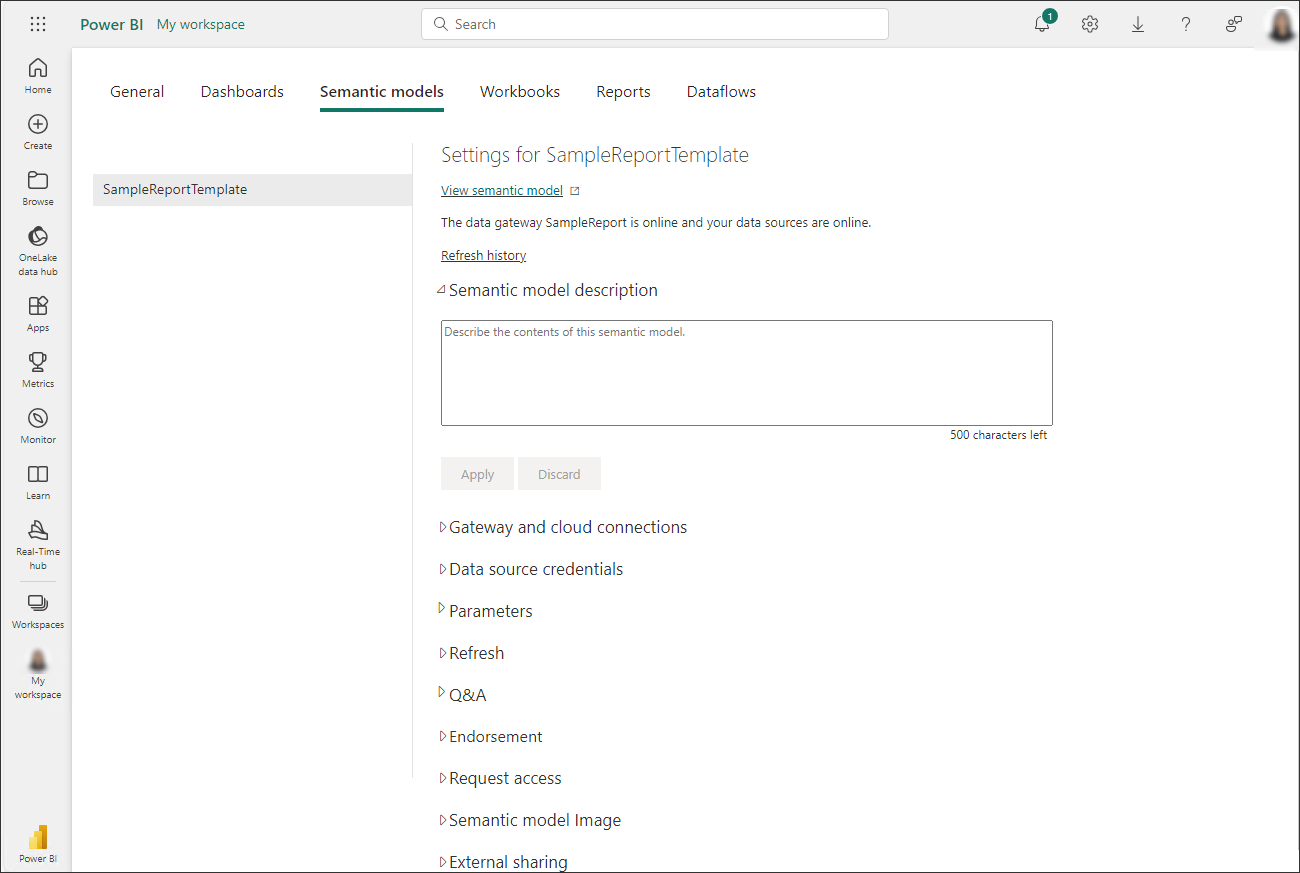 Power BI: Dataset Setiings
If the gateway and cloud connections have not been created, choose to open the report file. This will direct you to Power BI on the web, where the report will appear blank with a message above stating: No gateway selected to access the data source openit.
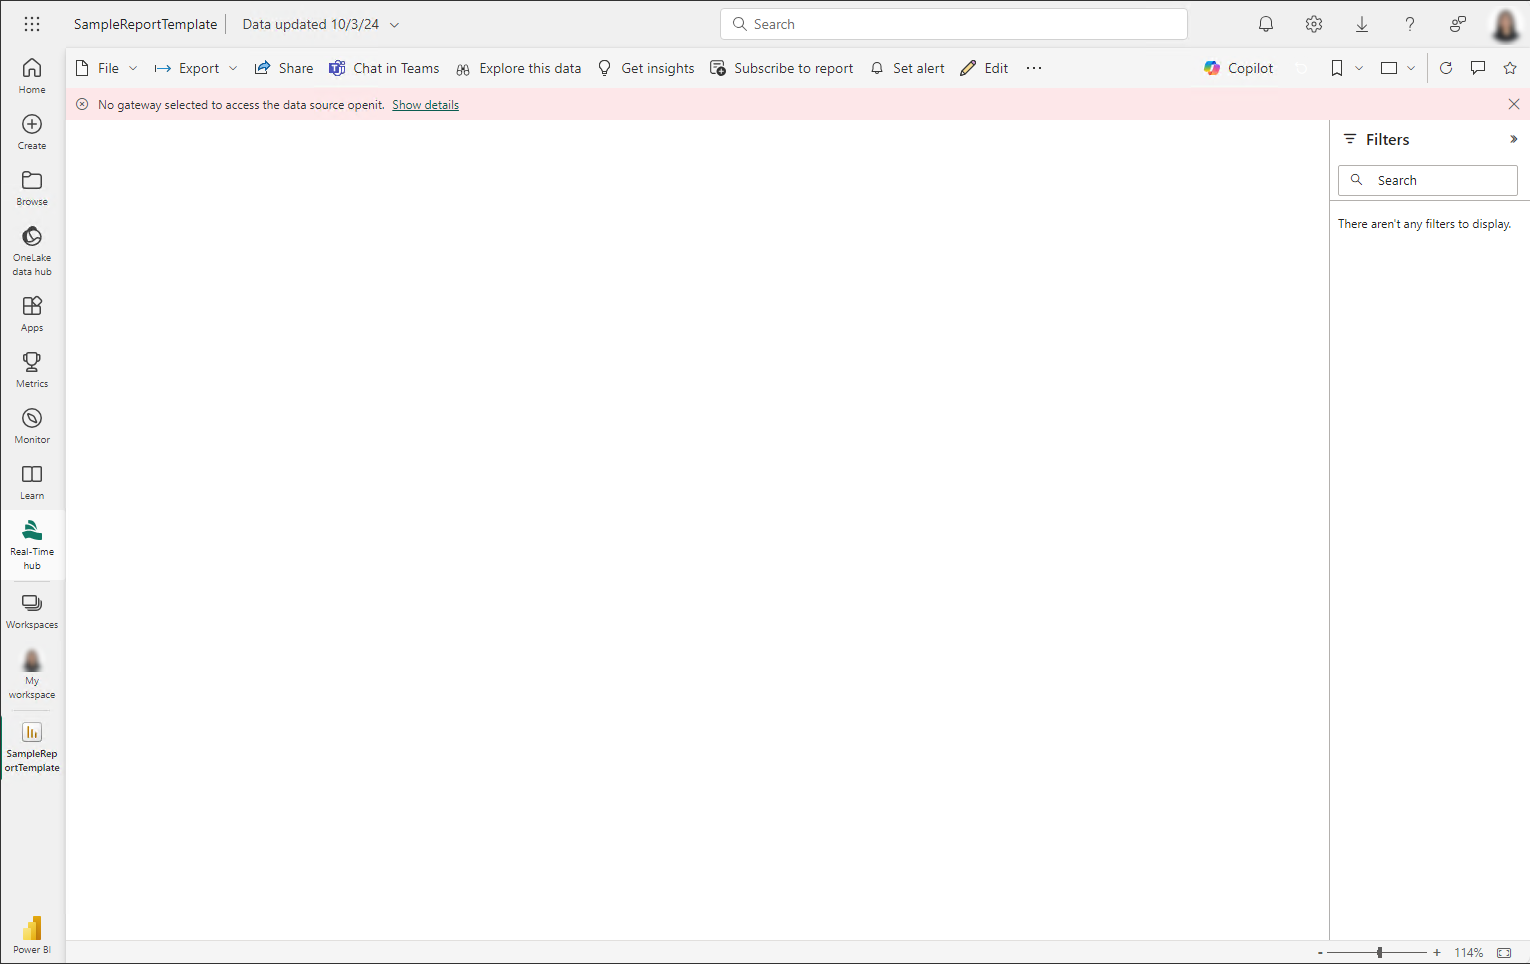 Power BI: Publish to Power BI
You must set up and configure your data gateway. Follow the instructions on Configuring On-premises Data Gateway
#
Configuring On-premises Data Gateway
On-premises Data Gateway facilitates a secure and efficient communication between cloud services and on-premises data sources. This section guides you in installing an on-premises data gateway.
#
Installing On-premises Data Gateway
To install On-premises Data Gateway, follow the steps below:
Visit the designated download location to acquire the Power BI Gateway (Standard).
Execute the installation process by running the downloaded file. Select the directory where you want to install the On-premises data gateway. Click the checkbox to accept the terms of use and carefully review the privacy statement. Click Install to start the installation process.
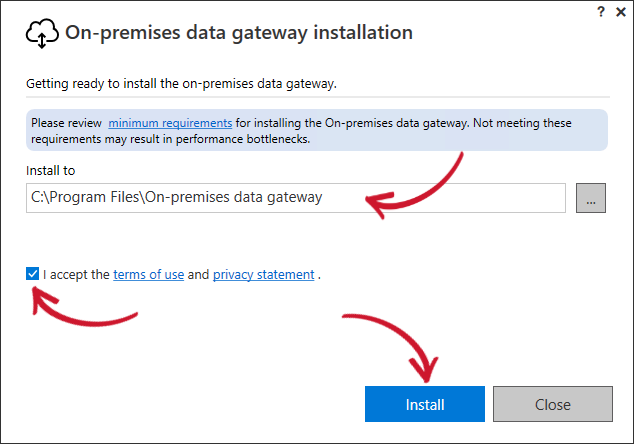 On-premises Data Gateway Installation
Wait for the installation process to finish.
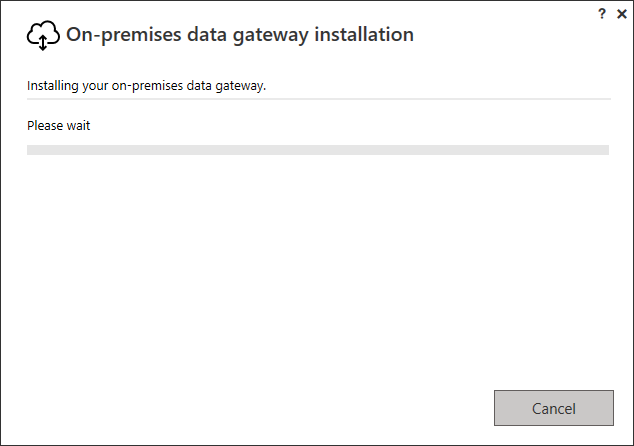 On-premises Data Gateway Installation in-progress
Upon installation, enter the email address to use with the gateway, then click Sign in.
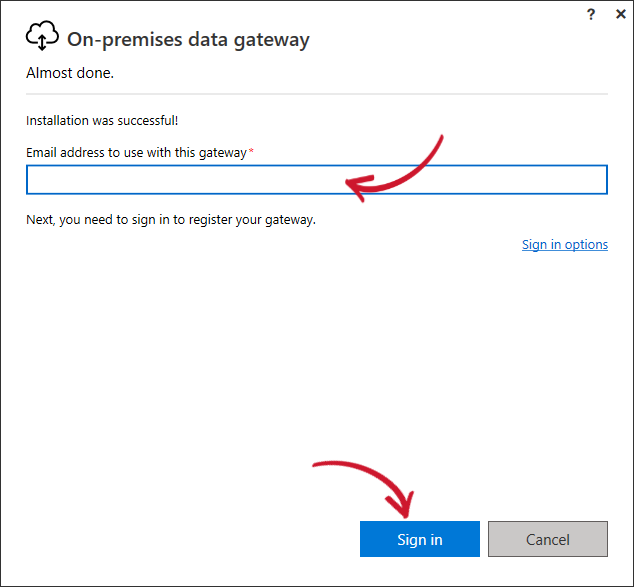 Signing in
Select Register a new gateway on this computer, then click Next.
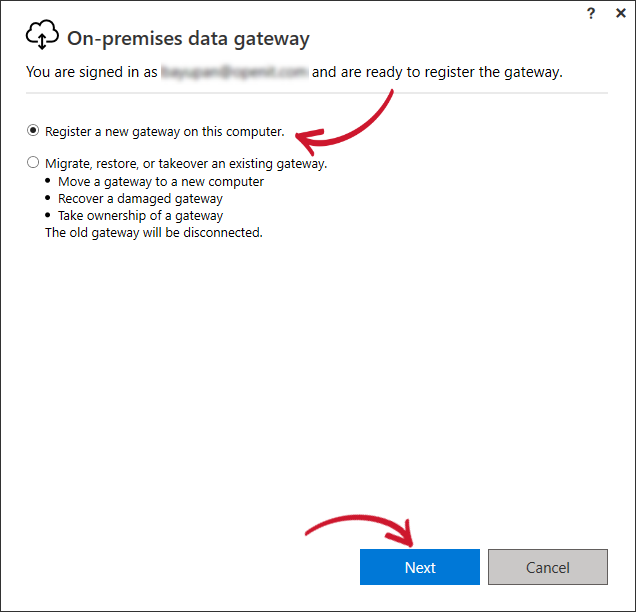 Register a new gateway
Fill out the required fields to register the on-premises data gateway. It is recommended that you use openit.com as the new gateway name. After filling out the form, click the Configure button.
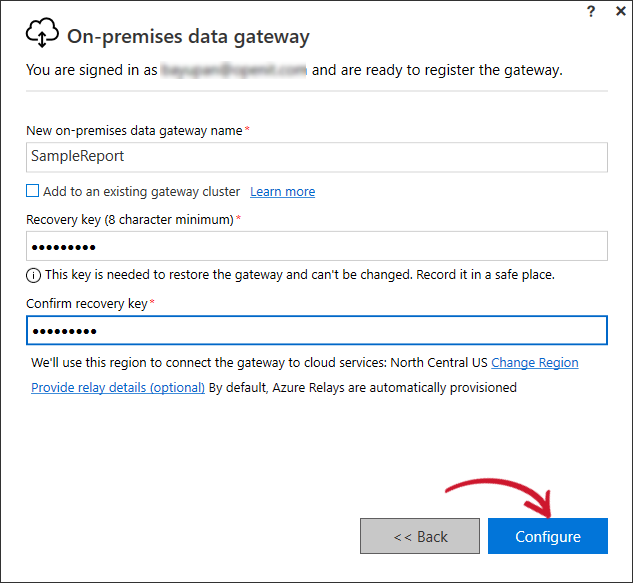 Configuring the new on-premises data gateway
Once installation and configuration are done, click the Close button.
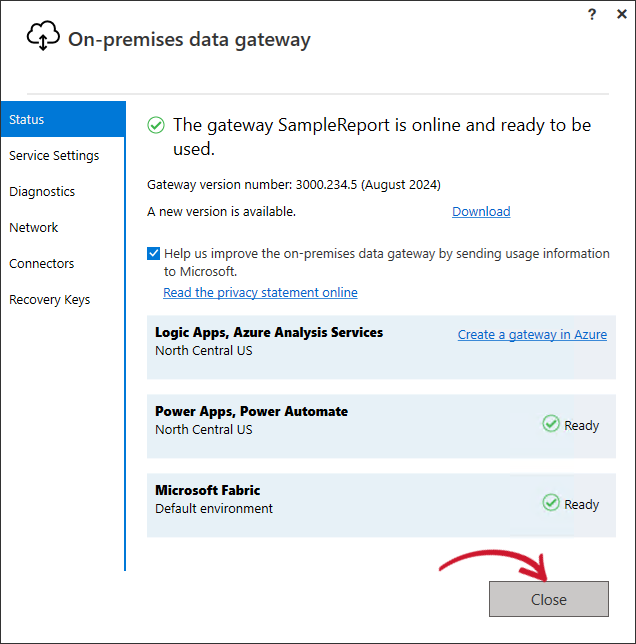 Installation Complete
#
Setting up On-premises data gateway
In the published report, click the gear icon to access the Settings. Under the Resources and extensions, select the Manage connections and gateways.
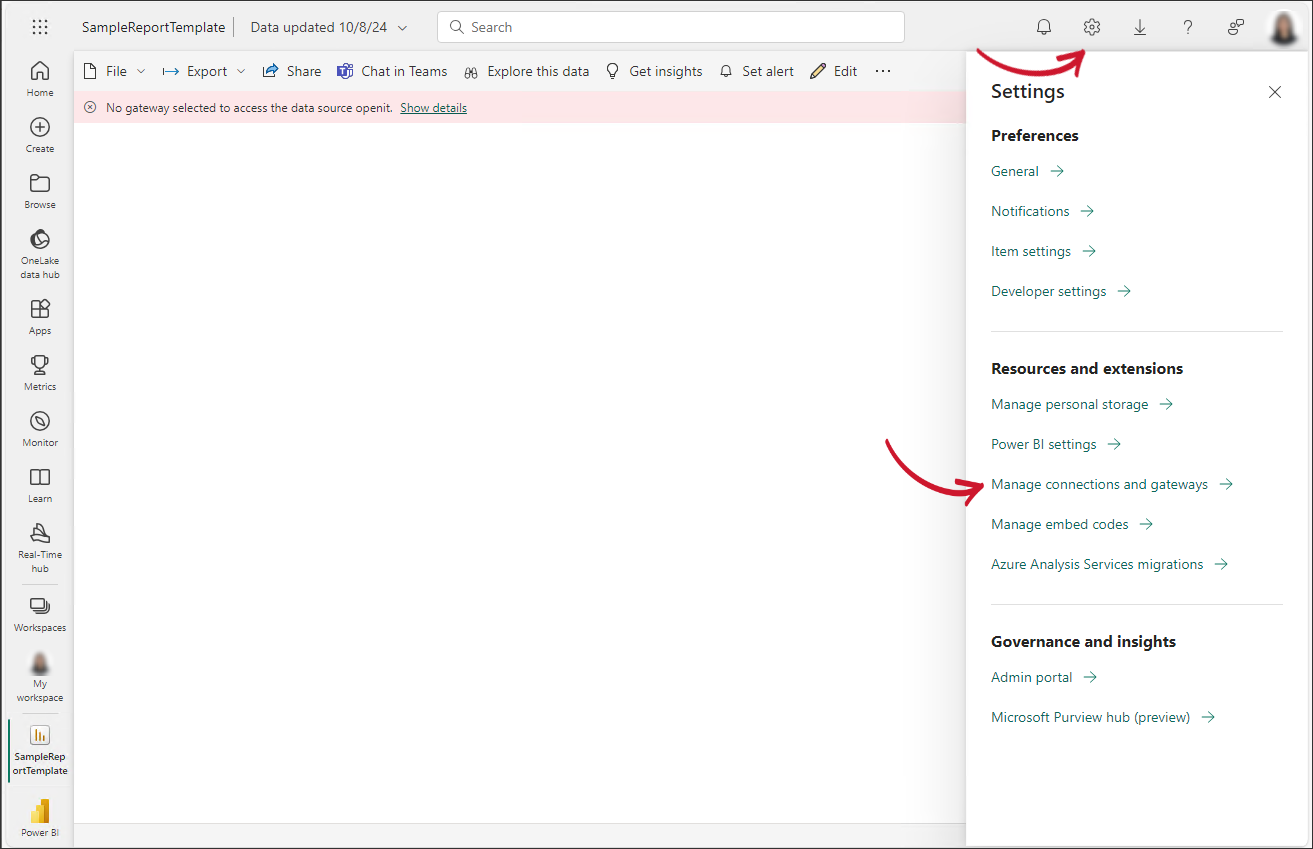 On-premises Data Gateway: Navigating Settings
Go to the On-premises data gateways tab and check the newly added gateway in the Data Gateways table to verify that it has been added. Click the button under the Status column to bring the gateway online.
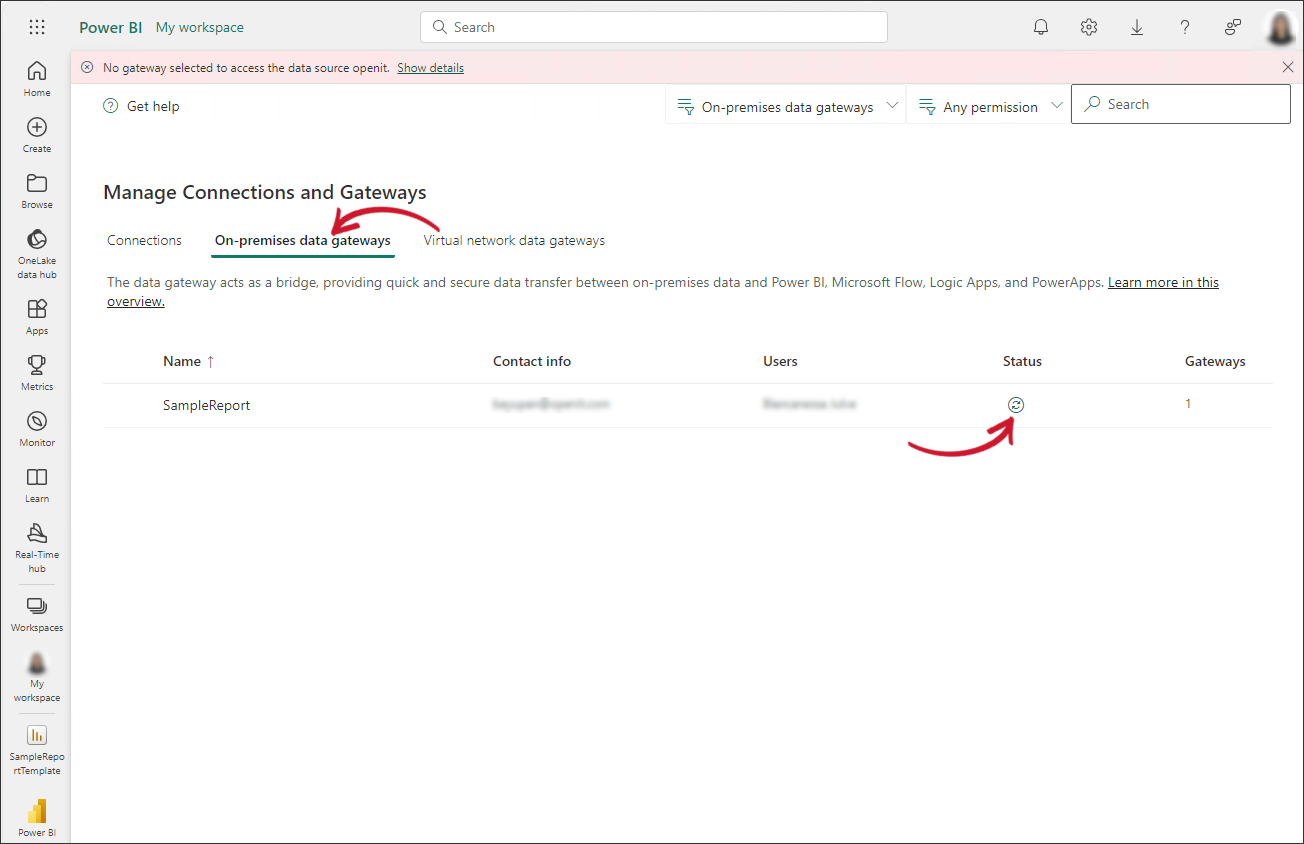 On-premises Data Gateway: Verifying the created gateway
Add a gateway connection by going to the Connections tab, then clicking the New button at the top-left corner of the window.
A side panel will appear at the right side of the window, select On-premises. Click the drop-down icon under the Gateway cluster name field and select the newly added on-premises gateway. Fill in the desired Connection name. Click the drop-down icon under the Connection type field and select Analysis Services.
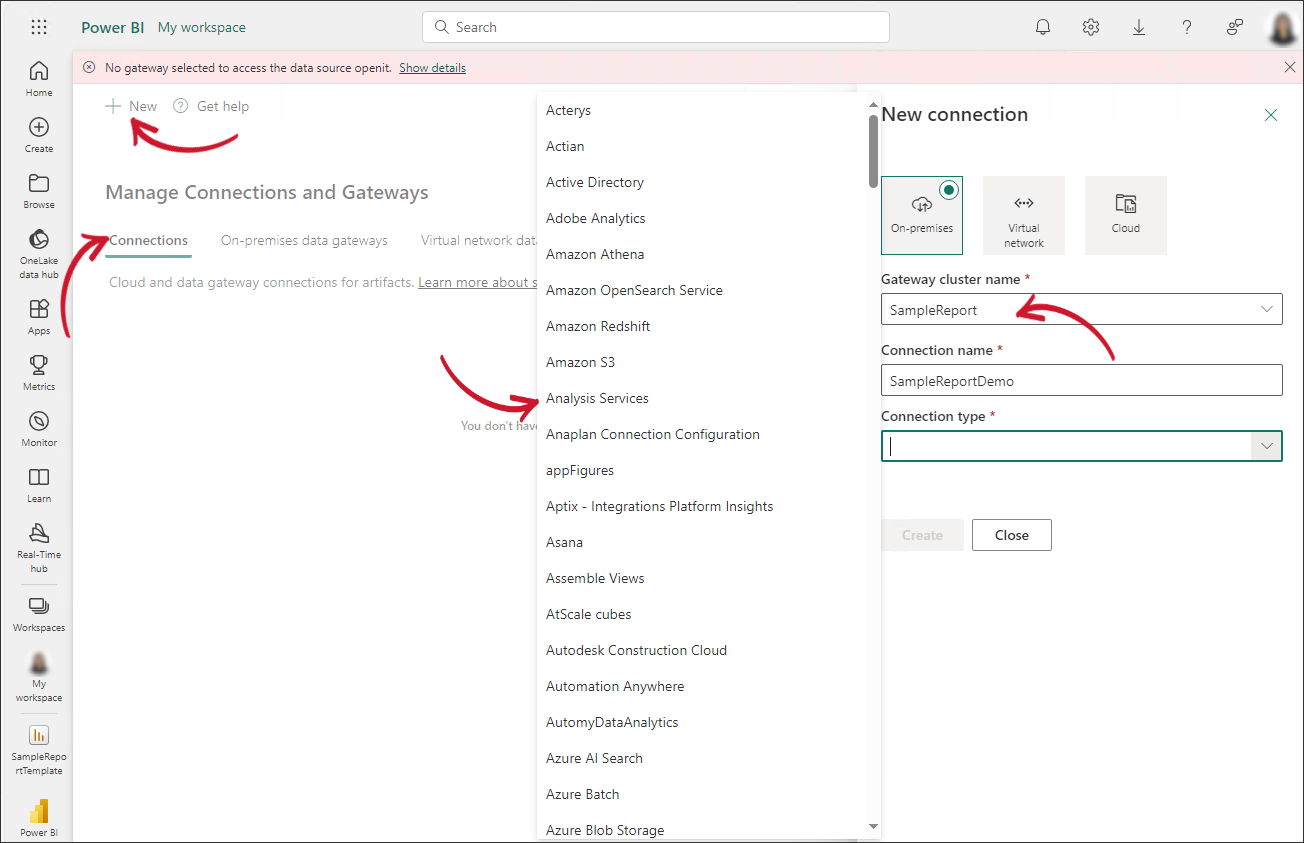 On-premises Data Gateway: Adding a connection
Fill in the remaining required fields with the following values:
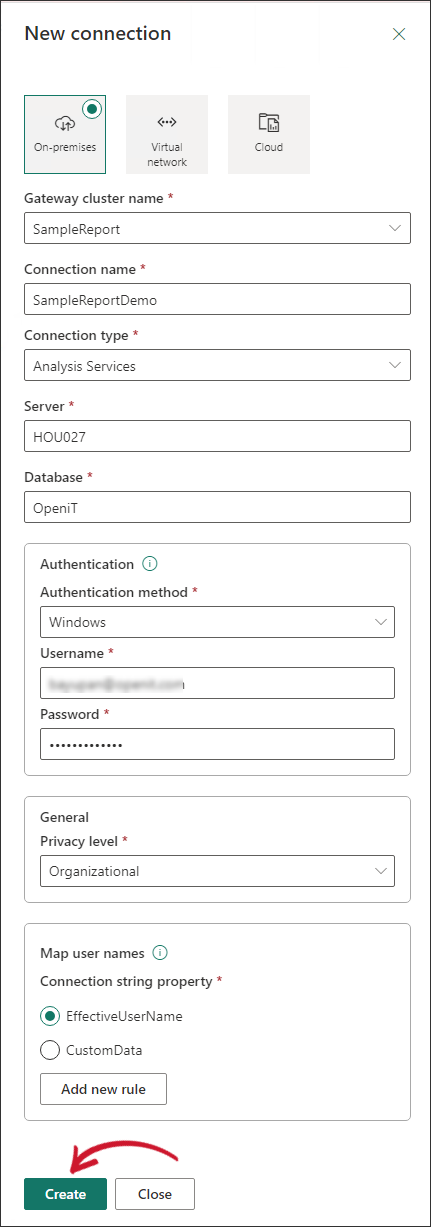 On-premises Data Gateway: Filling in Connection details
In the Authentication section, enter the Username and Password using the same credentials used to configure the On-premises data gateways. After completing all the connection fields, click Create.
Once done, a success message will be displayed at the top part of the panel. Click Close after adding the gateway connection.
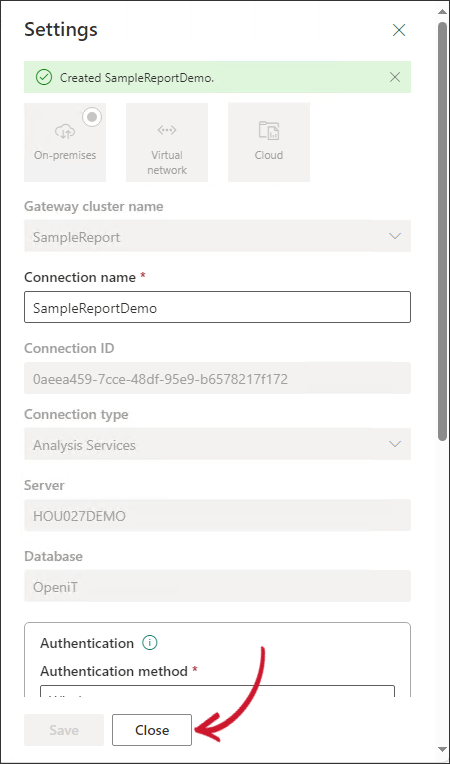 On-premises Data Gateway: Successful Creation of Data Gateway Connection
To verify a successful data gateway connection, go to the published report. The report visuals should be loaded properly.
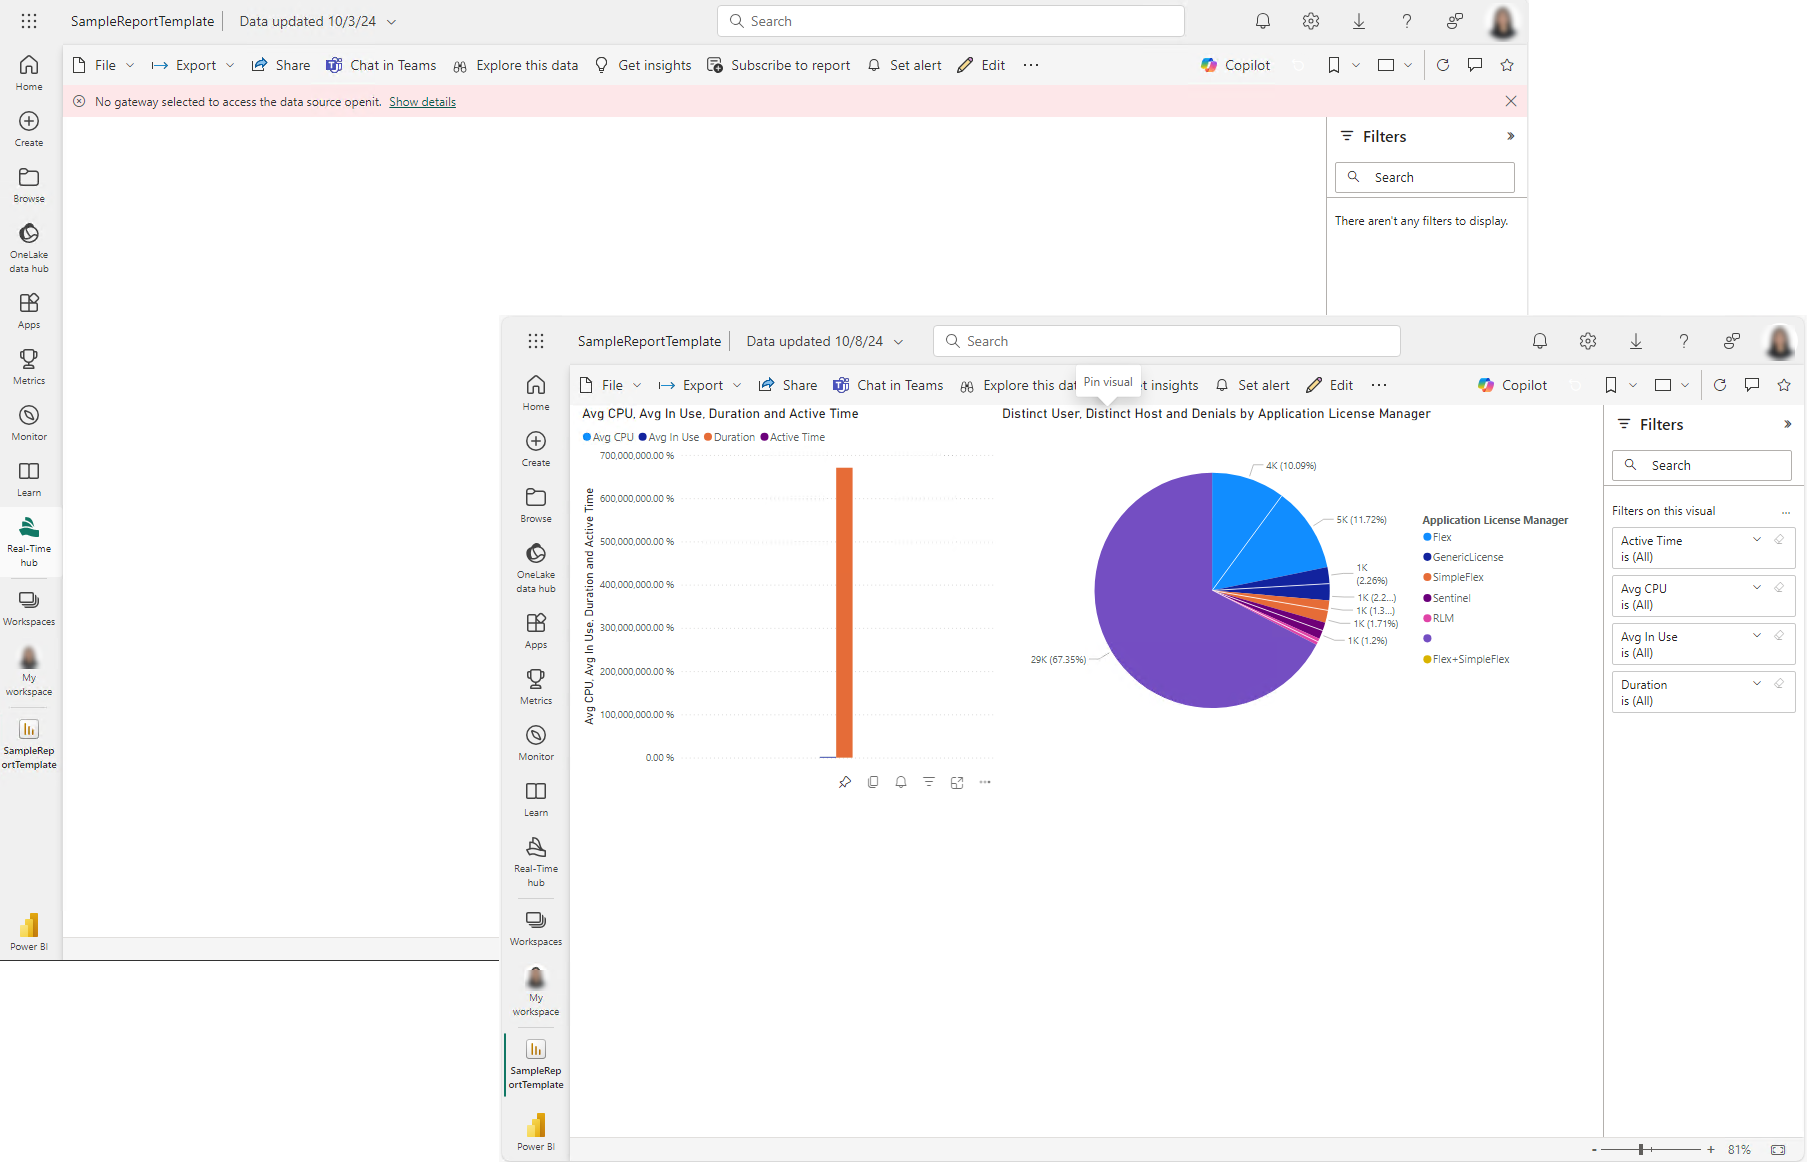
Refer to the official Microsoft documentation for a more comprehensive Power BI reporting guide.

